In this post we will learn getting started with Kendo UI MVC Wrapper.
Download Kendo UI free trial from here
Launch visual studio and create a new MVC 4 Web Application.

Choose Internet Application as type of application and Razor engine as the View Engine.

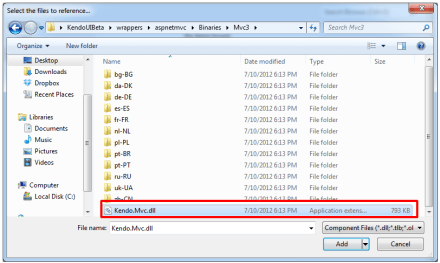
To test whether we have created application correctly or not press F5 and run the application. If application is successfully running then you are all set to start using Kendo UI MVC Wrapper in your application. Very first you need to add reference of Kendo.Mvc.dll. You will find this file in location \wrappers\aspnetmvc\Binaries\Mvc3. Right click on the reference in project and browse to add Kendo.Mvc.dll in the project.
After adding the reference open Web.config file

You need to make sure that following entry is present in the Web.config file.
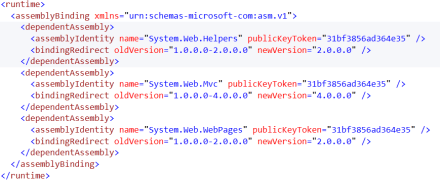
If above entry is not present then make sure to add them in Web.config file.
<runtime>
<assemblyBinding xmlns="urn:schemas-microsoft-com:asm.v1">
<dependentAssembly>
<assemblyIdentity name="System.Web.Helpers" publicKeyToken="31bf3856ad364e35" />
<bindingRedirect oldVersion="1.0.0.0-2.0.0.0" newVersion="2.0.0.0" />
</dependentAssembly>
<dependentAssembly>
<assemblyIdentity name="System.Web.Mvc" publicKeyToken="31bf3856ad364e35" />
<bindingRedirect oldVersion="1.0.0.0-4.0.0.0" newVersion="4.0.0.0" />
</dependentAssembly>
<dependentAssembly>
<assemblyIdentity name="System.Web.WebPages" publicKeyToken="31bf3856ad364e35" />
<bindingRedirect oldVersion="1.0.0.0-2.0.0.0" newVersion="2.0.0.0" />
</dependentAssembly>
</assemblyBinding>
</runtime>
Now you add Kendo JS files and CSS files in the project. To add Kendo JS files right click on Script folder and select add existing item

Browse to JS folder in Kendo UI installation directory and add all the JS files in the Scripts folder. After adding JS files add CSS files in the project. To add that right click on Content folder in the project and choose option to add existing items
Browse to Styles folder in Kendo UI installation directory and all the CSS files in the Content folder. If you are going to use some specfic style like Metro or Silver then make sure you add texture folder in the Content directory as well. Make sure you have added Texture folder and Default folder also in the Contnet folder of the project.
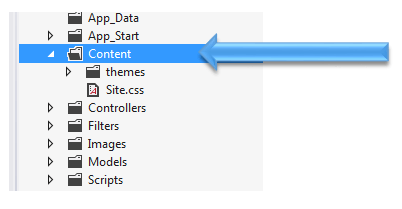
After adding all the css files and folder , Content folder in the project should look like as following

By this step , you have added all the required dll, js files and css files in the project. Next open Web.config from the Views

Here you need to add following namespace

You need to add this namespace in root level Web.config as well. So open root level Web.config and add the name space.

And add the namespace as following

last step you need to add references of CSS and JS file in _layout.cshtml file. You will find this file in Shared folder.

Open this file and scroll down. Comment the like referring to jquery file. You will find that reference just before closing body tag.

And at the beginning of the file add the following references ,

Above we have referred Metro CSS for metro styled UI experience. So go ahead and following references in _layout.cshtml file
<link rel="stylesheet" href="@Url.Content("~/Content/kendo.common.min.css")" />
<link rel="stylesheet" href="@Url.Content("~/Content/kendo.metro.min.css")" />
<script src="@Url.Content("~/Scripts/jquery.min.js")"></script>
<script src="@Url.Content("~/Scripts/kendo.web.min.js")"></script>
<script src="@Url.Content("~/Scripts/kendo.aspnetmvc.min.js")"></script>
Now you are all set to use Kendo UI MVC Wrappers in the project. Let us go ahead and put a Kendo Calendar widget on index.cshtml . You can put that as following

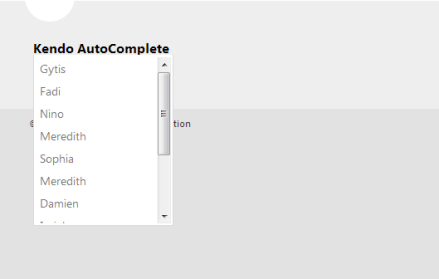
Now press F5 to run the application. You should get the Kendo UI Calendar on the index view as following,

In this way you can start working with Kendo UI MVC Wrapper in ASP.Net MVC 4.0 Application. I hope you find this post useful. Thanks for reading!