Using Kendo AutoComplete in ASP.Net MVC 4.0

In this post, we will see how we could work with Kendo AutoComplete in ASP.Net MVC. We will fetch data from SQL Server table in Kendo AutoComplete using LINQ to Sql class

Adding the Model

Follow Adding Model section of this post to create model.

Adding Controller

We have created the Model, now we need to fetch data using Model in the Controller. I am going to use default created HomeController and Action Index. Go ahead and in HomeController.cs file modify the Action Index.

image

Here we need to create instance of model and pass the data to view. That can be done as following

image

Adding Kendo AutoComplete on View

We are passing data from Index action, so we need to put Kendo AutoComplete in IndexView. Go to View and Home folder and open Index.cshtml

image

Very first you need to make View as strongly typed. You can make a View strongly typed as following

image

Next add Kendo UI AutoComplete. Make sure that you are providing the name attribute. In DataTextField pass the name of the column on which you want to filter the data.

image

For your reference code in view is as following


@model IEnumerable<mvcwrappersample1.Models.Person>

<h3>Kendo AutoComplete</h3>

@(Html.Kendo().AutoComplete()
.Name("name")
.DataTextField("FirstName")
.BindTo(Model)
.Filter("contains"))

Press F5 to run the application, you should able to get data from model in Kendo AutoComplete.

image

I hope you find this post useful. Thanks for reading.

Advertisement

New UI Controls as part of Telerik DevCraft Q3 2012 Release

On Oct 17 2012, we did a release of our Telerik DevCraft bundle known as Q3 2012 release. As part of the release our UI suites have got couple of new controls added to the bundle. In this blog post we will look at what new controls have been added to our UI suites namely – RadControls for ASP.NET AJAX, RadControls for Silverlight, RadControls for WPF, RadControls for WinForms, Windows 8 Controls and RadControls for Windows Phone. So lets go over them one by one.


RadControls for ASP.NET AJAX:

ASP.NET AJAX suite gets the following new controls added to the family of already existing 70+ controls. They are:

Gauge:

This is a high performing HTML5 based radial and linear gauge control which can be used to show certain values in a scale.


See demos of Gauge control here

PivotGrid (Beta):

PivotGrid is a control used to show pivoted data in a tabular or outline or in a compact layout. We bring the power of Pivot to Web with the introduction of this control. This control supports aggregates, drag and drop and a field list control panel.

See demos of PivotGrid here.
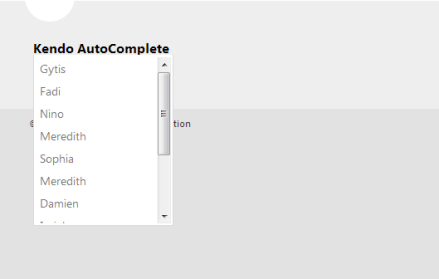
AutoCompleteBox:

As the name goes – this is a auto completion textbox. It auto suggests filtered list with options based on user input and supports multiple item selection. This was one of the highly requested control for ASP.NET AJAX

See demos of AutoCompleteBox here.

You can download a free trial of RadControls for ASP.NET AJAX and evaluate the controls for your needs.

image


RadControls for SilverLight:

Four new controls got added to the Silverlight controls family. They are:

PivotGrid (Beta):

RadPivotGrid is released as a Beta control in this release. This supports data summarizations and great data visualization capabilities.

image

See demos of RadPivotGrid here.

GanttView:

GanttView is a control designed for managing and visualizing complex planning data and tasks. Often used in project planning and management scenarios. Using this control it is easier to understand and analyze the data.

image

See demos of GanttView here.

AutoCompleteBox:

No need to explain this control. The auto suggestion control is now available in Silverlight suite also.

image

See demos of AutoCompleteBox here.

HeatMap:

HeatMap is a control which is matrix-like control, which uses color to encode the values along two axes.

image

See demos of RadHeatMap here.

Download free trial of RadControls for Silverlight and evaluate them for your needs.

image


RadControls for WPF:

New controls introduced for WPF suite are as follows:

PivotGrid (Beta):

image

GanttView:

image

AutoCompleteBox:

image

HeatMap:

image

Download free trial of RadControls for WPF and evaluate them for your projects.

image


RadControls for WinForms:

There was one control added to the WinForms family. That is RadPivitGrid and released as a Beta control in this release.

PivotGrid Filtering

You can download thirty day free trial of RadControls for WinForms with dedicated support during trial period.

image


RadControls for Windows Phone:

Five new controls got added to the Windows Phone controls family. They are as follows:

TimeSpanPicker:

TimeSpanPicker control provides full control over time and duration in any app where users set duration. This control allows users to define duration of certain action.

TimeSpanPicker

Expander:

Expander control allows users to expand or collapse conversations. Fits well in applications that rely on interaction and messaging.

Expander Control

PasswordBox:

As the name goes this is a ready made password input text box for Windows Phone scenario. Using this control in a registration form will automatically display the typical dots in place of the actual password being typed.

PasswordBox

DataForm:

DataForm control provides with out of the box data forms that can be simply configured to work with business logic of your application. It also provides out of the box validation, styling and other customization mechanisms.

DataForm

InputPrompt:

This control allows you to create prompts where you can ask users to enter important details such as Phone number, email, etc.

InputPrompt

You can download a free trial of RadControls for Windows Phone to evaluate the controls.

image


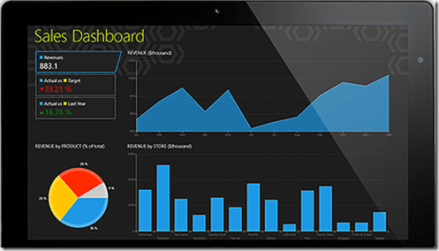
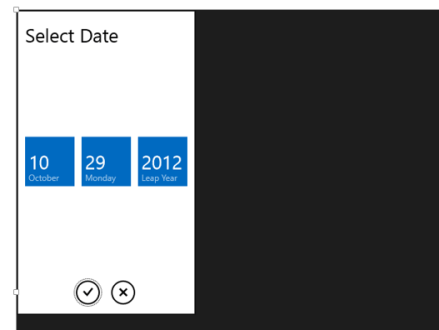
RadControls for Windows 8:

This is a brand new suite as far as the RadControls family is concerned. This suite contains some of the controls which are not found in the SDK of Windows 8 development like date and time pickers. These controls have been built from ground up and provide you with the same UI and UX as that of Windows 8 look and feel. Currently following 15+ controls are released and many more will be added to the suite over time. At this moment we are offering this suite at an introductory price of $99 and you will receive all the new components and updates that will be added to the suite in the next year.

image

image


Hope this blog post excites you in terms of the new control offerings from our UI control suites. If you feel like trying out them go ahead and download our free 20 day trials and evaluate them. Note that during the trial period you will get dedicated support meaning you can raise support tickets and a dedicated support team will be responding to you. Give it a try and let us know how you feel about our UI controls.

Till next time, Happy Coding.

Getting Started with Rad Controls for Windows 8

In this post, we will learn how we could start with Rad Controls for Windows 8.

Download Trial Version from here

As of now these controls are available, 

  • Chart
  • DatePicker
  • Pagination
  • Gauge
  • TimePicker
  • HubTile
  • BulletGraph
  • NumericBox
  • Slider
  • ComboBox
  • AutoCompleteBox
  • DropDownList

You can download Demo Applications exploring the controls from here

After downloading, follow the Telerik Installer Wizard.

 image

Make sure that Windows8 is selected. Click on OK.LET’S DO THIS. Configure installation folder , accept license terms and click on Go to Next Step

image

Provide credential and click on Install to start the installation.

image

After successful installation, you will get following message

 image

By this step, you have successfully installed Rad Controls for Windows 8. Now go ahead and launch Visual Studio and create an Application for Windows Store. Let us choose Blank Application from the XAML Windows Store template.

image

Once the project is created in Solution Explorer right click on the Reference and select Add Reference

image

In the dialog box make sure that you have selected Extension and select Rad Controls for Windows 8.

image

After adding rerefence in solution explorer verify that refence of Rad Controls has been added successfully.

image


By this step you have succesfully created the project and added the required refrence. Now you are all set to use Rad Controls for Windows 8 in your application. Let us go ahead and add RadDatePicker control on the MainePage.xaml. Before using any Rad Control , you need to add namespace. Add namespace as following

image

After adding namespace put RadDatePicker control as following

image

Now press F5 and run the application. You should able to get RadDatePicker control

image

In this way you can start working with Rad Controls for Windows 8. In further posts we will explore each controls individually. I hope you find this post useful. Thanks for reading.

Using Kendo Grid in ASP.Net MVC 4.0

In this post we will see, how we could work with Kendo Grid in ASP.Net MVC. We will display data from SQL Server table in Kendo Grid using LINQ to Sql class. Pictorially we can represent it as follows

image

Before you start with this post, I strongly recommend you to read

Getting started with Kendo UI MVC Wrapper in ASP.Net MVC 4.0

Adding Model

Once you are done with setting up environment go ahead and add a model. We are going to use LINQ TO SQL Class as model. To add model right click on model folder and select New Item. Select Data tab and choose LINQ to SQL Classes to add as model. Give any name to model, I am leaving the default name.

image

Next on the design surface choose Server Explorer

image

If in the Server Explorer, you do not find Data Connection you want to use then go ahead and right click on the Data Connection and select Add New Connection

image

In Add Connection dialog box provide server name and from drop down choose desired database.

image

Click on Ok to add a new connection. Next from Server Explorer drag and drop the tables on dbml file to create the model. I am choosing only Person class from School database.

image

In Solution explorer you can see a dbml file has been added.

image

Adding Controller

We have created the Model, now we need to fetch data using Model in the Controller. I am going to use default created HomeController and Action Index. Go ahead and in HomeController.cs file modify the Action Index.

image

Here we need to create instance of model and pass the data to view. That can be done as following

image

Adding Kendo Grid on View

We are passing data from Index action, so we need to put Kendo Grid in IndexView. Go to View and Home folder and open Index.cshtml

image

Very first you need to make View as strongly typed. You can make a View strongly typed as following

image

Next we can bind data from Model to Kendo Grid as following. Make sure you provide name of the Kendo Grid. This is mandatory because name act as id attribute of the Grid element.

image

For your reference code in view is as following


@model IEnumerable<mvcwrappersample1.Models.Person>

<h3>Kendo Grid</h3>

@(Html.Kendo().Grid(Model)
.Name("personGrid")
.Columns(columns =>
{
columns.Bound(p => p.FirstName);
columns.Bound(p => p.LastName);
columns.Bound(p => p.HireDate);
columns.Bound(p => p.EnrollmentDate);
})
.Pageable() //Enable paging
)

Press F5 to run the application. You should able to get data from model in Kendo Grid.

image

I hope you find this post useful. Thanks for reading.

My favorite 5 Icenium features

Icenium Cloud based IDE got launched and I found this “one stop solution” to create Hybrid applications or Cross-platform application very impressive. While playing around Icenium, I liked almost every features in this Cloud based IDE. However below I am listing my favorite 5 features. In further post, I will discuss more features and step by step explanation to work with them.


image


Code Editor

Being a hybrid application developer, we need to write lot of HTML, JavaScript and CSS. Code Editor in Icenium is clean and elegant editor. It allows us to write codes without much distraction.

image

Just Code is integrated with Code Editor. In Code Editor, we can perform tasks like

  1. Refactoring
  2. Navigation
  3. Code Commands

image


We can perform Code Commands like

  • Formatting of Code
  • Expand selection
  • Duplicate a text
  • Put a block comment


image


The best part is, there is short cut for all the operation. In Navigation we can perform tasks like

  • Go To File
  • Go To Member
  • Go to Symbol


image

So my one of my favorite feature in Icenium is its elegant Code Editor.


Certificate Management

If you have created any Android application then you may be knowing that you need to have a certificate to create apk file. Icenium allows us to create and mange certificate right from the IDE.


image

Icenium provides two options to create a certificate,

  • Request for a certificate
  • Create self-signed certificate


image

Creating certificate right from the IDE is one of the cool feature.

Version Control

Icenuim provides complete version control solution for application development. We can work locally and can perform following tasks in Icenium

  • Compare the changes in between local and latest versions from the server
  • Commit the changes
  • Revert the changes
  • View the history log in the repository


image


We can compare changes, navigate from one change to another as shown in the below image.


image

We can view the

  • history
  • change sets
  • Conflict etc. as shown in the following image,

image


Icenium allows us to commit or revert the changes. While committing we need to provide comment for that particular change. We can commit as shown in below image,


image

Version control is one of the cool feature I got impressed while playing with Icenium.

Integration with github Repository

Yes you read it corectly , right from the IDE you can push and pull yor project to github repository. Icenium allows us to

  • Configure the repository
  • Pull from the repository
  • Push into the repository
  • Invite the Collaborators

image

The best part is that right from the IDE we can Invite Collaboratoes . Before pushing to github we need to commit the changes to resposiory . Commit comment will be displayed next in the github respository comment


image


Code sign ,Permissions and Publish of application


Right from Icenium IDE ,we can sign the code , configure the permissions and set the icons of the application.


image


In Icenium with a right click on the project , we can publish the application.

image

I hope you like these fetaure and you are all set to play around Icenium. Thanks for reading this post and I am looking very forward to share more learning on Icenium with you in furher post.

Creating First Cross-Platform Application using Kendo UI Mobile and Icenium


Learn and explore more about Icenium here

Learn more about Kendo UI Mobile here

Yes as you see in below image that I am developing an application for IPhone on my Windows Machine and this is possible using Icenium.

Being an application developer I am very much excited with the launch of ICENIUM .Icenium is Cloud Based IDE to create Hybrid Application. If you are new to Hybrid Application then you may want to read what is a Hybrid Mobile App? And you may want to read As a Developer why should I worry about Hybrid Application Development?

Learn and explore more about Icenium here

Icenium provides you two different types of IDE.


In this post we are going to use Icenium Graphite to create our first Cross-platform application. To start with launch Icenium Graphite IDE. You will be asked to Login to Icenium. You can login using any of the following as given in the image below.

Let us choose Telerik ID to login into Icenium IDE.


After successful login you will get a Project dashboard. On project dashboard you can perform following three tasks

Create New Project
Browse existing Projects
Clone a project

In below image you can see list of existing projects. To create new project click on New.

There are three project templates as following

  • Blank
  • Using jQuery
  • Using Kendo UI Mobile

Let us go ahead and create a cross-platform device application using Kendo UI Mobile.


Give name of the project. You will notice that you are not asked to select a location to save the project. Since Icenium is a cloud IDE, it saves the project in the cloud rather than saving it locally. Click ok to create the application.

Let us go ahead and explore Project Navigator. You will find project structure as given in following image,


On opening of index.html, you will find some prior code there for reference. As you see in below image that to create Hybrid application using Kendo UI Mobile, you need minimum following references.


There are three default files you will be working on. However you are free to give any name to files.


Let us go ahead and run the default application got created by choosing Kendo project template.


There are two ways you can run the application. You can run application either

  1. On Device
  2. In Simulator

On running you get application running in iPhone simulator.


There are four simulator supported in Icenium.


If you want to run the application in Android Simulator change the Device simulator and you are done

There are many other options available in Device Simulator. We will discuss them in detail in further blog posts.


In this way you can create, test and deploy a truly cross-platform application using Kendo UI Mobile and Icenium. I hope you find this post useful. Looking forward to share more learning on Icxenium and Kendo UI Mobile with you in further blog posts.

Getting started with Kendo UI MVC Wrapper in ASP.Net MVC 4.0

In this post we will learn getting started with Kendo UI MVC Wrapper.

Download Kendo UI free trial from here

Launch visual studio and create a new MVC 4 Web Application.


Choose Internet Application as type of application and Razor engine as the View Engine.


To test whether we have created application correctly or not press F5 and run the application. If application is successfully running then you are all set to start using Kendo UI MVC Wrapper in your application. Very first you need to add reference of Kendo.Mvc.dll. You will find this file in location \wrappers\aspnetmvc\Binaries\Mvc3. Right click on the reference in project and browse to add Kendo.Mvc.dll in the project.


After adding the reference open Web.config file


You need to make sure that following entry is present in the Web.config file.


If above entry is not present then make sure to add them in Web.config file.


<runtime>
<assemblyBinding xmlns="urn:schemas-microsoft-com:asm.v1">
<dependentAssembly>
<assemblyIdentity name="System.Web.Helpers" publicKeyToken="31bf3856ad364e35" />
<bindingRedirect oldVersion="1.0.0.0-2.0.0.0" newVersion="2.0.0.0" />
</dependentAssembly>
<dependentAssembly>
<assemblyIdentity name="System.Web.Mvc" publicKeyToken="31bf3856ad364e35" />
<bindingRedirect oldVersion="1.0.0.0-4.0.0.0" newVersion="4.0.0.0" />
</dependentAssembly>
<dependentAssembly>
<assemblyIdentity name="System.Web.WebPages" publicKeyToken="31bf3856ad364e35" />
<bindingRedirect oldVersion="1.0.0.0-2.0.0.0" newVersion="2.0.0.0" />
</dependentAssembly>
</assemblyBinding>
</runtime>

Now you add Kendo JS files and CSS files in the project. To add Kendo JS files right click on Script folder and select add existing item


Browse to JS folder in Kendo UI installation directory and add all the JS files in the Scripts folder. After adding JS files add CSS files in the project. To add that right click on Content folder in the project and choose option to add existing items


Browse to Styles folder in Kendo UI installation directory and all the CSS files in the Content folder. If you are going to use some specfic style like Metro or Silver then make sure you add texture folder in the Content directory as well. Make sure you have added Texture folder and Default folder also in the Contnet folder of the project.

After adding all the css files and folder , Content folder in the project should look like as following


By this step , you have added all the required dll, js files and css files in the project. Next open Web.config from the Views


Here you need to add following namespace


You need to add this namespace in root level Web.config as well. So open root level Web.config and add the name space.


And add the namespace as following

last step you need to add references of CSS and JS file in _layout.cshtml file. You will find this file in Shared folder.


Open this file and scroll down. Comment the like referring to jquery file. You will find that reference just before closing body tag.


And at the beginning of the file add the following references ,


Above we have referred Metro CSS for metro styled UI experience. So go ahead and following references in _layout.cshtml file


<link rel="stylesheet" href="@Url.Content("~/Content/kendo.common.min.css")" />
<link rel="stylesheet" href="@Url.Content("~/Content/kendo.metro.min.css")" />
<script src="@Url.Content("~/Scripts/jquery.min.js")"></script>
<script src="@Url.Content("~/Scripts/kendo.web.min.js")"></script>
<script src="@Url.Content("~/Scripts/kendo.aspnetmvc.min.js")"></script>

Now you are all set to use Kendo UI MVC Wrappers in the project. Let us go ahead and put a Kendo Calendar widget on index.cshtml . You can put that as following


Now press F5 to run the application. You should get the Kendo UI Calendar on the index view as following,


In this way you can start working with Kendo UI MVC Wrapper in ASP.Net MVC 4.0 Application. I hope you find this post useful. Thanks for reading!

JumpStarting Development with Kendo UI for ASP.NET MVC

Today in the ASP.NET world, MVC is the talk of the town. Every enterprise and every developer is looking to adopt it at some time. Even the architecture guidance from Telerik recommends ASP.NET MVC liberally.

While MVC does have its benefits, it still is not as close to the ease of development that ASP.NET Web Forms provides. The default controls with ASP.NET MVC in Visual Studio are very limited. Telerik fills this productivity gap by providing the toolset that adds many powerful HTML Helpers that aid in faster development. Kendo UI Complete for ASP.NET MVC is the toolset that has the server wrappers that you can use in your ASP.NET MVC project.

In the video below, we explore quickly getting started with Kendo UI for ASP.NET MVC in your project.

We look forward to hearing your experiences using the HTML Helpers from Kendo UI for ASP.NET MVC.

How to do Exploratory Testing in Test Studio

Using Telerik Test Studio Exploratory Testing tool you can

  • Submit and send and idea
  • Submit and send Important information
  • Submit a bug to Team Pulse or TFS


Directly from your browser. In this post we will learn how we can perform Exploratory Testing. To do exploratory testing click on Telerik Exploratory Testing Extension in the browser (Chrome is being used here}


clip_image002

Not able to launch Exploratory Testing Tool? Read here

You will get Test Studio Exploratory toolbar open. Click on Feedback button to perform exploration testing

clip_image003


Next click on Capture button to capture a screenshot

clip_image005


Now you can capture any screen short from the page. Annotate a particular element as following. Like in following case we are saying “Change the font of Welcome element.

clip_image007


In the left side you get Feeback panel. Here you can provide Title, Description and tag the annotation.


clip_image008

You can tag either as Important or Idea. After providing all the information you can send this by clicking on send button in bottom.

clip_image009


You can either export to

  • Word
  • HTML

Or can send in Email. You can submit it as bug as well. You can submit to Team Pulse or TFS.


clip_image010


If you want to export to HTML click on HTML option. You will be asked to provide name of the file and choose the location to save the file.

clip_image012


You will get a confirmation message that Feedback is saved to the given location.


clip_image013


If you open file you will get all the information of the feedback submitted.


clip_image015

In this way you can perform Exploratory Testing right in your browser using Telerik Test Studio.

. I hope you find this post useful. Thanks for reading.

Not able to launch Exploratory Testing Tool in Test Studio?

You might have come across following error when you try to open Telerik Test Studio Exploratory Tool in browser

clip_image002 

If you open exploratory tool in Internet Explorer, you will get more specific error message as following

clip_image003

You can solve this problem in two steps,

Step 1:

Browse to folder C:\Program Files (x86)\Telerik\Test Studio\Bin\Feedback

clip_image004


Step 2:

locate for file Telerik.TestStudio.Feedback.Listener.exe . Right click on the file and click Run as Administrator

After running this service go back to browser and open exploratory tool, you should able to launch it successfully.

I hope you find this post useful. Thanks for reading

How to encrypt information while testing in Test Studio?

Let us assume that you are doing automated test of login functionality. While executing the test you want to encrypt the Password information provided by the user to authenticate. Test Studio allows you to encrypt the vital information in the test steps.

Suppose you have recorded a login test as following. If you see in step 4 password is displayed in the plain text.

image


If you want to encrypt this information select the step and open the property. Open the property window for enter password step and navigate to Behavior tab. At the top of property window you can verify that for which step property is open. You see that Encrypt behavior value is set to false.


clip_image003

To encrypt the password you need to change value of Encrypt to true.

clip_image004

After changing this value when you navigate back to test steps, you will find password has been encrypted

clip_image005

So in this way you can encrypt vital information while executing the test. I hope you find this post useful. Thanks for reading.

How to Submit a Bug to TeamPulse from Test Studio

In this post we will see, “How could we submit a bug from Test Studio to TeamPulse?

Let us assume that we executed an automated functional test and we got the following result. Step 6 in the test failed.

image

We need to submit this bug to Team Pulse. To submit bug to Team Pulse double click on Red Cross and you will get Step Failure Details dialog box as shown in following image.

image

Click on the Submit Bug. If Team Pulse is not configured then you will get dialog box to set up Team Pulse. In this dialog box click on Set this up now

image

If you have already configured TeamPulse or TFS in any of the other Test Project then Test Studio remember that and prompt you that whether you want to import previous setting or you want to go with New Setup. Let us go ahead with New Setup for that click on New Setup.

image

After clicking on New Setup now you will get below dialog box. Select TeamPulse Server and click on Configure Selected.

image

In next dialog box, provide

  1. Url of TeamPulse
  2. Username and Password to authenticate to Team Pulse.

image

After providing credential you need to click on the Connect button. After successful authentication you will get Project to select. Select Project, Severity and Status from drop down. At last click on Done button.

image

If you have successful connected to Team Pulse, you will get Green Right icon next to TeamPulse. Check on check box to make it default and click on Donebutton.

image

Next you will be prompted to dialog box to submit the bug.

image

Before submitting bug, you can Edit Title and Description of the Bug. If you want to submit files related to Failure details then check the check box Attach Failure details. To submit the bug, click on Submit button.

You will get successful message on successful submission of bug from Test Studio to TeamPulse

image

In this way you can submit bug to TeamPulse from Test Studio. I hope you find this post useful. Thanks for reading

What is new in Q3 from the Telerik? Sign up for the Webinar week

image

Excited about what is new coming from Telerik in Q3? To know more

Register for Webinar week

Find the schedule below. All the times mentioned below are in IST.


image


Select the webinars you want to attend here and register.

You can download 30 days trial with dedicated support from here and if you find products worth trying in your application and products then you may want to explore Pricing and Licensing here

Hope to see you in Webinar week.