Integrating SignalR in HTML 5 Applications with Kendo UI – Webinar Resources

On Mar 12 2015 we conducted yet another webinar as part of our monthly webinar series. This time we were happy to invite Vidyasagar Machupalli who is a Microsoft MVP in Gaming. In fact he is the only Gaming MVP in South East Asia. The topic for this webinar was “Integrating SignalR in HTML5 Applications with Kendo UI”. Idea was to talk about real time communication in ASp.NET using SignalR and how Kendo UI makes it easy to work with SignalR.

ASP.NET SignalR:

Here is what the official description of SignalR is at http://www.asp.net:

ASP.NET SignalR is a new library for ASP.NET developers that makes developing real-time web functionality easy. SignalR allows bi-directional communication between server and client. Servers can now push content to connected clients instantly as it becomes available. SignalR supports Web Sockets, and falls back to other compatible techniques for older browsers. SignalR includes APIs for connection management (for instance, connect and disconnect events), grouping connections, and authorization.

Kendo UI:

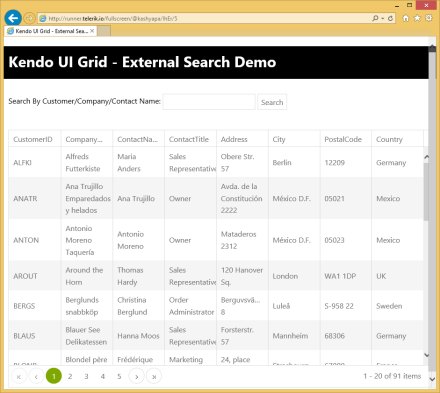
If you have been attending our webinars, you would have known about Kendo UI by now. If not, Kendo UI is a single package you need to develop HTML5 based sites/apps. Kendo UI is a HTML5 based client side JavaScript UI framework. To know more about Kendo UI head over to the project page here: http://www.telerik.com/kendo-ui. You can find Kendo UI demos online here: http://demos.telerik.com/kendo-ui

Slides:

Video:

Questions:

Q: Hi, SignalR is an advanced topic related to Web Sockets or Server Sent Events etc. Or it rely on these architecture?
A: SignalR is a real time communication technology on ASP.NET Stack from Microsoft.

Q: In order for the server to do real-time communication with SignalR, should the server be an IIS web server ?
A: SignalR at the moment can be hosted in IIS or as a stand alone process. But this requires you to be on Windows platform.

Q: Can we use Telerik controls with SignalR?
A: Absoutely. Telerik Kendo UI has specific binding/ support for SignalR.

Q: SignalR is purely async based or can it be set to be in sync mode like the way node.js is an async by default but can be set to mode sync?
A: SignalR is a server side technology and all it does is to keep track of all the clients connected and intimate them of any updates. So typically server sends a broadcast to all connected client and clients know how to react to this update on the client side.

Q: What is the most important advantage of SignalR ?
A: Real Time Communication between Server & Client.

T-Shirt Winners:

As usual we have picked 2 attendees randomly to receive our T-Shirts. They are:

  • Sonam Bhardwaj
  • Kapil Chhabra

Congratulations to the winners. We will contact you shortly on your registered email id. Rest of you, do keep attending our future webinars.

Till next time – Happy Coding.

Kendo UI Grid with External Search Box

How To: External Search Box For Kendo UI Grid

Couple of weeks ago, i had an email from a customer of ours who wanted to know how to provide a external search box to our Kendo UI grid. What they wanted to do was to have a text box and a button to initiate the search. This seems to be a common scenario that you will have in your proejcts. So i thought this makes a good case for a blog post. If you have a similar situation in your projects then you better read through this blog post till the end.

The Plot:

What i want to achieve is:

  • Have a text box to enter a search string
  • Have a button which will trigger the search
  • Have a Kendo UI Grid to show the data

I will be using our Northwind OData service available here: http://demos.telerik.com/kendo-ui/service/Northwind.svc/. I will be using the Customers data to show in the grid and search

Kendo UI Grid with External Search Box

Kendo UI Grid with External Search Box


Setting up the UI:

<div>
<div>
Search By Customer/Company/Contact Name:
<input class=k-textbox type=text id="txtSearchString" placeholder="enter search text..." />
<button id="btnSearch">Search</button>
</div>
<br><br>
<div id="kGrid"></div>
</div>


Binding the Grid with Data:

On document ready, i will instantiate the Kendo UI Grid and bind it to the Odata service. Here is the code snippet:

$(document).ready(onReady);
function onReady()
{
$("#btnSearch").kendoButton({
click:onSearch
})
$("#kGrid").kendoGrid({
dataSource:{
type:"odata",
transport:{
read:"http://demos.telerik.com/kendo-ui/service/Northwind.svc/Customers&quot;
},
schema:{
data:function(data){
return data.d.results
},
total:function(data){
return data.d.__count
},
},
serverPaging:true,
serverFiltering:true,
pageSize:20
},
height:550,
pageable:true,
columns:[
'CustomerID',
'CompanyName',
'ContactName',
'ContactTitle',
'Address',
'City',
'PostalCode',
'Country'
]
})
}
view raw documentgetreay hosted with ❤ by GitHub

Lets walkthrough as to what has been done. I provide a datasource to the grid . I set the page size to 20 and turn on server paging & server filtering so that the data source does not do client side paging & filtering. I also provide the grid with the columns that needs to be shown.


Handling Search Button Click:

As stated earlier, the external search will be triggered by the search button we have above the grid. If you thought that the Grid is what will be doing the search – well its not. Its actually the data source will do the heavy lifting. The Grid just gets the data to display from the data source. Now, the Grid’s data source is of type kendo.Data.DataSource. One of the API methods that the data source provides is query(). What query method does is – it will execute any specified query and will make a HTTP request when bound to a remote service. So the query we need to perform in our case is filtering. Our search text needs to be converted in to a bunch of filters. In my use case i would like to search the fields Company Name, Customer Name and Contact Name whether they contain the text entered in the search box. So this will be specified as 3 filter conditions with an “OR” logic. So here is the code snippet to do this:

function onSearch()
{
var q = $("#txtSearchString").val();
var grid = $("#kGrid").data("kendoGrid");
grid.dataSource.query({
page:1,
pageSize:20,
filter:{
logic:"or",
filters:[
{field:"CustomerID", operator:"contains",value:q},
{field:"CompanyName", operator:"contains",value:q},
{field:"ContactName", operator:"contains",value:q}
]
}
});
}
view raw searchfilters hosted with ❤ by GitHub

Well that’s all the code it takes you to provide a external search capability for your grid.


Result:

You can see a working demo here: http://runner.telerik.io/fullscreen/@kashyapa/IhEr/5

You can get the source code of this demo is available here: http://dojo.telerik.com/@kashyapa/IhEr/5


I think this post gives you an idea on the power of kendo.data.DataSource. You can do a lot of things with data source. Hope this example helps you in your project if you have a similar requirement.

Till next time, Happy Coding!

Error Solved: Binding Excel file as Data Source in Test Studio

Download free 30 days trial of TestStudio from here

Find more about Test Studio here

Okay, so have you come across this error while binding an Excel File as DataSource to a Test in Test Studio? You may get this error when you are working with fie saved in Excel 2013 format.

image

Now how to solve this error? Very easily you can solve this error by saving Excel file in Excel97-2003 Workbook format.

clip_image002

If you do not want and can save your file in Excel97-2003 format then probably you may want to check application log. To check application log follow these two steps,

  1. Navigate to Help Menu
  2. Click on Enable log to enable log in Test Studio.

image

In Log if you see something like Microsoft.ACE.OLEDB.12.0 is not registered on local machine then, you need to install Access Database Engine. You can download and install it from below link,

http://www.microsoft.com/en-us/download/details.aspx?id=23734

After installing it you should able to work with Excel file regardless of it format is Data Source in Test Studio.

I hope this post useful. Thanks for reading.

Download free 30 days trial of TestStudio from here

Find more about Test Studio here

How to iterate all the data in Kendo UI Data Source

In this post we will take a look on how could we iterate all the data of Kendo UI Data Source? Let us say we have a JavaScript array as given below,


var speakers = [
 {
 SpeakerName: "Chris Sells",
 SpeakerTitle: "Author, Ex- Microsoft and ardent community contributor"

},
 {

SpeakerName: "Steve Smith",
 SpeakerTitle: "Speaker, Author, Microsoft Regional Director and MVP"

},
 {

SpeakerName: "Dr.Michelle Smith",
 SpeakerTitle: "Enterprise Consultant"

},
 {

SpeakerName: "Gaurav Mantri",
 SpeakerTitle: "Founder Cerebrata & Windows Azure MVP"
 }

];

We will create a Kendo Datasource reading speakers array. Very simply we can create data source as following,


var yourdatasource = new kendo.data.DataSource({

data: speakers
 });

Now we will see how we could iterate each data of data source. We can do that by calling data() function on Kendo UI Data source. data() function is used to get and set data of the Kendo data source.

image

So we can read data from data source as following. We are alerting length of data source below.


var datasourcedata = yourdatasource.data()
alert(datasourcedata.length);

Finally we can iterate through data source as following,

yourdatasource.fetch();
 var datasourcedata = yourdatasource.data()

 for (var i = 0; i < datasourcedata.length; i++) {
 var dataitem = datasourcedata[i].SpeakerName;
 alert(dataitem);
 }

As output in alert we will get entire speakername. In this way you can iterate through data of Kendo datasource. I hope you find this post useful. Thanks for reading.

How to apply filter in creating Kendo UI Data Source from OData

I was working on an application and there was a requirement in which I had to apply filter while fetching data from the server using ODATA. I had two choice to achieve this

  1. Construct ODATA URL with filter applied
  2. Apply filter in Kendo UI Data Source

In this post we will discuss how we could apply filter while creating Kendo UI DataSource reading OData feed.

We can create data source reading ODATA feed as following. Below we are creating data source reading ODATA feed of Netflix


var movieTitleData;
movieTitleData = new kendo.data.DataSource(
{
type: "odata",
endlessScroll: true,
batch: false,
transport: {
read: {
url: "http://odata.netflix.com/Catalog/Titles?$select=Id,ShortName,BoxArt&$top=10",
dataType: "jsonp",

data: {
Accept: "application/json"
}
}
}

});

On inspecting request URL you will find that URL to fetch data is getting constructed as following. We are fetching top 10 movies title from Netflix

image

Now assume there is a requirement to fetch information of a particular movie with given Id. We can do that by applying filter while creating the KendoUI DataSource. We can apply filter to fetch movie of particular id as given below.

image

While applying filter we need to make sure that serverFiltering is set to true.

image

In Filter,

  1. Id is the column on which filter is being applied
  2. eq is operator to apply filter
  3. value is filter value

Kendo UI data source with filter applied can be created as following.


var moviedetailData = new kendo.data.DataSource(
{
type: "odata",
endlessScroll: true,
serverFiltering: true,
transport: {
read: {
url: "http://odata.netflix.com/Catalog/Titles?$select=Id,ShortName,BoxArt,AverageRating,ReleaseYear,Synopsis",
dataType: "jsonp",

data: {
Accept: "application/json"
}

}
},
filter: { filters: [{ field: "Id", operator: "eq", value: query }] }

});

While creating above KendoUI data source

  1. Data is fetched from Odata feed of Netflix
  2. Filter is applied on Id column of Netflix data source
  3. To apply filter at server side serverFiltering attribute is set to true

On inspecting request URL you will find that URL to fetch selected movie is getting constructed as following. We are fetching a particular movie on given id of the movie.

image

You will find that URL being constructed to fetch Odata feed is containing the filter query. In this way we can apply filter while creating Kendo UI DataSource reading an OData feed. I hope you find this post useful. Thanks for reading.