Kendo UI Grid

How To: Custom Date Filter Column in Kendo UI Grid using ASP.NET MVC Wrapper

In one of my previous blog post, i had written about how to have a custom date filter column in Kendo UI grid but the JavaScript way. You can read about it here. Video version of that blog post is available here. In this blog post i will showcase how to achieve the same scenario but using ASP.NET MVC Wrapper. Continue reading

Kendo UI Grid

Video: Custom Date Filter Column in Kendo UI Grid (JavaScript)

In my previous post here, i talked about Kendo UI Grid & Custom Date Filter column using JavaScript. I have recorded a screen cast on the same subject. In the screen case you will be able to follow the step by step instruction to create a custom date filter column. Below you will find the screen cast recording:

Hope the video helps you if you have a similar requirement in your projects.

Till next time – Happy Coding !

Kendo UI Grid

Video: How to Scaffold Kendo UI Grid in ASP.NET MVC Applications

Kendo UI is one of our popular controls set when it comes to HTML5 based app development. Kendo UI is client side UI framework and you work with Kendo UI using JavaScript. But if you are coming from ASP.NET MVC background you may be familiar with the concepts of HTML helper. Helpers are nothing but a shorthand to otherwise writing lengthy HTML code. With our UI for ASP.NET MVC product we provide what we call as “Kendo UI Wrappers for ASP.NET MVC” a.k.a Kendo UI helpers in ASP.NET MVC.

Grid control or widget as we call it – is one of the most widely used widget in Kendo UI. When you install our UI for ASP.NET MVC we also install Kendo UI Scaffolder. Scaffolding is a handy productivity feature in Visual Studio where the Scaffolder generates all the boiler plate code necessary. Our Kendo UI Scaffolder can scaffold Grid code for you – without you writing a single line of code.

In the below video i have tried to capture the steps required to perform a Kendo UI Grid Scaffolding in your ASP.NET MVC applications. The video is like a Step by Step instruction for you to follow:

Hope this video gives you a jump start if you are planning to use Kendo UI Grid in your ASP.NET MVC applications.

Till next time – Happy Coding !

Kendo UI Grid

Simple Export to PDF from your Data Grid using Kendo UI

In my last blog post, we looked at a new feature of Kendo UI Grid released as part of our Q3 2014 – namely Export to Excel. Exporting data from Data Grid was a high ask feature and we provided that in our latest release of the product. In this blog post we will look at how to export the data grid contents to PDF. Kendo UI Data Grid support exporting to PDF out of the box. So let’s start looking at some code.

Creating a Grid:

As usual let’s build a simple grid. I will make use of our Northwind service available on our demo server as a data source to the grid. Here is the code snippet:

<div id="grid"></div>
<script>
   $("#grid").kendoGrid({
       dataSource: {
           type: "odata",
           transport: {
               read: "http://demos.telerik.com/kendo-ui/service/Northwind.svc/Products"
           },
           pageSize: 7
       },
       sortable: true,
       pageable: true,
       columns: [
           { width: 300, field: "ProductName", title: "Product Name" },
           { field: "UnitsOnOrder", title: "Units On Order" },
           { field: "UnitsInStock", title: "Units In Stock" }
       ]
   });
</script>

This will produce the following grid:

Kendo UI Grid

Kendo UI Grid


Providing Export Option on the Grid:

As seen in my previous blog post on Excel Export, for PDF also we have a command bar option available out of the box. We just have to add a toolbar command named “pdf”. This will provide an “Export to PDF” on the grid toolbar and clicking which will export the Grid to PDF. Here is the code snippet:


<script>
   $("#grid").kendoGrid({
       tooldbar:[“pdf”]      
       ….
       //code omitted for brevity
   });
</script>

And here is the snapshot of how our grid will look like now:

Kendo UI Grid with Export button

Kendo UI Grid with Export button

If we now click on the “Export to PDF” we will get the Grid exported to a PDF document and the PDF will be saved to your system. Here is a snapshot of the PDF file itself:

PDF Document

PDF Document

Well that’s all it takes to export your Grid data to PDF.

Customizing the Exported PDF File:

Kendo UI Grid also provides certain options which can be set on the grid itself and these options will control how the PDF exported file has to be shaped. Here are the options supported for PDF export:

Property Type Description
author String Author of PDF Document
creator String Creator of PDF Document. Defaults to “Kendo UI PDF Generator”
date Date Date when PDF Document was created. Defaults to current date
fileName String Name of the exported PDF Document
keywords String Keywords of exported PDF Document
landscape Boolean Paper dimension setting. Default is false
margin Object Specify margins of the page
paperSize String Specify paper size of PDF Document. e.g. A4, A3 etc
subject String Specify subject of the PDF Document
title String Specify title of PDF Document

Here is the code snippet on how to set the PDF options:

<script>
   $("#grid").kendoGrid({
       tooldbar:[“pdf”],
        pdf:{
              author:"Lohith G N",
              creator:"Telerik India",
              date:new Date(),
              fileName:"NorthwindProducts.pdf",
              keywords:"northwind products",
              landscape:false,
              margin:{
                      left: 10,
                      right: "10pt",
              top: "10mm",
               bottom: "1in"
              },
              paperSize:"A4",
              subject:"Northwind Products",
              title:"Northwind Products"
       },     
       ….
       //code omitted for brevity
   });
</script>

Programmatically Export to PDF:

Toolbar option to provide an export option is great. It lets you add export feature without much of you doing any coding. But what if you have a situation where you want to a button outside of the Grid i.e. no toolbar button. And you want the grid to be exported to PDF on click of that external button. Kendo UI Grid covers you in this scenario by exposing a method called “saveAsPDF()”. You just grab instance of the grid at runtime and invoke the method “saveAsPDF()” to start the export. That’s as easy and simple it is. Here is the code snippet to show this:


&nbsp;

<div id="grid"></div>
<br>
<button id="btnExport">Export to PDF</button>
<script>
$("#btnExport").kendoButton(
{
click:function(){
$("#grid").data("kendoGrid").saveAsPDF();
}
});
//code omitted for brevity
</script>

That’s all its there to exporting the data grid to a PDF document. Do give it a try and let us know if you have any suggestion/feedback on this feature.

All the code in this blog post can be accessed on our Kendo UI DoJo here: http://dojo.telerik.com/@kashyapa/ADUVi

Kendo UI Grid

Simple Export to Excel from your Data Grid using Kendo UI

In Q3 2014 release of our Kendo UI, we added one of the most sought out feature in the Grid. Exporting grid data was one of the top ask feature for Kendo UI Grid. We are happy to say that with the Q3 release Kendo UI Grid now supports exporting to Excel or PDF document out of the box. In this blog post we will take a look at how to use the Excel export feature of the Kendo UI Grid.

Creating a Grid:

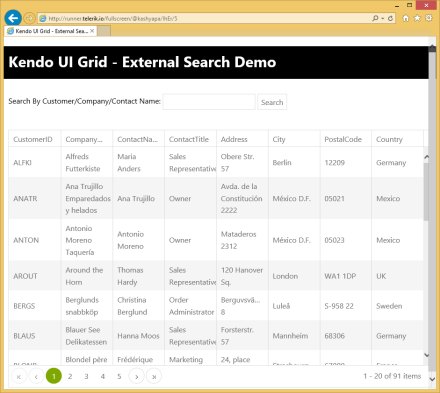
First we will create a simple Kendo UI Grid. I will connect to one of our demo service which is based on Northwind database. I will use the Products table and display Product Name, Units on Order and Units in Stock and will have a page size of 7. Here is the code snippet for the grid:

<div id="grid"></div>
<script>
    $("#grid").kendoGrid({
        dataSource: {
            type: "odata",
            transport: {
                read: "http://demos.telerik.com/kendo-ui/service/Northwind.svc/Products"
            },
            pageSize: 7
        },
        sortable: true,
        pageable: true,
        columns: [
            { width: 300, field: "ProductName", title: "Product Name" },
            { field: "UnitsOnOrder", title: "Units On Order" },
            { field: "UnitsInStock", title: "Units In Stock" }
        ]
    });
</script>

And here is the output of the above code snippet:

Kendo UI Grid

Providing Export Option on the Grid:

Before we proceed with enabling the export to excel option of the grid, there is one prerequisite that needs to be taken care of. Excel Export relies on a JavaScript library called “jszip”. This library needs to be referenced before Kendo UI JavaScript reference. JSZip is part of the Kendo UI distribution and is also available via the Kendo UI CDN:

<script src=”http://cdn.kendostatic.com/2014.3.1029/js/jszip.min.js”></script&gt;

Kendo UI Grid provides one of the easiest way to configure the export button options. If you have used Kendo UI Grid before, you will be familiar with the concept of Toolbars on Grid. We have provided a simple command which can be used in toolbar and provide export to excel or export to pdf option. Yes with just one setting you can now provide export capability on your grid. Let’s see the code to believe it:

<script>
    $("#grid").kendoGrid({
        toolbar:[“excel”]
        ….
        //code omitted for brevity
    });
</script>

And here is the output of the above code:

Kendo UI Grid with Toolbar
Let’s go ahead and click on the Excel export button. You should see a file named “Export.xslx” being download to your machine. Here is the screenshot of the excel file on my machine:

Excel Export File

Customizing the Exported Excel File:

So far we saw how simple it was to provide an export to excel capability on the Grid. But the exported file was named “Export.xslx”. Well that name is not intuitive. Better would be to provide a meaning full name to the excel file that’s gets exported. Fortunately, the Kendo UI team has thought about it and the Grid API has exposed certain options for Excel export feature. Let’s take a look at the options we have on hand:

Property Type Description
excel Object Configure the Kendo UI Grid Excel export settings
excel.fileName String Configure the file name of the exported excel file
excel.filterable Boolean Configure whether exported excel file will have column filtering or not
Excel.allPages Boolean Configure if all pages data need to be exported. Default is false

Let’s see the above excel options in action. Here is a code snippet which sets the excel options on the Grid:

<script>
    $("#grid").kendoGrid({
        toolbar:[“excel”],
        excel:{
	filename:”Northwind Products Stick List.xslx”,
	filterable:true,
	allPages:false
        },
        ….
        //code omitted for brevity
    });
</script>

Now, when we click on the Export to Excel button – the exported file will be named as “Northwind Products Stock List” and will have data filters on in the worksheet. Here is a screenshot of the exported excel file on my machine:

Excel Export File with Filters
Well that how easy it is to configure your excel export options.

Programmatically Export to Excel:

So far we have seen how the inbuilt feature of toolbar helps you to provide the excel export capability with juts a single setting. What if you have a scenario where you don’t need a toolbar button the grid rather you need a button outside the grid and on click of this external button excel file should be exported. Well even this scenario is covered by the export feature of Kendo UI Grid. Grid API exposes a single method called “saveAsExcel()” which can be invoked on the Grid at runtime and the excel file will be exported. Let’s see this in action. Here is the code snippet to do this:

<div id="grid"></div>
<button id="btnExport">Export to Excel</button>
<script>
  $("#btnExport").kendoButton({
    click: function()
    {
      $("#grid").data("kendoGrid").saveAsExcel()
    }
  })

    $("#grid").kendoGrid({
        excel: {
          fileName: "Northwind Products Stock List.xlsx",
          filterable:true,
          allPages:false
        },
        …
        //code omitted for brevity
    });

Lets take a closer look at what we have done here. I have placed a button outside the grid. I have gone ahead and set excel export options on the grid. When the button is clicked, I obtain a reference to kendo grid and call “saveAsExcel()” method on the grid instance. And the behavior is the same i.e. an excel file is exported according to the options set on the grid.

I hope this blog post excites you with the new feature of Kendo UI Grid namely Excel Export. If you have followed along the blog post, you would have realized that providing excel export option on a grid is as simple as setting couple of properties on the Grid itself. It cannot get any easier than this. Do give it a try and let us know your feedback or suggestion on Excel Export feature of Kendo UI Grid.

Note: The complete code of this blog post is made available as a Kendo UI DOJO here: http://dojo.telerik.com/@kashyapa/umuWI

Till next time, Happy Coding!

Kendo UI Grid with External Search Box

How To: External Search Box For Kendo UI Grid

Couple of weeks ago, i had an email from a customer of ours who wanted to know how to provide a external search box to our Kendo UI grid. What they wanted to do was to have a text box and a button to initiate the search. This seems to be a common scenario that you will have in your proejcts. So i thought this makes a good case for a blog post. If you have a similar situation in your projects then you better read through this blog post till the end.

The Plot:

What i want to achieve is:

  • Have a text box to enter a search string
  • Have a button which will trigger the search
  • Have a Kendo UI Grid to show the data

I will be using our Northwind OData service available here: http://demos.telerik.com/kendo-ui/service/Northwind.svc/. I will be using the Customers data to show in the grid and search

Kendo UI Grid with External Search Box

Kendo UI Grid with External Search Box


Setting up the UI:

<div>
<div>
Search By Customer/Company/Contact Name:
<input class=k-textbox type=text id="txtSearchString" placeholder="enter search text..." />
<button id="btnSearch">Search</button>
</div>
<br><br>
<div id="kGrid"></div>
</div>


Binding the Grid with Data:

On document ready, i will instantiate the Kendo UI Grid and bind it to the Odata service. Here is the code snippet:

$(document).ready(onReady);
function onReady()
{
$("#btnSearch").kendoButton({
click:onSearch
})
$("#kGrid").kendoGrid({
dataSource:{
type:"odata",
transport:{
read:"http://demos.telerik.com/kendo-ui/service/Northwind.svc/Customers&quot;
},
schema:{
data:function(data){
return data.d.results
},
total:function(data){
return data.d.__count
},
},
serverPaging:true,
serverFiltering:true,
pageSize:20
},
height:550,
pageable:true,
columns:[
'CustomerID',
'CompanyName',
'ContactName',
'ContactTitle',
'Address',
'City',
'PostalCode',
'Country'
]
})
}
view raw documentgetreay hosted with ❤ by GitHub

Lets walkthrough as to what has been done. I provide a datasource to the grid . I set the page size to 20 and turn on server paging & server filtering so that the data source does not do client side paging & filtering. I also provide the grid with the columns that needs to be shown.


Handling Search Button Click:

As stated earlier, the external search will be triggered by the search button we have above the grid. If you thought that the Grid is what will be doing the search – well its not. Its actually the data source will do the heavy lifting. The Grid just gets the data to display from the data source. Now, the Grid’s data source is of type kendo.Data.DataSource. One of the API methods that the data source provides is query(). What query method does is – it will execute any specified query and will make a HTTP request when bound to a remote service. So the query we need to perform in our case is filtering. Our search text needs to be converted in to a bunch of filters. In my use case i would like to search the fields Company Name, Customer Name and Contact Name whether they contain the text entered in the search box. So this will be specified as 3 filter conditions with an “OR” logic. So here is the code snippet to do this:

function onSearch()
{
var q = $("#txtSearchString").val();
var grid = $("#kGrid").data("kendoGrid");
grid.dataSource.query({
page:1,
pageSize:20,
filter:{
logic:"or",
filters:[
{field:"CustomerID", operator:"contains",value:q},
{field:"CompanyName", operator:"contains",value:q},
{field:"ContactName", operator:"contains",value:q}
]
}
});
}
view raw searchfilters hosted with ❤ by GitHub

Well that’s all the code it takes you to provide a external search capability for your grid.


Result:

You can see a working demo here: http://runner.telerik.io/fullscreen/@kashyapa/IhEr/5

You can get the source code of this demo is available here: http://dojo.telerik.com/@kashyapa/IhEr/5


I think this post gives you an idea on the power of kendo.data.DataSource. You can do a lot of things with data source. Hope this example helps you in your project if you have a similar requirement.

Till next time, Happy Coding!

Kendo UI Grid Wrapper for ASP.NET MVC – Getting Started

Overview:

In this blog post I will be exploring how to get started with our Kendo UI Grid Wrapper for ASP.NET MVC. We will take a basic usage of displaying data in a grid format in an ASP.NET MVC view. To know more about Kendo UI Web controls head over to www.kendoui.com. If you want to follow along with this blog post, you can do so by downloading a 30 day free trial of Kendo UI Complete for ASP.NET MVC.

Getting Started:

First lets create a ASP.NET MVC project. I am using Visual Studio 2012. When you install Kendo UI, we also install certain project templates which make it easy to create kendo UI based ASP.NET MVC project. I assuming you have installed Kendo UI Web for the rest of the post. In Visual Studio, select File > New Project > Web > Kendo UI for ASP.NET MVC. Give it a name and wait for Visual Studio to spin up the new project.

Datasource:

For the sake of this blog post, I will be using Northwind database. I will also be using ADO.NET Entity Model to Northwind database and use Customers table data. So go ahead and add a ADO.NET Entity Model to your project. We will use the entity data model to fetch data and bind it to the grid. I have also created a CustomerViewModel so that I can use this as the Model to the view. Here is the code for the CustomerViewModel:


public class CustomerViewModel
{
public string CustomerID { get; set; }
public string CompanyName { get; set; }
public string ContactName { get; set; }
public string ContactTitle { get; set; }
public string Country { get; set; }
}

Home Controller & Index Action method changes:

We will read the customers data, build CustomerViewModel list and add this to view as a Model. Here is the Index Action method code snippet:


public ActionResult Index()
{
var customerViewModelList = GetCustomers();
return View(customerViewModelList);
}

GetCustomers is a helper method which converts Customers entity to CustomerViewModel entity and return a list. Here is the code snippet of GetCustomers method:


private IEnumerable<CustomerViewModel> GetCustomers()
{
var context = new NORTHWINDEntities();
var customers = context.Customers.Select(customer => new CustomerViewModel
{
CustomerID = customer.CustomerID,
CompanyName = customer.CompanyName,
ContactName = customer.ContactName,
ContactTitle = customer.ContactTitle,
Country = customer.Country,
});
return customers;
}

Adding Grid to View:

In order to use a grid on a view, you will use the GridBuilder. GridBuilder supports the following overloaded methods for creating the grid:


public virtual GridBuilder<T> Grid<T>() where T : class;

public virtual GridBuilder<DataRowView> Grid(DataTable dataSource);

public virtual GridBuilder<DataRowView> Grid(DataView dataSource);

public virtual GridBuilder<T> Grid<T>(IEnumerable<T> dataSource) where T : class;

public virtual GridBuilder<T> Grid<T>(string dataSourceViewDataKey) where T : class;

in this blog post we will be using the method where it allows us to pass a IEnumerable as the data source. First lets take a look at the code snippet. Following the snippet I will explain the code in detail:


@using GridGettingStarted.Models
@model IEnumerable<CustomerViewModel>
@(Html.Kendo().Grid(Model)
.Name("Grid")
.Columns(columns =>
{
columns.Bound(c => c.ContactName).Width(140);
columns.Bound(c => c.ContactTitle).Width(190);
columns.Bound(c => c.CompanyName);
columns.Bound(c => c.Country).Width(110);
})
.Pageable()
.Sortable()
.Groupable()
.Filterable()
)

Well that’s all it takes to create a grid in MVC. Now lets go over the code in detail.

  • We pass the Model which is IEnumerable<CustomerViewModel> in this case to the GridBuilder
  • All widgets in Kendo UI needs to be named, so we provide a name using the Name() method
  • We define columns of the grid using the Columns() method. We can provide lambda expression to indicate which columns should be bound
  • In order to allow paging on the grid, we just add the Pageable() method
  • Sorting on the grid is enabled by adding the Sorting() method
  • Grouping is enabled by adding the Groupable() method
  • Similarly, filtering is provided by adding the Filterable() method

Now build the project and run the application. Following is the output of the code we just wrote:

image

Server Operation False:

At this moment if you click on a pager link or try to sort or try to group, Kendo UI Grid will be default send a request back to Server. That’s the default behavior that the grid works with. It assumes that Server would like to perform operation before getting the data. In this scenario that is not intended for me. I have got all the data that I need and I have given it to the grid. So it should do all the operation at client side rather than sending a request to server. For this to happen we just need to let the Grid DataSource not to perform server operation. This can be done by setting the Grid DataSource setting as  below:


@(Html.Kendo().Grid(Model)
.Name("Grid")
.Columns(columns =>
{
columns.Bound(c => c.ContactName).Width(140);
columns.Bound(c => c.ContactTitle).Width(190);
columns.Bound(c => c.CompanyName);
columns.Bound(c => c.Country).Width(110);
})
.Pageable()
.Sortable()
.Groupable()
.Filterable()
.DataSource(source => source
.Ajax()
.ServerOperation(false)
)
)

now when you run the project and perform any operations, grid will not send a request to the server but do it client side.

Conclusion:

This blog post was like a primer to anybody who would like to get started with Kendo UI Grid Wrapper for ASP.NET MVC. With just 15 lines of settings you will have a full fledged grid in your app within no time. If you are interested in Kendo UI Grid, do download a 30 day free trial at www.kendoui.com.