Telerik conducted Cross Platform Mobile Application Development workshop for students in India office

View Photos from Workshop here

Download Icenium from here

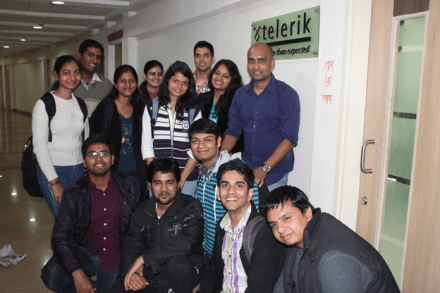
Cross Platform Mobile Application Development or Hybrid Application development is gaining huge popularity among mobile application developers. Seeing popularity of this paradigm we at Telerik decided to educate about Hybrid App Development to college students. We conducted 8 hrs. Regress training session for 13 students on 2nd March 2013 in our India office.

image

To select students we asked them two simple questions,

  1. Where is head office of Telerik ?
  2. Why we should select you for the workshop ?

There were more than 80 students who shown interest in attending workshop. We chosen 13 out of them. Event started at 11 am . Workshop was scheduled till 6 pm but seeing high energy and enthuse of students , we extended workshop by 2 hrs more. Workshop got over at 8pm.

Students learnt mainly on following topics and created two hybrid apps titled “Twitter Search “ and “Indian States”

  • Icenium IDE
  • Kendo UI Mobile
  • Difference between Native Apps and Hybrid Apps
  • Design guidelines for Hybrid App

image

Day started with keynote session by Telerik Country manger Abhishek Kant. He did set up dais for the day . Students got charged and motivated for day long coding after interaction with him.

image

As day progressed students learnt about various aspect of Hybrid App development paradigm. They created app using Icenium and Kendo UI Mobile.

All 13 students created these two Hybrid Apps

  1. Twitter Search Application
  2. Indian State App

In order to create these two apps students learnt about ,

  • Working with Kendo UI data source
  • Working with Kendo UI Mobile ListView
  • Working with Kendo UI Template
  • Understanding Icenium IDE
  • Building and packaging app using Icenium
  • Certificate management in Icenium
  • Creating APK package using Icenium.

It was a learning day for young students with lot of fun. There was visible happiness on each face when they installed APK package on their Android devices. They were on blue sky seeing app created by them running on their devices.

image

For us it was great day intercating and tecahing young students on latest of the mobile app development paradigm. We are excited for more of these types of events.

View Photos from Workshop here

Download Icenium from here

How to fetch data of selected item in KendoUI Mobile ListView

In this post we will take a look on how to read data value of selected item in KendoUI Mobile ListView. Let us say you have a ListView as given in following image,

image

As you see that there is button in each ListView item and on click of the button you need to fetch the selected phone number to make a call.

Above ListView can be created as following,


<div data-role="view" id="policestationview">

<ul data-role="listview"
id="policestationlistview"
data-style="inset"
selectable="true"
data-source="somedata"
data-template="sometemplate"
data-click="somefunction">
</ul>

</div>

In above view

  • Data source is set to somedata
  • Data Template is set to sometemplate
  • Most importantly data-click is set to a JavaScript function

Now in function you can fetch selected item on click event of ListView as following,

image

In above code snippet phonenumber and name is properties of the array set as the data source of the listview. For your reference datasource is as following. You can see that name and phonenumber are properties of the array used to create datasource.


var dataarray = [

{ name: "Darya Ganj", phonenumber: " 01123274683", group: "CENTRAL" },
{ name: "Kamla Mkt", phonenumber: "01123233743", group: "CENTRAL" },
{ name: "I.P. Estate", phonenumber: "01123318474", group: "WEST" }

];

var somedatasource = new kendo.data.DataSource.create(
{
data: dataarray,
group: "group"
});

</script>

In this way you can fetch data of slecetd itm of KendoUI Mobile ListView. I hope you find this post useful. Thanks for reading.

Toggle Button Icon and Handler in Kendo UI

While working on an application I come across a requirement to toggle the button in application layout. On clicking of the button, its icon and handler should be toggled with another icon and function. In this post we will learn how to achieve this.

Problem statement

To understand the problem better let us consider following application. You can see that detail of a particular session is displayed in the view. In header there is an Add button. When user click on the Add button, this particular session should get added to Favorite Session List and Add button should get changed to Trash button. Essentially we need to toggle the button with different icon and function attached the click event.

image

Solution

We can toggle from Add to Trash as following

clip_image002

In above code

  • saveButton is id of the button.
  • fsaveDataLocally is name of the function to add Session in Favorite Session List.
  • fremoveDataLocally is name of the function to remove Session from Favorite Session List.

You can bind and unbind handler from your application as per your business requirement.

We can toggle from Trash to Add as following

image

In this way you can toggle icon on Kendo Button and can toggle handler in the run time. I hope this post is useful. Thanks for reading.