UI for ASP.NET AJAX

Resources for webinar “Integrate Video and Photos in your ASP.NET applications with ease”

On Jul 12 2014, we conducted a webinar titled “Integrate Video and Photos in your ASP.NET applications with ease”. This is part of the monthly webinars we have been doing here in Telerik India. This blog post is a recap of that webinar.


RadImageGallery & RadMediaPlayer:

As the name goes, RadImageGallery can be used to create Image Gallery in your apps with minimal coding. Similarly, RadMediaPlayer can be used to create a YouTube like Media Player with minimal coding. Both of these controls are part of our “UI for ASP.NET AJAX” suite. If you are not familiar with our “UI for ASP.NET AJAX” suite of controls, head over to our product overview page here.
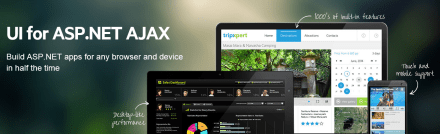
UI for ASP.NET AJAX

UI for ASP.NET AJAX

You can know more about RadImageGallery here and about RadMediaPlayer here.

Slidedeck:

Here is the slide deck that was used in the webinar:

Video Recording:

We record all our webinars and the videos are available for on demand viewing. So here is the video recording of this webinar:

Q & A:

Q: Is the library of these controls free to download or require any license?
A: A trial of 30 days is available. This is a paid product from Telerik

Q: Does it take Images from online services/providers like Flicker/OneDrive and stream here in control?
A: Both of these controls provide a feature of binding data from the client side. So you can get the data as JSON on page load and bind it to the control client side.

Q: Can we have this Image Gallery in MVC?
A: No. This is a ASP.NET AJAX control. Cannot be used in MVC.

Q: does RadImageGallery provides paging?
A: Yes. RadImageGallery supports the paging

Q: Can we specify how many thumbnails to show/ or customize thumbnail settings?
A: RadImageGallery provides a thumbnails settings where we can set Width, Height, Thumbnail Width, Thumbnail Height and Thumbnail spacing.

Q: How to get and integrate these controls to Visual studio?
A: Download the controls from http://www.telerik.com/products/aspnet-ajax.aspx. Run the Installer and that will integrate the controls in the control toolbox. Go ahead from there.

Q: Can we incrase the size of the preview display and keep the thumbnails in different dimensions?
A: Yes. RadImageGallery provide Image Area Settings and Thumbnails Area Settings.

Q: Can we give the source dynamically to the rad media player?
A: Yes. The data can be bound to RadMediaPlayer through code also.

Q: Does it require any media player to be installed at client side like Silverlight/Adobe media player?
A: No. RadMediaPlayer uses the build-in HTML5 <video> and <audio> element functionality to bring powerful media capabilities to your apps without the necessity of installing additional plug-ins. It provides a quick and easy to setup way to deliver rich media web experience for websites, blogs, online TV channels, e-commerce pages, etc. For older browsers which don’t support HTML5 natively, Internet Explorer 8 and 7 in particular, the player provides a Flash fallback method to play the video or audio file by rendering a Flash object.

Q: Does the image gallery support mobile platforms? How does it perform?
A: Yes it does. It is fully responsive. Details here: http://www.telerik.com/help/aspnet-ajax/image-gallery-mobile-support.html

Q: Does this control work on IE 6?
A: We have just announced that we would be dropping support for IE6 going forward. http://blogs.telerik.com/blogs/14-06-11/ie6-is-not-supported-by-telerik-ui-for-asp.net-ajax-as-of-june-2014

T-Shirt Giveaway:

In our webinars, we usually give away 2 t-shirts to 2 lucky attendees. We randomly pick from the webinar attendees and they get our .NET Ninja T-Shirt. In this webinar, the winners are:

  • Ashish Bhat
  • Surya Vinukonda

Don’t worry if you didn’t win the t-shirt. Try your luck in our next webinar.

Till next time – Happy Coding.

NetweaverGateway

Mobilizing your SAP Data with Kendo UI Mobile – Get the Environment Ready – Part 1

Over the last couple of years that I have been evangelizing for Telerik, I have met a lot of customers and in particular enterprise customers. Most of the big enterprises have SAP deployed in their organization. This gives them the flexibility of having point to point information with respect to their projects or revenue or even an employee. In short SAP is one of the widely used system in enterprises. But it comes with its own environment and applications. The number one question from enterprise customers for us has always been “how does your offering work with SAP?” A fair question especially when it comes to engaging with a third party vendor. This question was more of a high priority question when it came to Mobile teams in the enterprises. How soon can you go to market with an application and expose the SAP data.

The questions from the enterprises led me to write this 2 part series on how to mobilize your SAP data. This blog post is the first in this series and below is how I have planned out the 3 part series blog post:

  • Mobilizing Your SAP Data with Kendo UI Mobile – Get the Environment Ready – Part 1
  • Mobilizing Your SAP Data – Mobile App Development – Part 2

If you are as excited as I am, then be with me in this journey of 2 blog posts. So let’s get started.

What is SAP ERP?

According to the dictionary of the web i.e. Wikipedia, SAP ERP is defined as follows:

SAP ERP is an Enterprise Resource Planning software which provides an integrated solution that incorporates key business functions of an organization.

I will not be delving too much in to SAP as a software as that is not the intention of the blog post. Now that we know what is SAP let’s see how to expose data from SAP so that applications outside of SAP can consume them.

SAP Netweaver Gateway:

In order for the SAP data to be exposed to outside world you use a technology called SAP Netweaver Gateway to develop REST based ODATA services. According to SAP, Netweaver Gateway is defined as:

Technology that provides a simple way to connect devices, environments and platforms to SAP software based on market standards.

SAP Netweaver Gateway offers connectivity to SAP applications using any programming language and you do not need to have SAP knowledge. SAP Netweaver Gateway leverages the REST Services and OData/ATOM protocols for data exchange.

NetweaverGateway

SAP Netweaver Gateway System

Again I won’t be getting into too much details as to how you do this. SAP Community Network (SCN) has tutorials on how to do this.

SAP Netweaver Gateway Demo System:

If you are eager to try a SAP Netweaver Gateway Service, well we are in luck. SAP had released a set of Demo System for public usage. You can read more about the demo services here: http://scn.sap.com/docs/DOC-31221?rid=/webcontent/uuid/1051f6d9-e87a-2e10-d188-e2786c7878b1#section6. Following are the demo systems available for consumption:

  • Flight Example
  • Bank Example
  • Sales Order Example
  • GWDEMO/EPM Example
  • New EPM Sample

To get access to the demo system, you will need to follow the instructions provided here: http://scn.sap.com/docs/DOC-40986

Sales Order Example:

For the sake of this exercise, I will be using the Sales Order Example service. This service is based on the common scenario of Sales Order. This service exposes Sales Orders which contain header and line item data from the SAP backend ERP system. The service document can be found at the following URL: https://sapes1.sapdevcenter.com/sap/opu/odata/sap/ZCD204_EPM_DEMO_SRV. The Metadata of the service can be found at: https://sapes1.sapdevcenter.com/sap/opu/odata/sap/ZCD204_EPM_DEMO_SRV/$metadata. The Sales Order service exposes four collections mainly. They are:

  1. SalesOrders
    All the Sales Orders can be read using this collection
  2. SalesOrderItems
    Items of a Sales Order can be read from this collection
  3. Products
    Collection of products which can be purchased
  4. BusinessPartners
    Collection of Partners with whom the company does transaction

Setting Up Reverse Proxy:

Services exposed by SAP Netweaver Gateway Demo system are all protected and need credentials to access them. In the previous section we talked about getting access to the demo system. During that process you would have used a username and password. You need the same credentials to authenticate against the demo system when querying for data.

In order for us to perform full CRUD on the demo system we will need to setup a reverse proxy in order to overcome the Same Origin policy restriction. A reverse proxy should be used for sending client HTTP requests designated to its domain to the correct server. Reverse proxy can be achieved in 2 ways. They are:

  1. We can use IIS URL rewrite to create the reverse proxy. Here is an article on IIS rewrite: http://www.iis.net/learn/extensions/url-rewrite-module/reverse-proxy-with-url-rewrite-v2-and-application-request-routing.
  2. We can also create a simple reverse proxy using ASP.NET Web API.

Reverse Proxy using ASP.NET Web API:

A simple reverse proxy can be easily created using ASP.NET Web API. Idea is to create a Web API and pass the SAP URI we need query data as a query string parameter. The Web API will read the query string value and use that as a URI to connect to the SAP Service. Response from SAP Service will be relayed back to the client as JSON. Following code snippet shows the Web API Controller and in particular the Get action method:

public class ProxyController : ApiController
{
        string username = "<username>";
        string password = "<password>";
        // GET: api/Proxy
        public async Task<JsonResult<string>> Get(string url)
        {
            var sapUri = new Uri(url);
            using (var client = new HttpClient())
            {
                var base64String = GetBase64String(username, password);
                client.DefaultRequestHeaders.Add("Accept", "application/json");
                client.DefaultRequestHeaders.Add("Authorization", "Basic " + base64String);
                var response = await client.GetAsync(sapUri);
                HttpContext.Current.Response.StatusCode = (int)response.StatusCode;
                return Json(await response.Content.ReadAsStringAsync());
            }
        }
}

Instead of querying the SAP service directly from the mobile application, we will querying the proxy we just created above and pass the SAP service URL as a query string. Here is the usage:

http://<proxy server>:<port>/api/proxy?url=https://sapes1.sapdevcenter.com/sap/opu/odata/sap/ZCD204_EPM_DEMO_SRV/BusinessPartners

Notice that we pass an Authorization header when making a request. SAP Services expect an authorization header and we pass the username:password string converted to base 64 and pass it as a request header. I have showed the example of a Read or Get. But on the similar grounds you can create the Create/Update/Delete actions also.

Summary:

With this blog post we start a journey to read data from SAP and use that data in a mobile application. As a first step we learnt that SAP data can be exposed to outside world using the SAP Netweaver Gateway system. We looked at various the demo services and picked the Sales Order system as a candidate to build the mobile app. In next post we will create a mobile application using Kendo UI Mobile framework and Telerik App Builder.

How to Verify Dynamic Links pointing to Live URLs in an Application – MSN

Recently I was browsing MSN India when I encountered a dead link by clicking on a story. How embarrassing!

That set me thinking that there should be a way to automate checking the URLs that are displayed on this content aggregation portal. I think the same is true for all portals that rely on external content for their functionality.

Below, I propose a mechanism to automate testing of such requirement. Some peculiarities of this web portal:

  1. The news article displayed is changed frequently (maybe every few hours)
  2. Alongwith the news article text, the URL of the article will change
  3. We need to verify that the URL is a live URL

We will be using Telerik Test Studio v 2014.1 to do this test. We can start by creating a new project in Telerik Test Studio:

Click on OK.

Right Click on the project name and create a new test of type Web Test. Call this Sports_Section_MainStory_Verification Test.

Double Click on this test to start recording this test. You should be in the “Test” section of the Ribbon. Click on Record button located at the top.


Select the browser you want to record the test in (I am using Internet Explorer):

This will launch a new IE window with automation enabled (notice the small toolbar on the top of the screen). Now type in the MSN URL: http://www.msn.com and press enter.

Click on “Enable/Disable Hover Highlighting” icon on the Test Studio toolbar. Hover over the Sport Section Main Story Headline (shown in the screenshot below):

Clicking on the blue bubble exposes the “Element Menu” from where you should select “Add to Project Elements”:

Name the element appropriately and click on Add Element:

Now close the browser. We will be working with this element in coded steps. The first step is to correct the identification logic of this element. Go back to Test Studio and highlight the element in the “Element Explorer” of Test Studio:

Right Click and select “Edit Element”. Click on “Find in Live Version” -> New Browser -> Browse and Navigate”:

This will open a new automated window in a browser. We are interested in the “Find Element” window:

Notice the suggestions pane in the left of the screen. We are going to be using HtmlPath this time. Click on HTMLPath to add it to the right section of the screen. By clicking on the one logic present in the right section, you will be able to delete the same. The screen should now look like:

Click on Save to return to the Test Studio. Now add a coded step in Test Studio using the Add menu -> Script Step:

We are going to use C# to author our scripts. Please select C# in the next window. In the bottom pane of Test Studio, you will be able to write your script. A single line of code will do:

SetExtractedValue(“MainSportsLink”, Pages.MSNIndiaNewsCricket.Sports_Section_Main_Headline.HRef);


Next we will need to add Reference to System.Net namespace. To do that go to Project menu ribbon and click on settings:

Click on Add Reference and select the System.Net.dll located here: C:\Program Files (x86)\Reference Assemblies\Microsoft\Framework\v3.5

Then Click on Open, followed by OK in the Project Settings Window. Next, click on the below shown icon to view the entire code behind file in the “Code Viewer” section.

Scroll to the top of the code file, and add:

using System.Net;

Next add a new coded step and copy the following code there:

string urlloc = (string)GetExtractedValue(“MainSportsLink”);

System.Net.HttpWebRequest browurl = (System.Net.HttpWebRequest) WebRequest.Create(urlloc);

using (WebResponse response = browurl.GetResponse())

{

Assert.AreEqual<string>(“OK”, ((HttpWebResponse)response).StatusDescription);

}

Save the test and Run the test by using the Start button. The test would pass!

Congratulations, you have now automated verification of dynamic content with its associated URL using Test Studio. One can similarly author different tests for each section of the webpage and accordingly verify of the links are active.

If you want to take the next step, think about data driving the find expression of each of the elements. Interesting??

How to create Custom Theme for Kendo UI DataViz

Kendo UI DataViz is our Data Visualization package as part of the Kendo UI Framework. Kendo UI DataViz is HTML5 compliant and generates SVG (Scalable Vector Graphics) on HTMl5 supported browsers and falls back to VML (Vector Markup Language) on browsers that don’t support HTML5. VML is supported by pretty much all browser versions. If you are keen to know more about Kendo UI DataViz, head over to our DataViz demos online: http://demos.telerik.com/kendo-ui/area-charts/index

This blog post will walk you through how to create a custom theme for DataViz charts. Out of the box we ship the following 11 themes:

Default
image

Blue Opal
image

Bootstrap
image

Silver
image

Uniform
image

Metro
image

Black
image

Metro Black
image

High Contrast
image

Moonlight
image

Flat
image

I don’t know about you guys but I say those are pretty good themes for me. But we do understand that not all the times you will go with the default themes we ship. You may want to customize it to your organizational or even project color combination. So we will see how we can do the customization in the coming section.

Kendo UI Themebuilder:

The tool which will help you to customize Kendo UI themes is known as “Kendo UI ThemeBuilder”. It lets you modify themes so that they match the look and feel of our DataViz widgets to that of your site or app. It is an online tool and no we don’t charge you to use it. You can look at the ThemeBuilder tool here: http://demos.telerik.com/kendo-ui/themebuilder/

Steps to Customize DataViz Widgets:

  1. Navigate to ThemeBuilder tool online.
  2. To start customization, you are required to first select one of the default themes. This is like a foundation to start the customization. So select any default theme first.
    image 
  3. Next start the ThemeBuilder tool by clicking on the button named “Kendo UI ThemeBuilder”. This will launch the ThemeBuilder GUI tool and will appear on the right hand side of the page. Give it a couple seconds to load the GUI.
    image
  4. Since we want to customize the DataViz widgets, select the button labeled “DataViz” in the ThemeBuilder GUI tool. This will provide us with a UI which will help us to customize different aspects of the DataViz widgets.
    image 
  5. Things that can be customized on the DataViz Widgets are: Title, Legend, Charting Area, Axes, Tooltip, Series Colors and Gauge
  6. Scroll Down the page to see the DataViz widgets. Then change the appropriate widget property to your custom value. For e.g. I have changed the chart area color to a custom value and as soon as I do it – I get a instant update of how the widget will look like. Here is a snapshot of my changes:
    image
    Like this you can set your custom colors for all the customization points available for the widget.
  7. Once you are done with your changes, click on the “Get JSON” button available on top of the GUI tool. This will spit out a JSON structure of the changes you just did.
    image 
  8. The JSON code will look like below:
    image
    Notice that by default the custom code is named as “newTheme”. You can change that and provide your own custom name. Remember the name as this is the name you will use to set a theme on a DataViz widget. All we are doing is – we register this new theme with the DataViz ui and later when we set theme property of DataViz widgets to this custom theme name, Kendo UI will be able to apply your color schemes to the widgets.
  9. Copy the JSON code and add that into a new JavaScript file. Give JS file a meaningful name and include it in any page where you need the custom theme.

Using Custom Theme:

In the previous section, we saw how to create a custom theme. In order to use the custom theme, all you need to do is to set the “theme” property on DataViz widgets to the new custom theme name you have provided during registration. Here is a code snippet of setting the theme on a DataViz widget:

$("#area-chart").kendoChart({

        theme:"LohithTheme",

            transitions: false,

            title: {

                text: "Internet Users"

            },

            legend: {

                position: "bottom"

            },

            seriesDefaults: {

                type: "area"

            },

            series: [

                {

                    name: "United States",

                    data: [67.96, 68.93, 75, 74, 78]

                }, {

                    name: "World",

                    data: [15.7, 16.7, 20, 23.5, 26.6]

                }

            ],

            valueAxis: {

                labels: {

                    format: "{0}%"

                }

            },

            categoryAxis: {

                categories: [2005, 2006, 2007, 2008, 2009]

            },

            tooltip: {

                visible: true,

                format: "{0}%"

            }

        });

I have named my theme as “LohithTheme” and use that name while creating a chart.

I have put up a full fledged demo with a custom theme here: http://trykendoui.telerik.com/@kashyapa/icAJ. This is our new shiny playground for Keno UI called “Kenod UI Dojo”. In the code section you can review the JS code and when you click on Run button output will be shown on the right hand side. Here is snapshot of my custom theme in action:

image

And that’s as easy as it can get to customize a DataViz theme.

Hope this blog post helps you if you have a similar scenario of customizing our DataViz widgets. Do let us know your feedback on this blog post through the comments.

Till next time – Happy Coding.