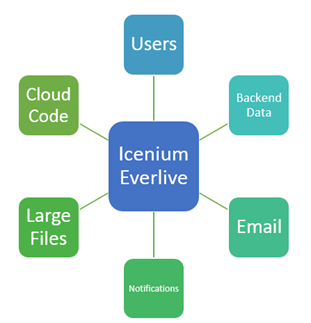
Learn more about Telerik Everlive here
You can consider this post as second post of the series. In first post of this series we learnt about fetching data from Telerik Everlive in a .Net application.
How to fetch data from Telerik Everlive in a .NET Application
In previous post we touched upon following,
- Creating client side representation of Everlive content type
- Adding required assembly to work with Everlive in a .Net application
- Fetching data from Everlive in .Net application.
To create an item also we need client side representation of Everlive content type. You can create a single item as following,
static async void CreateData(EverliveApp productApp)
 {
 var productToInsert = new Products
 {
 ProductName = "sugar",
 IsContinued = true ,
 Quantity = 100,
 UnitInStock = 23,
 UnitPrice = 20 ,

 };

await productApp.WorkWith().Data<Products>().Create(productToInsert).ExecuteAsync();
 Console.WriteLine("Product Inserted " + productToInsert.Id);
 }
In above code,
- We are creating item to be inserted. This item is instance of client side representation (class) of Everlive content type. In this case we are creating object of Products. This will pass as parameter to Create function.
- Asynchronously we are inserting an item by calling Create function. This function takes instance of Products as parameter. This instance will get inserted as an item to Telerik Eeverlive
So these simple steps you need to follow to insert an item from .Net application to Telerik Everlive content type.
Next you can update an item by first fetching it on basis of id or any other column. Once data is fetched at the client application , you can update that and using Update() function save data back to Everlive server.
static async void UpdateData(EverliveApp productApp)
 {

var productToUpdate = await productApp.WorkWith().Data<Products>().GetById("76a49eb0-67ad-11e3-8374-496a59d093be").ExecuteAsync();
 productToUpdate.ProductName = "Sugar and Salt";
 productToUpdate.IsContinued = true;
 await productApp.WorkWith().Data<Products>().Update(productToUpdate).ExecuteAsync();

}
In above code,
- We are fetching an item to update
- Updating required columns
- Using Update function saving data back to Everlive
These simple steps are required to update an item from .Net application.
Deleting an item is simplest. You need to pass id of item to delete that. If you want you can delete an item on other projection as well. In further posts we will discuss about that. To keep it simple we can delete an item on basis of id as below,
static async void DeleteData(EverliveApp productApp)
 {

var idtoDelete = "76a49eb0-67ad-11e3-8374-496a59d093be";
 await productApp.WorkWith().Data<Products>().Delete(idtoDelete).ExecuteAsync();

}
These simple steps are required to perform CRUD operation from .Net application on Telerik Everlive data. I hope you find this post useful. Thanks for reading.


![clip_image001[6]](https://telerikhelper.net/wp-content/uploads/2013/11/clip_image0016.png "clip_image001[6]")

![clip_image001[8]](https://telerikhelper.net/wp-content/uploads/2013/11/clip_image0018.png "clip_image001[8]")