Learn more about Kendo UI here
In this video you will learn, how to get started with Kendo UI ASP.NET MVC wrapper.

Learn more about Kendo UI here
In this video you will learn, how to get started with Kendo UI ASP.NET MVC wrapper.
In this video we will learn to move Tests between Test Projects in Test Studio
Learn more about Test Studio here
Learn more about Rad Controls for Windows 8 here
Read content of this video in following blog
Three Steps to work with RadDataGrid in XAML based Windows Store Application
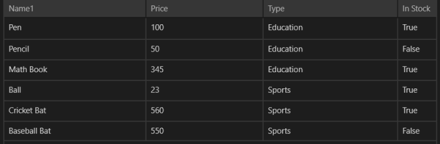
Today in the ASP.NET world, MVC is the talk of the town. Every enterprise and every developer is looking to adopt it at some time. Even the architecture guidance from Telerik recommends ASP.NET MVC liberally.
While MVC does have its benefits, it still is not as close to the ease of development that ASP.NET Web Forms provides. The default controls with ASP.NET MVC in Visual Studio are very limited. Telerik fills this productivity gap by providing the toolset that adds many powerful HTML Helpers that aid in faster development. Kendo UI Complete for ASP.NET MVC is the toolset that has the server wrappers that you can use in your ASP.NET MVC project.
In the video below, we explore quickly getting started with Kendo UI for ASP.NET MVC in your project.
We look forward to hearing your experiences using the HTML Helpers from Kendo UI for ASP.NET MVC.
Add References
    Test Application
<script type="text/javascript" src="http://code.jquery.com/jquery-1.7.1.min.js"></script>
                <!-- Kendo UI Scripts --><script type="text/javascript" src="http://cdn.kendostatic.com/2012.1.515/js/kendo.all.min.js"></script>
<script type="text/javascript" src="http://cdn.kendostatic.com/2012.1.515/js/kendo.mobile.min.js"></script>
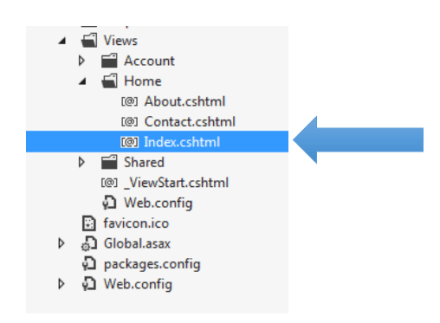
Create View
</pre>
<div id="loginview" data-role="view">

<h1>This is Login View</h1>
</div>
<pre>

</pre>
<div id="detailview" data-role="view">

<h1>This is Detail View</h1>
</div>
<pre>

</pre>
<div id="settingview" data-role="view">

<h1>This is Setting View</h1>
</div>
<pre>
Initialize KendoUI
<script type="text/javascript">// <![CDATA[
        var app = new kendo.mobile.Application($(document.body),
            {
                initial: "loginview",
                layout: "defualtlayout"

            }
            );

// ]]></script>
Create Layout
</pre>
<div data-role="layout" data-id="defualtlayout">
<div data-role="header">
<div data-role="navbar"><a data-role="backbutton" data-align="left">
 Back
 </a>
 Test Application</div>
</div>
<div data-role="footer">
<div data-role="tabstrip"><a href="#loginview" data-icon="home">login</a>
 <a href="#detailview" data-icon="details">detail</a>
 <a href="#settingview" data-icon="settings">setting</a></div>
</div>
</div>
<pre>
Finally Full source code of Video is as following
    Test Application
<script type="text/javascript" src="http://code.jquery.com/jquery-1.7.1.min.js"></script>
                <!-- Kendo UI Scripts --><script type="text/javascript" src="http://cdn.kendostatic.com/2012.1.515/js/kendo.all.min.js"></script>
<script type="text/javascript" src="http://cdn.kendostatic.com/2012.1.515/js/kendo.mobile.min.js"></script></pre>
<div data-role="layout" data-id="defualtlayout">
<div data-role="header">
<div data-role="navbar"><a data-role="backbutton" data-align="left"> Back </a> Test Application</div>
</div>
<div data-role="footer">
<div data-role="tabstrip"><a href="#loginview" data-icon="home">login</a> <a href="#detailview" data-icon="details">detail</a> <a href="#settingview" data-icon="settings">setting</a></div>
</div>
</div>
<pre>

</pre>
<div id="loginview" data-role="view">
<h1>This is Login View</h1>
</div>
<pre>

</pre>
<div id="detailview" data-role="view">
<h1>This is Detail View</h1>
</div>
<pre>

</pre>
<div id="settingview" data-role="view">
<h1>This is Setting View</h1>
</div>
<pre>
<script>
        var app = new kendo.mobile.Application($(document.body),
            {
                initial: "loginview",
                layout: "defualtlayout"

            }
            );
</script>
Follow @debug_mode


