If you know jQuery, and want to include data-viz elements in your web page without all the hassle, you are at the right place. I am going to give you a gist of how Kendo works with jQuery to create robust data-viz elements.
We will build a ratings pie chart, step by step. Final product is shown below.
1. Download
First things first. You need to download Kendo UI. There are several paid versions, and a free (trial) version. Trial is more than enough for trying it out.
Download Kendo UI for a trial period from here. You will have to sign up to download it.
2. Transport
Extract the downloaded ZIP archive to an easily accessible location. We are going to need it’s js and css folders.
3. Kickstart
Kickstart the project by creating a new folder, say kendo-pie. Copy the downloaded js and css folders in kendo-pie.
Now, create a new HTML file in kendo-pie, say index.html. This is our main webpage. The pie chart will reside here.
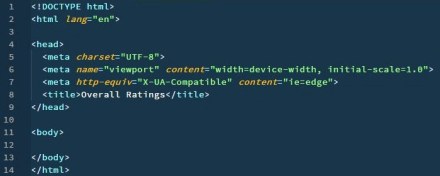
4. The HTML
Open index.html with your favourite text editor. Add some starter code.
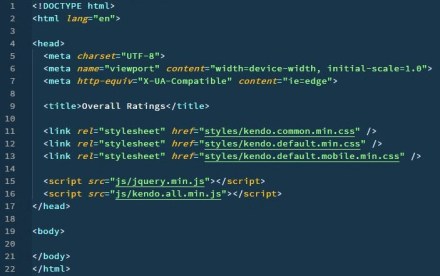
Give it a title, say Overall Ratings. Link all the necessary js and css files, inside head.
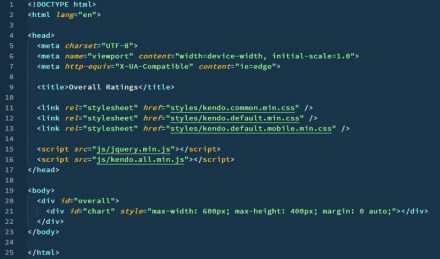
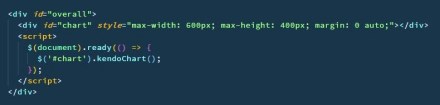
Time to populate the body. Create a wrapper (div), with id overall. The actual chart element and it’s script will reside in this wrapper. Create the chart div inside the wrapper, with id chart. Give it some style with a style attribute.
The above goes inside body, and the whole thing up-to this point looks something like this:
5. The jQuery
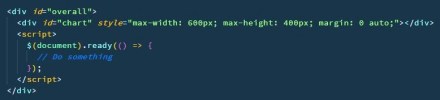
Create a script element inside the wrapper, and add some starter jQuery code.
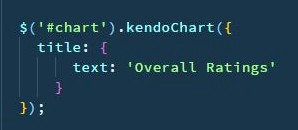
Inside the document-ready function, select the chart element with jQuery’s id selector, and apply kendoChart() method.
6. The Kendo
kendoChart() takes a configuration object as an argument. This configuration object is used to describe the chart and include data (local or remote) to be represented.
Let’s contsruct the configuration object:
Add title property.
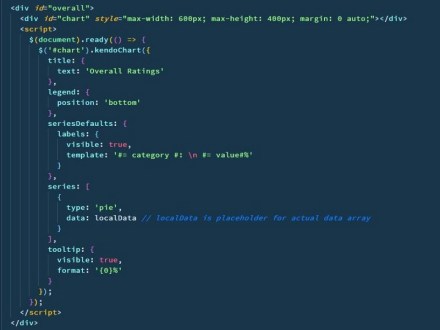
2. Add legend property.
3. Add some defaults.
4. Add series properties: type of chart and local data.
5. Add tooltip property.
kendoChart() method is ready. So is the script. Coding part is complete. Wrapper should look like this.
These were the basic steps to create a pie chart using jQuery and Kendo, mostly Kendo. Now, open index.html in browser, and you should see output as below.
I hope the above steps were helpful in giving you a basic idea about Kendo UI. It’s up to you now to tweak the chart however you want, or create a new element altogether. There are loads available. Docs are available here, and demos here.
Note: This post is authored by Mr. Abhay Kumar, interning with GTM Catalyst (distributor of Telerik controls in India).
Node.js is an exciting technology that has been widely adopted. For those starting out, one of the key requirements is the ability to connect node.js with an enterprise RDBMS such as MS SQL Server.
In this post, we will guide you through the process of connecting your Node.js app with SQL Server successfully, and hopefully, without any errors, doubts or confusions.
Let’s get started!
1. Download
Before getting started on the mission, we need a couple of things:
SQL Server Management Studio (SSMS) 17.8* from here.
I am assuming you have Node.js installed on your PC.
*Version number might differ.
2. Install
Installation is easy. Double-click the SQL Server installer downloaded earlier, named something like SQLServer2017-SSEI-Expr*.
*Again, version number might differ.
Click Basic, then click Accept, and finally click Install.
After successful installation, you are greeted with a final screen containing information like Instance Name, SQL Administrators, Features Installed, Version, and also locations of various things including helpful Resources.
A row of four buttons is present at the bottom, containing: Connect Now, Customize, Install SSMS, and Close.
Close is pretty obvious, and we don’t need to touch Customize.
a. Connect Now
An instance of SQL Server starts running in the background automatically after successful installation (until you stop it manually).
The Connect Now button is a way to connect to that instance without any login. You can execute T-SQL statements right in the terminal.
Press the button, a new SQLCMD terminal window will open up. Terminal is all yours. T-SQL away!
b. Install SSMS
The Install SSMS button will take you to the same download page mentioned in Download above.
If you didn’t download SSMS earlier, now is the time. And then, just install it. Simple install, no worries.
3. Configure
OK! It’s time for some configurations:
Enable TCP/IP to allow remote connections, and
Enable default login or create a new one.
The default login in SQL Server is sa, stands for System Administrator (aka, sysadmin). It is disabled by default (I don’t know why). You need to enable it, or create a new sysadmin login for yourself.
1. Enable TCP/IP to Allow Remote Connections
Search in Start Menu for SQL Server Configuration Manager. Open it.
You can see that SQL Server (SQLEXPRESS) service is running, and it’s Start Mode is Automatic. Like I said earlier.
If you observe the left pane, you are in SQL Server Services section. Expand SQL Server Network Configuration, and click on Protocols for SQLEXPRESS. You can see TCP/IP is disabled by default. Right-click and Enable it.
Now, we need to set the default TCP port, which for SQL Server is 1433. Double-click on TCP/IP. Click on IP Addresses tab. Scroll down to the bottom to reach IPAII section. Clear TCP Dynamic Ports field and leave it empty. Set TCP Port to 1433. Click OK.
Restart SQL Server (SQLEXPRESS) service, and you are done with first configuration. Onto next one!
2. Enable Default Login or Create a New One
Search in Start Menu for SQL Server Management Studio. Open it.
You are greeted with a dialog box to connect to the server. You have to connect via Windows Authentication because you don’t have a sysadmin login right now to connect via SQL Server Authentication. Exactly the point of this configuration. Click Connect.
On the left, there is an Object Explorer pane. Here you can manage your server: creating and deleting logins, creating and deleting databases, and loads of other admin things, so to say.
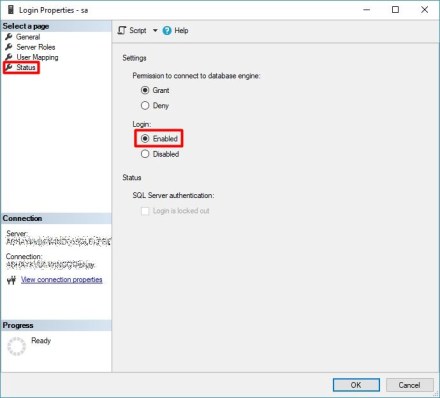
Let’s enable the sa login. Expand Security. Expand Logins. You can see a little red cross on sa’s icon. This shows that the login is disabled.
Double-click sa. In the left pane, click Status. Select Enabled under Login in Settings. Click General in the left pane, change password, and click OK. Bam! You have a sysadmin login now.
You can try re-connecting to the server with this newly enabled login, or the one you create. Click File > Disconnect Object Explorer to disconnect. Click File > Connect Object Explorer…, this time, selecting SQL Server Authentication in the Authentication drop-down menu. Enter sa as Login, and the password you chose earlier as Password.
If you want to create a new login:
Connect to server, if not already.
Expand Security in the left pane.
Right-click Logins.
Select New Login…
Enter Login name.
Select SQL Server authentication.
Enter and re-enter Password.
Click Server Roles in the left pane.
Select sysadmin.
Click OK.
You have successfully configured your SQL Server.
Errors
Nobody wants errors. But sometimes, they are inevitable. You may encounter one of the two errors when you are trying to connect your Node.js app with SQL Server:
ESOCKET: TCP/IP is disabled. Perform first configuration to get rid of this error.
ELOGIN: Unable to login. Perform second configuration to get rid of this error.
4. Connect
Let’s create the simplest Node.js app, and connect it to SQL Server.
Create a new folder, say node-sql. Execute npm init in this folder to create package.json.
We need a Node.js driver for SQL Server. tedious is one such driver. Execute:
npm install tedious --save
Create a new index.js file (which will be the main entry point for our app) in node-sql. Open index.js with your favourite text editor.