
In this post we will take a look on working with RadNumericBox. If first time you are working with RadControls in JavaScript based Windows 8 Application, I recommend you to read this post .
To work with RadNumericBox simply set data-win-control property of a div or span as Telerik.UI.RadNumericBox

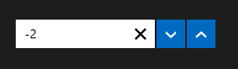
You will get RadNumericBox configured with default values as following,
You can work with RadNumericBox from JavaScript as well.

Here agebox is id of span.

You can set different options for RadNumericBox. Some of those options are as following,
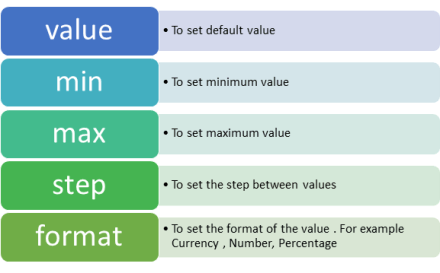
Options can be set as following,

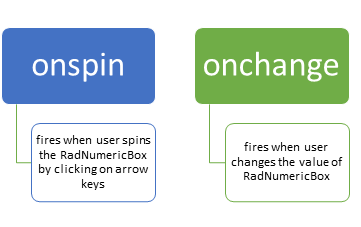
Now when you run the application, you should get RadNumericBox configured with default value 40, minimum value 0, maximum value 255 and step as 10. While working with RadNumericBox there are two important events,
In code behind you can attach event to RadNumericBox as following,

You can work with spin event as following

And showmessage function is written as below,

For your reference code is given below,
Default.html
<!DOCTYPE html>
<html>
<head>
<meta charset="utf-8" />
<title>javascriptAutoComplete</title>
<!-- WinJS references -->
<link href="//Microsoft.WinJS.1.0/css/ui-dark.css" rel="stylesheet" />
<script src="//Microsoft.WinJS.1.0/js/base.js"></script>
<script src="//Microsoft.WinJS.1.0/js/ui.js"></script>
<!--Telerik references -->
<script src="///Telerik.UI/js/jquery.js"></script>
<script src="/Telerik.UI/js/ui.js"></script>
<link href="/Telerik.UI/css/dark.css" rel="stylesheet" />
<link href="/Telerik.UI/css/common.css" rel="stylesheet" />
<!-- javascriptAutoComplete references -->
<link href="/css/default.css" rel="stylesheet" />
<script src="/js/default.js"></script>
</head>
<body>
<h1>Numeric Box Demo</h1>
<div id="agebox"
data-win-control="Telerik.UI.RadNumericBox"
data-win-options="{value: 40,
min: 0,
max: 255,
step: 10,
decimals: 2,
format: 'n0',
}">
</div>
<br />
<span id="output" >
</span>
</body>
</html>
Default.js
if (args.detail.kind === activation.ActivationKind.launch) {
 if (args.detail.previousExecutionState !== activation.ApplicationExecutionState.terminated) {
 // TODO: This application has been newly launched. Initialize
 // your application here.
 } else {
 // TODO: This application has been reactivated from suspension.
 // Restore application state here.
 }
 args.setPromise(WinJS.UI.processAll());
 var nbage = document.getElementById("agebox").winControl;
 nbage.addEventListener("spin", showmessage);
 nbage.addEventListener("change", function (e) {
 document.getElementById("output").innerText = "You have selected" + nbage.value;
 });
 }
 };

 function showmessage(e) {

document.getElementById("output").innerText = "You have selected" + e.target.value;
 }
I hope you find this post useful. Thanks for reading.

Pingback: Working with RadNumericBox in JavaScript Windows 8 Application