
Events are an important part of your marketing strategy. They provide a unique opportunity for potential buyers to interact with your product and service and get to know your organization. Events also give you the opportunity to align your brand with other organizations that share the same values or customer demographics.
Whether your event is a webinar, meetup, training session, user conference, tradeshow, surveys are an indispensable tool for assessing your attendee’s needs and measuring how well you are meeting them.
Event surveys can be used at all phases of your event to:
- Explore your target audiences’ needs and expectations
- Setup registration forms and collect payment
- Collect logistical information to accommodate attendees
- Engage attendees with interactive polls and quizzes and conduct mid-event evaluations on speakers and workshops
- Increase leads/sales with lead generation forms
- Measure the success of your event
- Event Goal
UseCase: Recently, Progress Xchange, our premier annual event was conducted in Mumbai and post-event, marketing team wanted to conduct a survey to evaluate the event feedback.
So how do you approach a post-event evaluation? We are going to demonstrate creation of anonymous survey and hosting the survey on portal using Rollbase, low-code, RAD and adaptive platform. You can learn more about at www.rollbase.com and feel to give it a try.
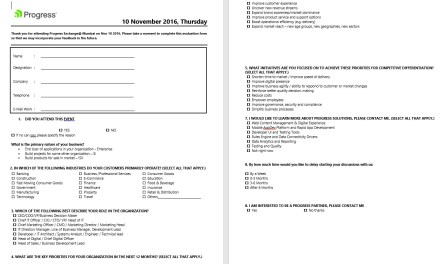
- Enclosed snapshot of survey question which needs to be created and deployed. Survey questions are combination of text, radio and check boxes.
- Now, let’s create a trial account at http://www.rollbase.com which is good for 30 days
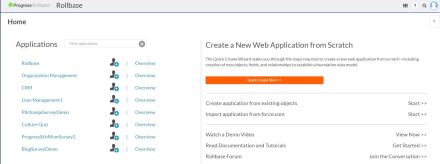
- Rollbase Application foundation is based on Objects, Fields along and relationships between them. Lets create a new app called BlogSurveyDemoApp using QuickStart option on the Home Page
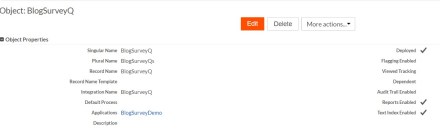
- Once the App created, we’ll create the Object – BlogSurveyQ which will contain all the questions.
- Once Application is create, we’ll create new Objects and corresponding fields which mirror the questions
 Quick Start Application

Steps
4. Once the application and object are created, let’s review App setup by choosing Overview Option in the app.
5. This Snapshot below shows Application configuration which lists Tabs, Objects and Portals.

6. We’ll need to add all the survey questions as new New fields to the current object listed below. Field type would resemble questions in the survey.
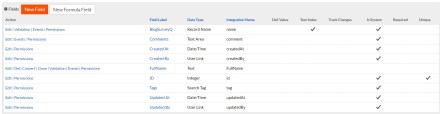
All Fields for Object BlogSurveyQ
7. choose create new field and you will be present the following options for Data types. We will create a Phone number field to demonstrate field creation
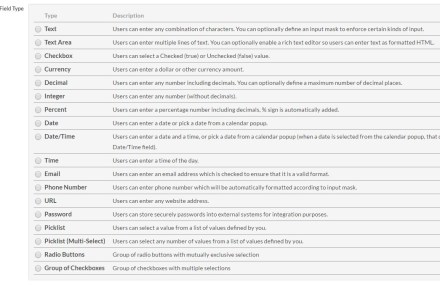
Commonly used field types
8. Choose text field and create a new field call Phone no. We could use built in Phone Option, however, validation is mapped for US phone No.
Note: Also Each field has an unique integration name that can be used to refer via API call.
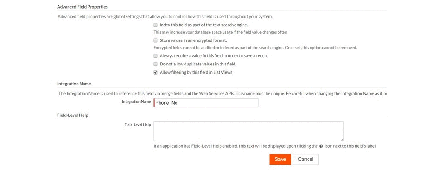
Field Properties for Phone
9. We’ll go ahead and create all the necessary field for the survey and enclosed snapshot of field and field types.
- Fields with IsSystem option enabled indicates they are part of Rollbase system
- Fields can be made mandatory.

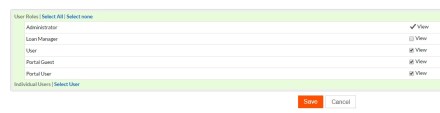
10. Let’s create Portal to encapsulate the object which inturn contains the question. Navigate to Application and create a new portal and choose the following options:
- Check IsDeployed Option which enables portal view
- Choose bootstrap design option for theme
- Select Application portal would be associated with – BlogSurveyDemo

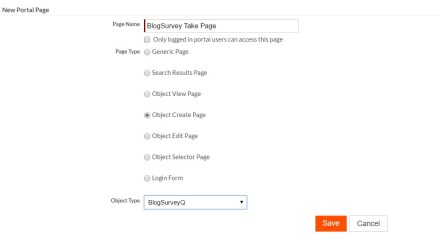
11. Select the Portal Link and navigate to Create new page (Default Portal Page). Choose Object Create Page which allows for storing data from survey form and object (fields to be mapped) as BlogSurveyQ

Portal Main Page – Default page
Survey Taker Page — Create new survey records
12. After the new page is created, Portal would contain two pages – Default and BlogSurvey (Survey Taker page). Choose Portal page and make BlogSurvey as start page for the portal


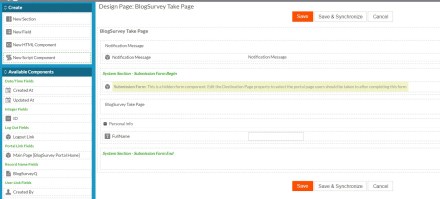
13. Edit BlogSurvey Take Page and create tow sections – Personal info and Survey Questions.
- Create Section for Heading
- Create Section for Personal information
- Drag and drop fields from the Object on the page and Save. Choose option to preview final page.
Page Builder
14. Using above steps, we have created a survey page with out any code. URL for Survey enclosed. https://www.rollbase.com/prod1/portal/portal.jsp?c=294235521&p=311266333&g=316193897
Note: Portal access does not require login and when the user submits the survey, rollbase saves the response data. In the next post, we’ll explore custom portal using KendoUI widget.
Happy Coding and Stay tuned.
