Make a Call on Icenium using PhoneGap

In this post we will take a look on making a call using PhoneGap in a Hybrid application creating using Icenium. Let us create a view like following to make a call,

image

Above view can be created using following code snippet,


<div data-role="view" id="callview" data-title="Make a Call">
<h1>Call this number!</h1>
<div id='Div1'>
<label for="txtName" style="display: inline-block;">Enter Phone Number to Call:</label>
<input type="text" id="Text1" value="" />
</div>
<div>
<a id="A1" data-role="button" data-click="callfunction" data-icon="action">Make A Call</a>
</div>
</div>

On click of Make a Call button a call can be done as following,


function callfunction() {

var phntocall = document.getElementById('txtPhoneNumber1').value;
window.location.href = "tel:" + phntocall;

}

In above code snippet we are reading phone number. After that using tel: to make a call. It will open native Call application with configured phone number to make a call.

I hope you find this post useful. Thanks for reading.

Send SMS on Icenium using PhoneGap

In this post we will take a look on sending SMS using PhoneGap in a Hybrid application creating using Icenium. Let us create a view like following to send SMS,

image

Above view can be created using following code snippet,


<div data-role="view" id="messageview" data-title="Send SMS">
<h1>Send Messages!</h1>
<div id='helloWorldInput'>
<label for="txtName" style="display: inline-block;">Enter Phone Number to send message:</label>
<input type="text" id="txtPhoneNumber1" value="" />
<input type="text" id="txtPhoneNumber2" value="" />
</div>
<div>
<a id="submitButton" data-role="button" data-click="sayMessage" data-icon="compose">Send Message</a>
</div>
</div>

On click of Send Message button a SMS can be send as following,


function sayMessage() {
var phn1 = document.getElementById('txtPhoneNumber1').value;
var phn2 = document.getElementById('txtPhoneNumber2').value;
var phonenumbers = phn1 + "," + phn2
window.location.href = "sms:" + phonenumbers + "?body=" + "hello test message";
}

In above code snippet we are reading two phone numbers and concat them with comma. After that using sms: to send the message. It will open native Message application with configured phone numbers and message body.

I hope you find this post useful. Thanks for reading.

Working with Github and Icenium

Cloud based IDE Icenium allows you to develop cross platform mobile applications. When you create a project in Icenium IDE , it saves that project in cloud and allow you to do version control. Aprat from cloud integration , Icenium allows you to push and pull your project with Github Repositiry as well.

image

To integrate project from Icenium to Github repository, first create a repository in guthib. You can create that on Github site by clicking on New Repository link button

image

To create new repository, you need to provide following information. I am symbolically providing information here to create a new repository.

image


Once repository got created, you will get a URL to work with that repository.

image

As of now you have created a repository in Github. Now let us switch to Icenium IDE. Right click on the project then select Version Control. In Version Control select the option of Configure Remote Repository

image

Next you need to provide URL of Github repository.

image

Next again right click on the project and from Version Control select the option of Pull

image

You will see that you have pulled the repository.

image  

Now to push the project to github repository right click on project and select version control then Push option

image

When you start pushing you need to authorize yourself to the repository.

image

On successful completion of the push, you will get a message at bottom of IDE as following    

image


So in this way you can integrate project from Icenium to Github repository.  I hope this post was useful. Thanks for reading.

My favorite 5 Icenium features

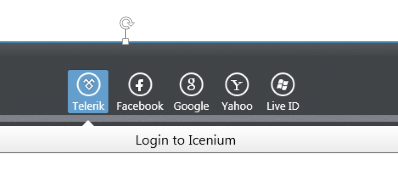
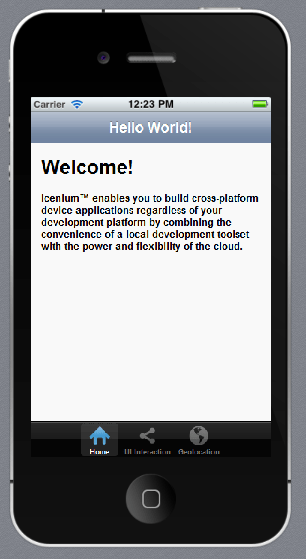
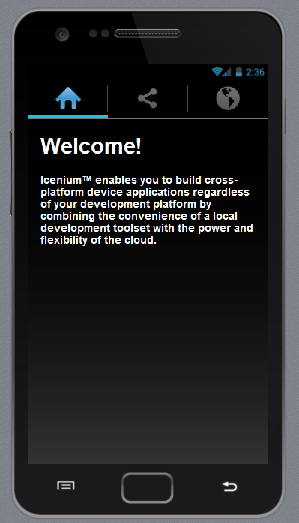
Icenium Cloud based IDE got launched and I found this “one stop solution” to create Hybrid applications or Cross-platform application very impressive. While playing around Icenium, I liked almost every features in this Cloud based IDE. However below I am listing my favorite 5 features. In further post, I will discuss more features and step by step explanation to work with them.


image


Code Editor

Being a hybrid application developer, we need to write lot of HTML, JavaScript and CSS. Code Editor in Icenium is clean and elegant editor. It allows us to write codes without much distraction.

image

Just Code is integrated with Code Editor. In Code Editor, we can perform tasks like

  1. Refactoring
  2. Navigation
  3. Code Commands

image


We can perform Code Commands like

  • Formatting of Code
  • Expand selection
  • Duplicate a text
  • Put a block comment


image


The best part is, there is short cut for all the operation. In Navigation we can perform tasks like

  • Go To File
  • Go To Member
  • Go to Symbol


image

So my one of my favorite feature in Icenium is its elegant Code Editor.


Certificate Management

If you have created any Android application then you may be knowing that you need to have a certificate to create apk file. Icenium allows us to create and mange certificate right from the IDE.


image

Icenium provides two options to create a certificate,

  • Request for a certificate
  • Create self-signed certificate


image

Creating certificate right from the IDE is one of the cool feature.

Version Control

Icenuim provides complete version control solution for application development. We can work locally and can perform following tasks in Icenium

  • Compare the changes in between local and latest versions from the server
  • Commit the changes
  • Revert the changes
  • View the history log in the repository


image


We can compare changes, navigate from one change to another as shown in the below image.


image

We can view the

  • history
  • change sets
  • Conflict etc. as shown in the following image,

image


Icenium allows us to commit or revert the changes. While committing we need to provide comment for that particular change. We can commit as shown in below image,


image

Version control is one of the cool feature I got impressed while playing with Icenium.

Integration with github Repository

Yes you read it corectly , right from the IDE you can push and pull yor project to github repository. Icenium allows us to

  • Configure the repository
  • Pull from the repository
  • Push into the repository
  • Invite the Collaborators

image

The best part is that right from the IDE we can Invite Collaboratoes . Before pushing to github we need to commit the changes to resposiory . Commit comment will be displayed next in the github respository comment


image


Code sign ,Permissions and Publish of application


Right from Icenium IDE ,we can sign the code , configure the permissions and set the icons of the application.


image


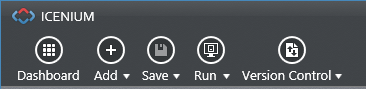
In Icenium with a right click on the project , we can publish the application.

image

I hope you like these fetaure and you are all set to play around Icenium. Thanks for reading this post and I am looking very forward to share more learning on Icenium with you in furher post.

Creating First Cross-Platform Application using Kendo UI Mobile and Icenium


Learn and explore more about Icenium here

Learn more about Kendo UI Mobile here

Yes as you see in below image that I am developing an application for IPhone on my Windows Machine and this is possible using Icenium.

Being an application developer I am very much excited with the launch of ICENIUM .Icenium is Cloud Based IDE to create Hybrid Application. If you are new to Hybrid Application then you may want to read what is a Hybrid Mobile App? And you may want to read As a Developer why should I worry about Hybrid Application Development?

Learn and explore more about Icenium here

Icenium provides you two different types of IDE.


In this post we are going to use Icenium Graphite to create our first Cross-platform application. To start with launch Icenium Graphite IDE. You will be asked to Login to Icenium. You can login using any of the following as given in the image below.

Let us choose Telerik ID to login into Icenium IDE.


After successful login you will get a Project dashboard. On project dashboard you can perform following three tasks

Create New Project
Browse existing Projects
Clone a project

In below image you can see list of existing projects. To create new project click on New.

There are three project templates as following

  • Blank
  • Using jQuery
  • Using Kendo UI Mobile

Let us go ahead and create a cross-platform device application using Kendo UI Mobile.


Give name of the project. You will notice that you are not asked to select a location to save the project. Since Icenium is a cloud IDE, it saves the project in the cloud rather than saving it locally. Click ok to create the application.

Let us go ahead and explore Project Navigator. You will find project structure as given in following image,


On opening of index.html, you will find some prior code there for reference. As you see in below image that to create Hybrid application using Kendo UI Mobile, you need minimum following references.


There are three default files you will be working on. However you are free to give any name to files.


Let us go ahead and run the default application got created by choosing Kendo project template.


There are two ways you can run the application. You can run application either

  1. On Device
  2. In Simulator

On running you get application running in iPhone simulator.


There are four simulator supported in Icenium.


If you want to run the application in Android Simulator change the Device simulator and you are done

There are many other options available in Device Simulator. We will discuss them in detail in further blog posts.


In this way you can create, test and deploy a truly cross-platform application using Kendo UI Mobile and Icenium. I hope you find this post useful. Looking forward to share more learning on Icxenium and Kendo UI Mobile with you in further blog posts.