
Are you an Angular Developer? If yes so which CSS or SCSS you are using for making your application better in User Experience?
In this post, I’ll tell you how you can use Kendo UI by Telerik to make applications that pop out to users. We will use the minimalist approach in this article by simply “enhancing” a button on the webpage.
I’ve divided this article into three steps:
- Download Kendo UI for React, Angular, jQuery.
- Create an Angular Application by Angular CLI
- Include Kendo UI to showcase the improved User Experience
So, let’s start and see what is Kendo UI and how to get it?
What is Kendo UI?
Kendo UI is an easy to use HTML 5 JavaScript framework by Telerik for building interactive and high-performance modern web applications and websites. Kendo UI comes with JavaScript files, images and style sheets and offers a library of 70+ UI widgets and features. The best part is that Kendo UI provides AngularJS and Bootstrap integration.
To get Kendo UI, browse to: https://www.telerik.com/kendo-ui and login if you have a Telerik account already or click to ‘Get a Free Trial’.
Now you need to select an option to indicate in which Application you want to use Kendo UI. I selected Angular because I’ll be creating an Angular 5 application.
Next you will need to create a telerik.com account. After the account is created, you will be shown a Getting Started document by Telerik Developers. This is a quick start guide that you can refer.

As the next step, we will create a vanilla Angular app in which we will install Kendo UI.
For Angular development, we need to have Angular CLI installed on our computer. We can check the same as follows:
- Open Command Prompt and type
"ng -v"use to check angular version.

If we do not have angular installed, the command prompt will give an error. In this case, please install Angular CLI, from the following URL: https://cli.angular.io/
Type the following command at Node command prompt or Command Prompt of windows: "npm install -g @angular/cli"
After successful installation of Angular CLI try again the last Command to check Angular Version "ng -v". I hope now you’ll get version info on command prompt.
Let’s create our first Angular App using CLI by using the following command:
"ng new my-first-project –style=scss"

Now your Angular application is successfully created. But still we don’t have Kendo UI in our app.

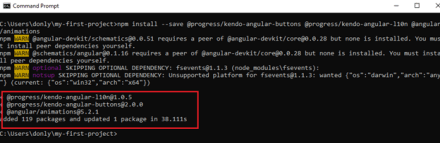
To add Kendo UI in the Angular app, use the following command:
"npm install --save @progress/kendo-angular-buttons @progress/kendo-angular-l10n @angular/animations"

Note: The Kendo UI components use Angular animations. As of the Angular 4/5 release, you have to install the @angular/animations package separately.
Now you have Kendo buttons available in your Angular application.
We need to edit our project and I’ll be using Visual Studio Code by Microsoft for the same.
Open that folder where created your Angular application “my-first-project”.
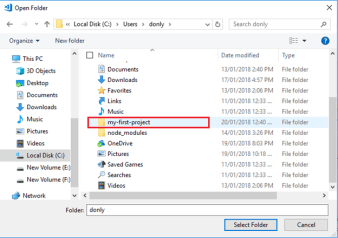
Now you can see all files and folders of your project in your Visual studio Explorer. src is that folder where your application is existing.

As we know in Angular application we have a module file “src/app/app.module.ts” so update that file with following code:
import { BrowserModule } from ‘@angular/platform-browser’;
import { NgModule } from ‘@angular/core’;
import { FormsModule } from ‘@angular/forms’;
import { HttpModule } from ‘@angular/http’;
import { AppComponent } from ‘./app.component’;
// Import the Animations module
import { BrowserAnimationsModule } from ‘@angular/platform-browser/animations’;
// Import the ButtonsModule
import { ButtonsModule } from ‘@progress/kendo-angular-buttons’;
@NgModule({
declarations: [
AppComponent
],
imports: [
BrowserModule,
FormsModule,
HttpModule,
// Register the modules
BrowserAnimationsModule,
ButtonsModule
],
providers: [],
bootstrap: [AppComponent]
})
export
class AppModule { }
Your code should look like the below:

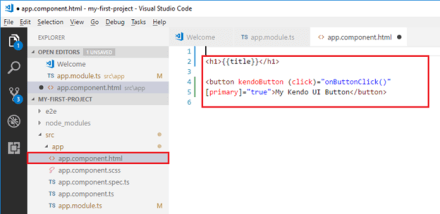
Now we will add an input button from Kendo UI. Update your view file from path ‘src/app/app.component.html’ with the following code:
{{title}}
kendoButton (click)=“onButtonClick()”
[primary]=“true”>My Kendo UI Button
The code should look like the following:
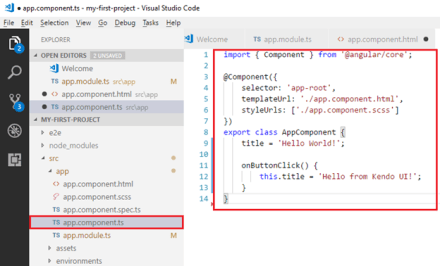
We are almost done. The last change is to include a function in your default component that can be called on button click which updates the model value.
Update your app component ‘src/app/app.component.ts ‘ as follows:
import { Component } from ‘@angular/core’;
@Component({
selector: ‘app-root’,
templateUrl: ‘./app.component.html’,
styleUrls: [‘./app.component.scss’]
})
export class AppComponent {
title = ‘Hello World!’;
onButtonClick() {
this.title = ‘Hello from Kendo UI!’;
}
}
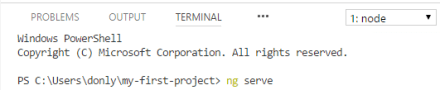
It is time to run the application. Now open terminal or Command prompt to start your application.
For built-in terminal in Visual Studio code press (ctrl + `) and run command:
'ng serve' to start web pack for angular application.
Note: The Kendo UI components use @angular-devkit/core from node modules. If you get the error as shown:
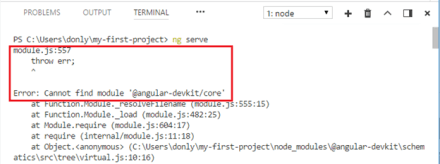
Then you have to install the @angular-devkit/core package separately by using command:
'npm I @angular-devkit/core'

After this again run 'ng serve' or 'ng serve –open' it’ll start listening our request on a default port 4200 in windows. We can change it if this port is busy by using command: 'ng serve –port <1234>' 1234 is any free port.
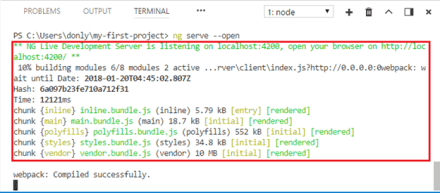
So, here is your first look of your application with a simple and plain button.
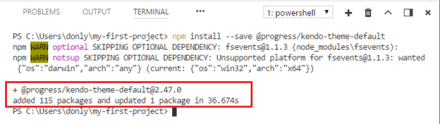
Now install Kendo Default Theme for you scss in application with command:
'npm install --save @progress/kendo-theme-default'

It will update your packages in application.
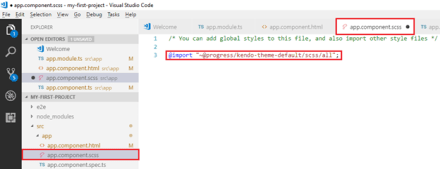
Now just update last file of this project ‘src/styles.scss’ to import the Kendo Theme:
@import “~@progress/kendo-theme-default/scss/all”;
This is how easy it is to get Kendo UI in your Angular v5 app.
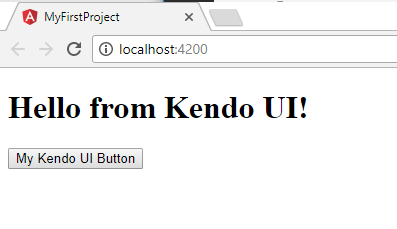
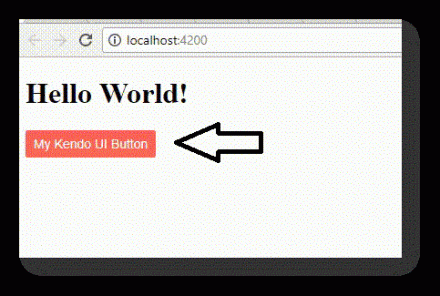
Just run your application again with same command: 'ng serve –open'

With the stylesheet in place, you should see something like this in the browser:
Hope you have enjoyed this simple tutorial on Getting Started with Angular with Kendo UI. The source code for this simple application will be available shortly.
To explore the other features of Kendo UI button, please visit: https://www.telerik.com/kendo-angular-ui/components/buttons/button/
We will be publishing more such guides. Come back for more!

Pingback: Beautiful Buttons with Kendo UI in Angular v5 app | Telerik Helper - Helping Ninja Technologists
Pingback: Tell me more: Kendo UI ButtonGroup in Angular v5 App | Telerik Helper - Helping Ninja Technologists
awesome article! I will be sure to try this
Pingback: Angular + Kendo UI: DropDown Button | Telerik Helper - Helping Ninja Technologists
This doesn’t tell me why I should care. At the end of day it’s a long, overly complicated hello world using the legacy forms method instead of reactive forms and applying some css.
Additionally, the telerik control module importation is not granular enough. There should be a module per component to support lazy loading, not a module per category of component.
And lastly, seriously, you’re squatting the entire @progress package namespace on npm? Without even a product called progress? That is equal parts arrogant and shitty. Especially considering your products are well behind alternatives from Google and even Twitter.
I’ve always kept a respectful distance and not really bad-mouthed telerik products, but you guys have stepped over the line from unassuming also-ran to aggressively self-promoting regressivism.