RadControls for Web – New controls in Q2 release

We at Telerik shipped our second release of the year which we call it as Q2 release, in June 2012. In this post we will look at what are the new controls available under RadControls for Web which includes ASP.NET AJAX, ASP.NET MVC and Silverlight.

RadControls for Web consists of the following suites:

  • RadControls for ASP.NET AJAX
  • RadControls for ASP.NET MVC
  • RadControls for Silverlight

So lets look at new controls added in Q2 release one by one.


RadControls for ASP.NET AJAX:

This suite is a complete ASP.NET AJAX development toolset. RadControls for ASP.NET AJAX contains over 70 controls and helps in rapid component based UI development. In Q2 2012 release we have added 3 new controls. They are:
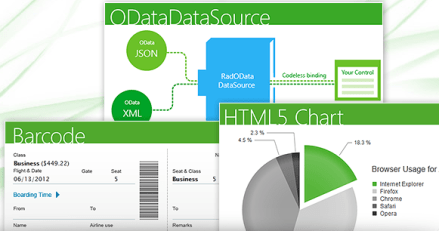
  • HTML5 Chart
  • BarCode
  • ODataDataSource

image

HTML Chart:

HTML5 Chart

HTML5 Chart control also known as RadHtmlChart provides a powerful charting mechanism. The charts are based on SVG format for modern browsers and VML for older browsers. Here are some of the salient features of HTML5 Chart control:

  • Client Side Rendering – Rendered entirely through JavaScript and hence reduces the amount of work to be done by Server. Only serialized data is sent to the client which boosts the performance of the application.
  • Control Data Loading – You have the full control over the data loading process. Load the data after page is loaded or invoke a callback via JavaScript.
  • Customize Appearance – The markup structure exposes all properties necessary to customize the appearance.

See Demos

Barcode:

Barcode control enables you to quickly and easily create industry standard barcode formats to your applications. Here again the barcode is generated in SVG format for modern browsers and VML format for older browsers.

See Demos

ODataDataSource:

ODataDataSource control enables you to codelessly bind your controls to OData Services.This control supports a Visual Studio design time wizard to query any Odata service supporting JSON and XML. So you can visualize the data even before you binding it. As said earlier this allows you to codelessly bind the odata services to controls like TreeView, Grid etc,

See Demos


RadControls for ASP.NET MVC:

With Q2 release we no longer promote the ASP.NET MVC extensions, rather we advice you to migrate to our new breed of UI framework known as Kendo UI which composes of Web, DataVisualization and Mobile contols. Kendo UI is the new platform for HTML5/JavaScript development. Kendo UI Web controls also comes with server side wrappers for ASP.NET MVC for easier development. You can know more about Kendo UI at www.kendoui.com.

In Q2 release 1 new widget was added to Kendo UI Web suite.

DateTimePicker:

As the name goes this is a UI widget which allows you to select Date as well as time within in one single widget/control. If your scenario requires for a Date and Time to be shown, this control can be used instead of two controls – one to show Date and another to show Time.

image image

See Demos


RadControls for Silverlight:

This suite is one of the industry’s leading suite of Silverlight controls for today’s Line Of Business (LOB) application development. RadControls for Silverlight helps you to create engaging and interactive user experiences for Web and Desktop. This suite contains over 65 controls which will surely cut your development time.

In Q2 release, there were 2 new controls added to the suite. They are:

  • RadHeatMap
  • RadGanttView

RadHeatMap:

Heat Map control is a matrix like control that uses color to encode values along two axes. Some of the features of this controls are:

  • Interactive tool tips – provides context aware detail on the heat map
  • Colorizers – allows you to use different colors to encode values
  • Super fast rendering – uses immediate mode bitmap based rendering and proprietary hit-testing and lay outing to render vast amount of visual detail without slowing down and sacrificing the interactivity

HeatMap

See Demos

RadGanttView:

This control as the name goes, allows you to visualize and manage hierarchical project data as a Gantt Chart. This has the capability to visualize different types of project data such as Tasks, Milestones, Summaries, and also the relations between them. You can highlight different types of important items like late or critical tasks. Another feature of the control is the ability to import data from your MS project and visualize it in a friendly way.

image

See Demos

Summary:

In this post we looked at new controls released as part of the Q2 Release under RadControls for Web suite. We looked at 3 core technologies under Web i.e. ASP.NET AJAX, ASP.NET MVC and Silverlight – and looked at the new controls available under each of those suites, Hope you are excited to try these new controls yourselves. Don’t forget that all these controls suites are available for free 30 Day trial downloads.

Webinar : Telerik Tools for Ninja Developer – Just Mock

Telerik India in a new initiative has started a series of webinars known as “Telerik tools for the Ninja Developer – The Series”. We have already completed 3 webinars as part of the series which includes Kendo UI, Just Code and Test Studio.

Continuing the series we are hosting a webinar on Aug 29 for Asia region. Here is the details of the webinar:

Title: Telerik Tools for Ninja Developer : Just Mock

Date: Aug 29 2012

Time: 3PM – 4PM IST

(Note: click on the title above to get to the registration link)

Do you avoid running your unit tests for fear they will never be complete? Do you wish for a better way? Well, look no further! With Telerik JustMock, you can make sure your code works as intended and be out of the office in time for happy hour. In this session, you will learn how to separate dependencies to make your tests run faster with JustMock Lite. You will then learn how the full edition of JustMock is used to tackle those hard-to-reach bits of code. Whether you’re new to unit testing, new to mocking, or just looking for a better way, this webinar is for you!

image

JustMock is an easy, fast, feature rich framework for creating unit tests. This complete mocking tool allows for mocking of non-virtual methods, non-public members, sealed classes and static methods and classes – all within one simple API. JustMock is the easy and fun way to test your code – anyone can mock with JustMock!

So join me as I take you through a tour of Just Mock and Unit Testing. Hope you will be there and will enjoy the ride. So what you waiting for – book a seat for yourself now. Register here.

See you at the webinar. Happy coding!

RadControls for Web – And you ask why?


Overview:

In this post, we will quickly look at the factors that will compel you to consider Telerik RadControls as the framework for all your User Interface layers in your projects. So buckle up and let’s go for a ride with Telerik RadControls.


RadControls Defined:

Rad or RAD – stands for Rapid Application Development and RadControls are nothing but controls which help you in Rapid Application Development. Telerik offers over 10 years of aggressive development which includes a set course of 3 releases per year & the Service Packs, has been able to come out with industry leading UI component suite for Microsoft ASP.NET technology which includes AJAX, MVC and Silverlight. There are nearly 175+ controls under the combined umbrella of   AJAX, MVC and Silverlight. The controls themselves, enhance the framework provided controls with a lot of out of the box features. For e.g. If you consider the RadGridView we complement the framework Grid with features such as Filtering, Grouping, Sorting, Paging and export capability. Imagine if you had the onus of writing the paging and export all by yourself. I have been a programmer for close to a decade and I would say it will be like reinventing the wheel. So, with RadControls you just have to worry about your business need and the control complements your requirement with out of the box features.

image     Telerik Extensions for ASP.NET MVC   image


RadControls Decision Factors:

Having known about RadControls and what they are, next question will be – Why should you choose RadControls? Lets quickly run through some of the check list before you decide:

  • You want to develop a professional web application.
  • You want to deliver your application fast to the Client/Market.
  • You want to build apps which adhere to certain standards like Accessibility standards.
  • You want to meet your deadlines and budgets.
  • You want to cut down your development cost and development time.
  • You want to rapidly provide custom software for ever changing needs of clients.
  • You want to quickly create working prototypes.

If you have answered Yes to the above checklist – then – RadControls is what you need. RadControls will help you to achieve all of the above mentioned points in the check list. So I highly recommend you to download a trial and test drive the following RadControls:


RadControls and Developers:

Developer friendliness is one of the important factors for any UI component vendor. Keeping the developers in mind helps Telerik adopt the highest degree of friendliness when it comes to the UI controls. There are three main factors which we think makes a developers life easy when working with our RadControls. They are:

  • Visual Studio Integration – All our suites extend Visual Studio by integrating seamlessly with the Visual Studio toolbox. This allows developers to use the controls quickly by simply dragging and dropping on the working area. Currently we have support for Visual Studio 2012 as well.


  • Design Time Wizards – When working with the controls in design time, RadControls provide wizard interfaces on all controls to easily configure the features you need.


  • Familiarity – Whole of the RadControls framework mirrors the Microsoft .NET framework. So as a developer if you understand the .NET framework, RadControls is no different. So the learning curve is very minimal and you will be able to get on with it in a jiffy.


RadControls and Themes:

One of the deciding factors we looked at earlier was that of developing a professional looking web application. What we needed to make our application look like a professional app is style sheets. Be it Web app or Silverlight app, styles play a pivotal role in the look and feel of any User Interface. Most of the developers are not designers – which includes me too :). So the RadControls suite comes to the rescue by way of packaging what we call as Themes i.e. a complete style sheet which adheres to one common color scheme across the controls. The Telerik RadControls suite comes bundled with close to 25+ themes under the combined umbrella of ASP.NET AJAX, MVC and Silverlight. So out of the box we ship 25+ themes to use in your production level application. If that is not enough you can always create your own theme and embed the same in your application. ASP.NET AJAX and MVC suites provide a Visual Theme Builder which can be used to create your custom themes. Here are the links for Visual Theme Builder:


Summary:

Telerik RadControls for Web provides a lot of benefit to enterprises in not only speeding up the development life-cycle but also cuts down on the cost and time of development. It also is developer friendly with seamless Visual Studio integration and design time wizard to help code faster. As said in the previous sections, there are nearly 175+ controls to play around in the area of AJAX, MVC and Silverlight. If that doesn’t excite you then I don’t know what will :). Download the 30 day trial we have and give it a try. I bet you will fall in love with the RadControls.

Till next time – Happy Coding !!!

4 Steps to Kendo UI


Overview:

In this post, we will look at the steps involved in working with Kendo UI. For those of you who are hearing about Kendo UI for the first time – I would recommend you head straight to www.KendoUI.com and spend couple of moments there to familiarize yourself with Kendo UI. In brief Kendo UI is

Kendo logo

A comprehensive, end-to-end framework, compatible with jQuery, and custom-built from the ground up for rock-solid reliability and lightning-fast performance. Includes MVVM support, a rich DataSource, several UI widgets, and everything you need to build rich JavaScript applications today.

It takes 4 steps to working with Kendo UI. So lets see the 4 steps in detail in the coming sections.


Step 1:

The simplest of all the steps :). This step involves downloading of Kendo UI. You can download Kendo UI from the download page at: http://www.kendoui.com/download.aspx.

Kendo UI comes in 3 flavors, namely:

  • Kendo UI Web – UI controls to be used in web applications
  • Kendo UI Data Viz – Data Visualization controls for both Web and Mobile platforms
  • Kendo UI Mobile – UI controls for Mobile platforms like iOS, Android and BlackBerry

Kendo UI comes with a free 30 day trial and I highly recommend downloading that. Rest of the sections will assume that you have downloaded kendo ui on to your hard disk.


Step 2:

Once you have downloaded the Kendo UI on to your hard drive next step is to start using it in a HTML page. First piece to get in place is the stylesheets required by the Kendo itself. These stylesheets are responsible for giving the look and feel of the UI controls or widgets as we call them. When you install the Kendo ui the styles folder contains all the required stylesheets. Kendo UI ships with  5 themes namely – Default, Black, Blue Opal. Metro and Silver.

We need to first reference the common stylesheet required by the Kendo framework. The link tag for this as follows:

<link href=”styles/kendo.common.min.css” … />

Here are the theme specific stylesheet which must be referenced while applying a particular theme:

  • Default theme:

<link href=”styles/kendo.black.min.css” … />

  • Black theme:

<link href=”styles/kendo.black.min.css” … />

  • Blue Opal theme:

<link href=”styles/kendo.blueopal.min.css” … />

  • Metro theme:

<link href=”styles/kendo.metro.min.css” … />

  • Silver theme

<link href=”styles/kendo.silver.min.css” … />

If you are using DataViz framework then you would need to refer DataViz stylesheet apart from the common stylesheet. Here is the link tag for that:

<link href=”styles/kendo.dataviz.min.css” … />

Here is the HTML code for step 2:

<!DOCTYPE html>
<html>
  <head>
    <title>Kendo UI</title>
    <!-- Kendo UI Web styles -->
    <link rel="stylesheet" href="styles/kendo.common.min.css" />
    <link rel="stylesheet" href="styles/kendo.default.min.css" />
  </head>
  <body>
  </body>
</html>

Step 3:

Once we have the stlesheet in place, next it to add the Javascripts which is required for the initialization of the UI controls/widgets themselves.

So for web applications, the first script to reference is the jquery. Then reference the kendo.web.min.js file from the js folder. Here is how the =script tag will look like:

<script src=”js/jquery.min.js” ..></script>
<script src=”js/kendo.web.min.js” ..></script>

If you are working with Data Visualization, then instead of the kendo.web.min.js you will need to refer kendo.dataviz.min.js file.

Here is the HTML code for step 3:

<!DOCTYPE html>
<html>
  <head>
    <title>Kendo UI</title>
    <!-- Kendo UI Web styles -->	
    <link rel="stylesheet" href="styles/kendo.common.min.css" />
    <link rel="stylesheet" href="styles/kendo.default.min.css" />

    <!-- Kendo UI Web scripts -->
    <script src="js/jquery.min.js"></script>
    <script src="js/kendo.web.min.js"></script>	

  </head>
  <body>
  </body>
</html>

Step 4:

This is the interesting step. With Step 2 and Step 3 we have set the stage for the most interesting part of the journey with Kendo UI. Stykesheets and scripts necessary to work with Kendo UI has been referenced. Now we see how to initialize the kendo UI controls or widgets. Kendo UI Web as nearly 19 widgets to work with. You can know more about this at http://demos.kendoui.com/web/overview/index.html.

For this exercise I will take a simple control like Calendar widget and show you how to initialize that. To start with, place a div in the HTML body and give it name, let’s say “kendo-calendar”. Next spin up a jquery statement for document ready and code the following:

<script>
  $(document).ready(function(){
    $("#kendo-calendar").kendoCalendar();
  })
</script>

well that’s all its there to working with kendo UI. What we have done is, we have grabbed the div which have placed it in the HTML body and used kendo framework to turn that into a pretty neat calendar. Here is the code for the Step 4:

<!DOCTYPE html>
<html>
  <head>
    <title>Kendo UI</title>
    <!-- Kendo UI Web styles -->	
    <link rel="stylesheet" href="styles/kendo.common.min.css" />
    <link rel="stylesheet" href="styles/kendo.default.min.css" />

    <!-- Kendo UI Web scripts -->
    <script src="js/jquery.min.js"></script>
    <script src="js/kendo.web.min.js"></script>	

  </head>
  <body>
	<div id="kendo-calendar"></div>
	<script>
		$(document).ready(function(){
			$("#kendo-calendar").kendoCalendar();
		});
	</script>
  </body>
</html>

Here is the live version of the same code that I have created in jsfiddle:

http://jsfiddle.net/kashyapa/CrEZb/


Summary:

In this post we saw how easy it is to work with Kendo UI. with simple 4 steps you are ready to take a ride with Kendo UI. Although we saw a simple example of calendar being initialized, pretty much all the widgets in Kendo UI can be initialized in the same mechanism. Hope you will do the step 1 and following along till step 4.

Till next time, Happy coding.