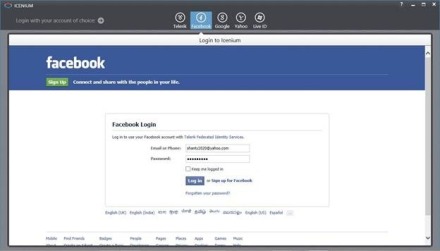
On any kind of Apps sharing on Facebook could be a frequent task. Icenium a Cloud Based IDE allows you to create Cross Platform Apps. In this blog post we will take a look on sharing status on FaceBook from a Cross Platform App being created using Icenium.
To start with let us create view. I am putting an input text box and a button. On click of button text from input box will be shared on FB wall of user.

Very first we will create helper functions we need to post To start with let us create an identity provider. Identity Provider can be created as given in following code
var IdentityProvider = function (config) {
 var that = this;
 var ref;
 this.getAccessToken = function (callback) {

// Begin Authorization
 var authorize_url = config.endpoint
 + "?response_type=" + config.response_type
 + "&client_id=" + config.client_id
 + "&redirect_uri=" + config.redirect_uri
 + "&display=" + config.display
 + "&access_type=" + config.access_type
 + "&scope=" + config.scope

//CALL IN APP BROWSER WITH THE LINK
 ref = window.open(authorize_url, '_blank', 'location=no');

ref.addEventListener('loadstart', function (event) {
 that.locationChanged(event.url, callback);
 });

ref.addEventListener('loadstop', function (event) {
 that.locationChanged(event.url, callback);
 });
 }

this.locationChanged = function (loc, callback) {
 if (loc.indexOf("access_token=") != -1) {
 ref.close();
 var token = getParameterByName("access_token", loc);
 callback(token);
 }
 }
}
We are using a function to get parameter by name. Below function is doing this task.
function getParameterByName(name, url) {
 name = name.replace(/[\[]/, "\\\[").replace(/[\]]/, "\\\]");
 var regexS = name + "=([^&#]*)";

console.log("Parameter name: " + name);
 console.log("Url: " + url);

var regex = new RegExp(regexS);
 var results = regex.exec(url);

console.log("Result: " + results);

if (results == null) {
 return false;
 }
 else
 return decodeURIComponent(results[1].replace(/\+/g, " "));
}
Once identity provider is being created, next you need to create instance of IdentityProvider. Important configuration you need to pass are as follows
- Name of the app
- In client id make sure to pass client if for your app. You will get client id while registering your app to Facebook.
- In case of Cross Platform mobile App redirect Uri will be always as given in below setting
- loginMethodName would be always loginWithFaceBook
var facebook = new IdentityProvider({
 name: "My Test App",
 loginMethodName: "loginWithFacebook",
 endpoint: "https://www.facebook.com/dialog/oauth",
 response_type: "token",
 client_id: fbClientID,
 redirect_uri: "https://www.facebook.com/connect/login_success.html",
 access_type: "online",
 scope: "email,publish_actions",
 display: "touch"
});
By this step we have created all the helper functions we need to post an update on Facebook. Now on click event of the button we will
- get Access Token from helper function
- pass that to Graph API to post on FaceBook
Below we are reading textbox value, fetching access token and calling a function to make a FB post.
function PostOnFb(e)
{
 var msgToPost = $('#msgTxt').val();
 alert(msgToPost)
 facebook.getAccessToken(function (token) {
 makefbPost(msgToPost, "http://debugmode.net", "DebugMode", token);
 });
}
We are passing
- message to post
- URL of application
- Title of the post and
- FB token to post status message
Last function we need to create to make a FB post. That function is as given below.
function makefbPost(FBmessage, FBLink, FBLinkName, fbToken) {
 var postURL = "https://graph.facebook.com/me/feed";
 var data = {};
 data.message = FBmessage;
 data.name = FBLinkName;
 data.link = FBLink;

data.access_token = fbToken;
 console.log("Token:" + fbToken);

$.post(postURL, data)
 .done(function (results) {
 navigator.notification.alert("Status Posted", function () { }, "DebugMode", "Done");

})
 .error(function (err)
 navigator.notification.alert("Error encountered. Details:" + err.message, function () { }, "Error", "Done");
 });
}
In above function important points are as follows
- We are posting data to URL https://graph.facebook.com/me/feed. We are using Facebook Graph API to post status on Facebook
- We are setting message, link, name and access token as property of data to be posted.
This is all what you need to do to post a Facebook status message from a Cross Platform Mobile Application being created using Icenium.