Download Slides and Source Codes from Rad Controls for Windows 8 Webinar

Download Webinar Resources from here

Thank you so much for attending webinar Telerik Tools for Ninja Developer: Windows 8 RadControls . I hope it was useful. If you have not done it yet then I strongly recommend you to download free trial of RadControls for Windows 8and start playing around it. You will find more resources at below given links

Product Overview

Download free tiral from here

Find Fourm here

Demo Applications

Documentation on XAML based Rad Controls for Windows 8

Documentation on HTML based Rad Controls

In webinar we started with discussion on development for Windows Store. We discussed on various aspect in choosing development option. We did a walkthrough of various RadControls for Windows8. In detail we discussed on following RadControls in HTML based Windows Store Application,

  • RadChart
  • RadAutoCompleteBox
  • RadNumericBox
  • RadDropDownList
  • RadHubTile

Download Webinar Resources from here

If you need more information and any assistance then please feel free to get connected with me at @debug_mode or send me mail on Dhananjay.kumar@telerik.com . Thanks once again for attending the webinar.

Working with RadAutoCompleteBox in JavaScript based Application for Windows Store

In this post we will take a look on working with RadAutoCompleteBox in JavaScript based Windows Store Application.

Getting Started with RadAutoCompleteBox

You can create RadAutoCompleteBox by setting data-win-control property of a div or span as Telerik.UI.RadAutoCompleteBox. See the code below,


<div id="sportsAutoComplete"
 data-win-control="Telerik.UI.RadAutoCompleteBox"
 data-win-options="{placeholder:'enter player...'}">
</div>

In above code

  • data-win-control attribute of div is set as Telerik.UI.RadAutoCompleteBox
  • In data-win-options attribute

You can set datasource of RadAutoCompleteBox in two ways. You can directly set datasource either in data-win-options attribute or in the JavaScript function. You can set datasource in code behind as following,


var sportsArray = ['Sachin Tendulkar', 'Saurabh Ganguli', 'MS Dhoni', 'Rahul Dravid', 'Kevin Pierson', 'Kalis'];
 var sportsAutoComplete = document.getElementById("sportsAutoComplete").winControl;
 sportsAutoComplete.dataSource.data = sportsArray;

In above code we are

  • Creating an array named sportsArray
  • Creating reference of RadAutoCompleteBox as winControl
  • Setting datasource of RadAutoCompleteBox with the sportsArray

At the point if you run application you should get Auto Complete Box as following,

image

Working with Template for RadAutoCompleteBox

There may be scenario when you need to set data source of RadAutoCompleteBox to array of complex objects. For example there is an array as following,

 var movieArray = [
 { title: "The Artist", picture: "images/TheArtist.jpg" },
 { title: "A Better Life", picture: "images/abetterlife.jpg" },
 { title: "Abduction", picture: "images/abduction.jpg" },
 { title: "African Cats", picture: "images/africancats.jpg" },
 { title: "Angel Crest", picture: "images/angelscrest.jpg" },
 { title: "Arthur", picture: "images/arthur.jpg" },
 { title: "Anonymous", picture: "images/anonymous.jpg" },
 { title: "A Dangerous Method", picture: "images/adangerousmethod.jpg" },
 { title: "A Good Old Fashioned Orgy ", picture: "images/agoodoldfashionedorgy.jpg" },
 { title: "A Seperation ", picture: "images/aseparation.jpg" },
 { title: "Another Earth ", picture: "images/anotherearth.jpg" },
 { title: "A Heartbeat Away ", picture: "images/aheartbeataway.jpg" },
 { title: "Bad Teacher ", picture: "images/badteacher.jpg" },
 { title: "Begineers ", picture: "images/beginners.jpg" },
 { title: "Brotherhood ", picture: "images/brotherhood.jpg" },
 { title: "Bridesmaids ", picture: "images/bridesmaids.jpg" },
 { title: "Born To Be Wild ", picture: "images/borntobewild.jpg" },
 { title: "Blackthorn ", picture: "images/blackthorn.jpg" },
 { title: "Bellflower ", picture: "images/bellflower.jpg" },
 { title: "Butter ", picture: "images/butter.jpg" },
 { title: "Bunraku ", picture: "images/bunraku.jpg" },
 { title: "Cars 2 ", picture: "images/cars2.jpg" },
 { title: "Cost Of A Soul", picture: "images/costofasoul.jpg" },
 { title: "Carnage ", picture: "images/carnage.jpg" },
 { title: "Crazy Stupid Love ", picture: "images/crazystupidlove.jpg" },
 { title: "Cracks ", picture: "images/cracks.jpg" },
 { title: "Colombiana ", picture: "images/colombiana.jpg" },
 { title: "Cedar Rapids ", picture: "images/cedarrapids.jpg" },
 { title: "Captain America ", picture: "images/captainamerica.jpg" },
 ];

You can set this array also, as data source of RadAutoComplte Box. This can be done as following,


var movieAutoComplete = document.getElementById("movieAutoComplete").winControl;
 movieAutoComplete.dataSource.data = movieArray;

On HTML RadAutoComplete with id movieAutoComplete is created as following

<div id="movieAutoComplete"
 data-win-control="Telerik.UI.RadAutoCompleteBox"
 data-win-options="{placeholder:'enter movie...',
 template:moviestemplate,
 dataTextField: 'title'}">
</div>

  • Placeholder is set as enter movie
  • dataTextField is set as title . title is one of the property in array.
  • template is set as moviestemplate. Template decides how data will be displayed in the control. Template can be created by setting data-win-control property of a div or span as WinJS.Binding.Template

We have created moviestemplate as following

<div id="moviestemplate" data-win-control="WinJS.Binding.Template">
 <div style="width: 100px;height: 100px;">
 <img src="#" style="width: 70px;height: 70px;" data-win-bind="src:picture" />
 <h4 data-win-bind="innerText:title" />
 </div>
 </div>

We are binding title of the array to h4 element and picture property of the array to image element. When you run the application, you should get RadAutoCompleteBox as following

image

Working with onSelect Event

You can read the selected item in RadAutoCompleteBox in onSelect event. You can attach select event and read the selected value as given in following,

movieAutoComplete.addEventListener("select", function (e) {
 document.getElementById("selectedmovie").src = movieAutoComplete.dataItem(e.item.index()).picture;
 });

In above code selectmovie is id of the image element. Image of the selected movie item will be displayed.

So in this way you can start using RadAutoCompleteBox in application. I hope you find this post useful. Thanks for reading.

Working with RadDropDownList in JavaScript based Windows Store Application

Read here to set up environment to use RadControls in your application.

In this post we will take a look on working with RadDropDownList in JavaScript based application for Windows 8. RadDropDownList allows you to select one item from list of items.

Getting Started with RadDropDownList

You can create a RadDropDownList by setting data-win-control property of a span or div element as Telerik.UI.RadDropDownList. You can do that as following,


<span id="sportsdropdown"
 data-win-control="Telerik.UI.RadDropDownList"
 data-win-options="{height: 250,
 dataSource:['Cricket','Soccer','Tennis']
 }"
 >
 </span>

RadDropDownList allows you to select an element from the list of elements displaying in drop down. RadDropDownList can display a local array or data returning from remote service as data. dataSource property of RadDropDown defines the data to be displayed . In above RadDropDown we have set the dataSource with inline array in the data-win-options. You can also bind dataSource of RadDropDownList from array defined in other files or JSON data returning from the remote services.

Let us say there is an array on default.js as following


var sportsArray = ['Cricket','FootBall','Hockey','Tennis','BaseBall'];

To set it as dataSource of RadDropDownList, first you need to create a Namespace. You can create that as following,

WinJS.Namespace.define("sportsdata", { sports: sportsArray }
 );

So far we have create array and namespace. Now you can set dataSource of RadDropDownList with array defined on default.js as following,

<div id="sportsdropdown"
 data-win-control="Telerik.UI.RadDropDownList"
 data-win-options="{height: 250,
 dataSource:sportsdata.sports
 }"
 >
 </div>

On running the application you should get RadDropDownList as populated with data from sportsArray as following,

image

Working with Remote Data

Above we used local data as dataSource of RadDropDownList. We can bind data from remote data source as well. For example if we want to display movies title from Netflix we can do that following below steps ,

  • Make a call to Netflix Odata serveice
  • Parse the resturned JSON
  • Construct array from parsed JSON data
  • Set array as datasource of RadDropDownList

WinJS.xhr({
 url: "http://odata.netflix.com/Catalog/Titles" + "?$format=json&$select=ShortName,BoxArt&$top=300"
 }).then(function (xhr) {
 var movies = JSON.parse(xhr.response).d;
 movies.forEach(function (i) {
 movieArray.push(i.ShortName);
 });
 var moviedropdown = document.getElementById("moviesdropdown").winControl;
 moviedropdown.dataSource.data = movieArray;
 });

In above code,

  • we are making call to Netflix OData feed using WinJS.xhr
  • Prasing returned JSON using JSON.parse
  • Iterting each element and pushing it to array
  • Taking reference of RadDropDownList using document.getElementbyID
  • Setting the datasource

And on HTML there is a div elment with id moviedropdown


<div id="moviesdropdown"
 data-win-control="Telerik.UI.RadDropDownList"
 data-win-options="{height: 250,

 }"
 >
 </div>

When you run the application you will get RadDropDownList populated with movies title from Netflix.

image

Attaching Change Event

You can attach change event to RadDropDownList and read the selected value . You can do that as following


moviedropdown.addEventListener("change", function (e) {
 document.getElementById("output").innerText = e.target.value;

});

In above code

  • Output is id of the span
  • Selected value will be displayed as text of the output span

In this way you can work with RadDropDownList in the application. In this post we learnt on getting started, working with remote data and about change event. I hope you find this post useful. Thanks for reading.

Kendo ComboBox Wrapper for ASP.NET MVC

Overview:

In this third post on Kendo UI Wrapper for ASP.NET MVC, we will look at one more wrapper named ComboBox. If you are new to Kendo UI Wrappers for ASP.NET MVC, I suggest that you go through “Jumpstarting Development with Kendo UI for ASP.NET MVC” by Abhishek Kant. This post, as the name suggests will give you a jumpstart on Kendo UI Wrappers for ASP.NET MVC. Lets go ahead and look at the ComboBox Wrapper in detail. If you are looking for the index post on this getting started series, click here.

What is The ComboBox control?

The ComboBox control displays a list of values and allows the selection of a single value from this list. Custom values may also be entered via keyboard input. If you do not wish permit keyboard input – that is, custom values are not permitted – use the DropDownList.

The ComboBox represents a richer version of a <select>element, providing support for local and remote data binding, item templates, and configurable options for controlling the list behavior.

image

Instantiating a ComboBox:

To instantiate a ComboBox on any page, we make use of the ComboBox builder available within the Kendo helper. See below the code snippet to instantiate a combobox:

   1: @(

   2:     Html.Kendo().ComboBox().Name("kcombobox")

   3: )

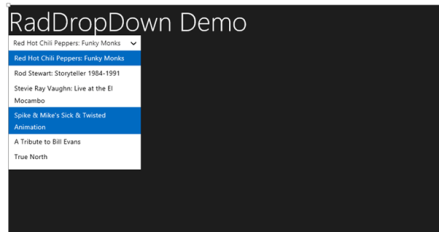
That’s it to get a combobox control on the page. Note that the Name is mandatory to be set on the wrapper. This makes the ID of the combobox when rendered on the client side. Here is the output of our code:

image

As you can see the combobox control is created on the page. But we don’t see anything happening yet because we haven’t bound any data to the control. we will see data binding option in a minute.

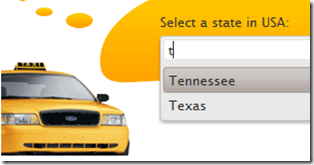
Providing a Placeholder:

ComboBox wrapper, similar to that of AutoComplete wrapper provides an option to put a placeholder text in the control when there is no value selected by the user. The placeholder will be displayed only when user has not made any choice; once he  makes a choice the placeholder text will not be shown instead the text of the selected item will be shown. We set placeholder using the Placeholder() method which accepts the string to be displayed as placeholder. Here is the code snippet:

   1: @(

   2:     Html.Kendo().ComboBox().Name("kcombobox")

   3:     .Placeholder("Select a value...")

   4: )

And here is the output of the above code:

image

Providing Data Source:

So far we have been able to get the combobo on to the page with the instantiation code. Now we will see how to provide data to the combobox. The data source can be provided in three ways and they are:

  • BindTo – using BindTo() method, any IEnumerable data can be bound
  • Items – using Items() method, define items
  • DataSource – using the DataSource() method, define action method and controller to fetch data

Using BindTo() for data binding:

BindTo() method allows you to provide data to the Combobox control right at the time of instantiating the control. BindTo() method accepts any data items which is of type IEnumerable. Lets say we have a string of text to show in the combobox, we can write the code as below:

   1: @(

   2:             Html.Kendo().ComboBox().Name("kcombobox")

   3:             .Placeholder("Select a value...")

   4:             .BindTo(new string[] {"Bulgaria",

   5:                                   "United States",

   6:                                   "India","Australia",

   7:                                   "United Kingdom"}

   8:                    )

   9:  )

As you can see, we just create a string array and bind it to the control. Here is the output of the above code:

image

Normally a combobox is used to show a lookup list where in the text inside the control is usually for the end user readability, where as the value stored in the database is usually an integer. So if your data source is a complex object and you want to show text and maintain value in the backend, you would need to set 2 extra properties for this to work correctly. They are DataTextField & DataValueField. Here is the code snippet to achieve this:

   1: @(

   2:             Html.Kendo().ComboBox().Name("kcombobox")

   3:             .HtmlAttributes(new { style = "width:250px"})

   4:             .Placeholder("Select a value...")

   5:             .DataTextField("Text")

   6:             .DataValueField("Value")

   7:             .BindTo(new List<SelectListItem>() {

   8:                           new SelectListItem() {

   9:                             Text = "Bulgaria", Value = "1"

  10:                           },

  11:                           new SelectListItem() {

  12:                             Text = "Unites States of America", Value = "2"

  13:                           },

  14:                           new SelectListItem() {

  15:                             Text = "India", Value = "3"

  16:                           },

  17:                           new SelectListItem() {

  18:                             Text = "Australia", Value = "4"

  19:                           },

  20:                           new SelectListItem() {

  21:                             Text = "United Kingdom", Value = "5"

  22:                           }

  23:                       }

  24:                  )

  25:         )

In the above code snippet we create a new list of SelectListItem, bind it to the control and let the control know which property should be used to show the text & which property should be used to store the value of the selected item. The output will have no change as compared to previous example.

Using Items() for data binding:

Items() method allows you to define the items of the combobox control at the time of instantiating the control. If you ever have a scenario where the data to be bound to the control is static but you still need the flexibility of displaying text/value pair, you can use the Items() method. Here is the code snippet to use the Items() method:

   1: @(

   2:             Html.Kendo().ComboBox().Name("kcombobox")

   3:             .HtmlAttributes(new { style = "width:250px" })

   4:             .Placeholder("Select a value...")

   5:             .DataTextField("Text")

   6:             .DataValueField("Value")

   7:             .Items(item =>

   8:                     {

   9:                         item.Add().Text("Bulgaria").Value("1");

  10:                         item.Add().Text("United States Of America").Value("2");

  11:                         item.Add().Text("India").Value("3");

  12:                         item.Add().Text("Australia").Value("4");

  13:                         item.Add().Text("United Kindom").Value("5");

  14:                     }

  15:             )

  16:         )

The output again will be the same as previous output.

Using DataSource() for data binding:

If you want to get the data for combobox from a controllers action method, you will need to use DataSource() method. This allows you to set the controller name and the action name from which the data will be retrieved at runtime by issuing an AJAX request. First lets look at the controller action method:

   1: public JsonResult GetCountries()

   2:         {

   3:             var countries = new List<SelectListItem>

   4:                             {

   5:                                 new SelectListItem{Text ="Bulgaria",

   6:                                                    Value="1"},

   7:                                 new SelectListItem{Text ="United States of America",

   8:                                                    Value="2"},

   9:                                 new SelectListItem{Text ="India",

  10:                                                    Value="3"},

  11:                                 new SelectListItem{Text ="Australia",

  12:                                                    Value="4"},

  13:                                 new SelectListItem{Text ="United Kingdom",

  14:                                                    Value="5"},

  15:                             };

  16:             return Json(countries, JsonRequestBehavior.AllowGet);

  17:         }

The action method is a standard action method and the only difference is that it is returning a JsonResult. This is because the control will issue a AJAX request on loading on the client side to fetch the data. Now here is the code snippet to instantiate the control:

   1: @(

   2:             Html.Kendo().ComboBox().Name("kcombobox")

   3:             .HtmlAttributes(new { style = "width:250px" })

   4:             .Placeholder("Select a value...")

   5:             .DataTextField("Text")

   6:             .DataValueField("Value")

   7:             .DataSource(source =>

   8:             {

   9:                 source.Read(read =>

  10:                 {

  11:                     read.Action("GetCountries", "Home");

  12:                 });

  13:             })

  14:         )

Pay attention to the DataSource() method declaration. We are providing it a configurator which knows what is the read URL to fetch the data. We are just providing the controller

& action name. The control will automatically issue a AJAX request to get the data as a JSON payload.

Serverside Filtering:

If we don’t specify any filter strategy i.e. server or client, the combobox control will use the client side filtering by default. If we have huge list then it is wise to filter the data on the server instead of sending everything to client and then filter on the client side. For the server side filtering to work, we should first set the filter type and then enable the ServerSideFiltering flag on the data source itself.  We can set the filter options with valid values equal to “StartsWith” or “Contains”. Here is the action method which depicts the server side filtering:

   1: public JsonResult GetCountries(string text)

   2:         {

   3:             var countries = new List<SelectListItem>

   4:                             {

   5:                                 new SelectListItem{Text ="Bulgaria",

   6:                                                    Value="1"},

   7:                                 new SelectListItem{Text ="United States of America",

   8:                                                    Value="2"},

   9:                                 new SelectListItem{Text ="India",

  10:                                                    Value="3"},

  11:                                 new SelectListItem{Text ="Australia",

  12:                                                    Value="4"},

  13:                                 new SelectListItem{Text ="United Kingdom",

  14:                                                    Value="5"},

  15:                             };

  16:             if (!string.IsNullOrEmpty(text))

  17:             {

  18:                 countries = (from item in countries

  19:                              where item.Text.StartsWith(text)

  20:                              select item).ToList();

  21:             }

  22:             return Json(countries, JsonRequestBehavior.AllowGet);

  23:         }

Here is the combobox definition:

   1: @(

   2:             Html.Kendo().ComboBox().Name("kcombobox")

   3:             .HtmlAttributes(new { style = "width:250px" })

   4:             .Placeholder("Select a value...")

   5:             .DataTextField("Text")

   6:             .DataValueField("Value")

   7:             .Filter(FilterType.StartsWith)

   8:             .DataSource(source =>

   9:             {

  10:                 source.Read(read =>

  11:                 {

  12:                     read.Action("GetCountries", "Home");

  13:                 }).ServerFiltering(true);

  14:             })

  15:             .Template("<span><img src='/Content/Images/${data.Value}.jpg' " +

  16:                             "width='20' height='20' />&nbsp;${data.Text}</span>")

  17:         )


Controlling the data binding:

The items of the combobox control will be queries as soon as the control is instantiated on the client side. If you do not wish to go with this behavior, the control provides a mechanism to control when to load the items. You can set the control to load the items either user types in the combobox or when he open the options list. This is possible due to a method called AutoBind(). This takes a boolean value to indicate whether to load data on instantiation or wait for the user interaction with the control. Here is the code snippet to set this behavior:

   1: @(

   2:             Html.Kendo().ComboBox().Name("kcombobox")

   3:             .HtmlAttributes(new { style = "width:250px" })

   4:             .Placeholder("Select a value...")

   5:             .DataTextField("Text")

   6:             .DataValueField("Value")

   7:             .Filter(FilterType.StartsWith)

   8:             .DataSource(source =>

   9:             {

  10:                 source.Read(read =>

  11:                 {

  12:                     read.Action("GetCountries", "Home");

  13:                 }).ServerFiltering(true);

  14:             })

  15:             .Template("<span><img src='/Content/Images/${data.Value}.jpg' " +

  16:                             "width='20' height='20' />&nbsp;${data.Text}</span>")

  17:             .AutoBind(false)

  18:         )

Custom templates for combobox item display:

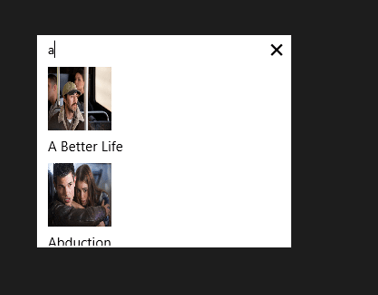
Consider a scenario where in you want to customize the combobox item display on the client side. i.e. let us say we want to show the country flag before the country name which is displayed as a text of the combobox item. Well, the control provides a way to provide our custom template which will be used for display on the client side. The Template() method accepts a HTML markup which will be used to display the item instead of the default template the control uses. You access data item using the {data.<property name>} syntax inside the custom template markup. Here is the code snippet to work with Template() method:

   1: @(

   2:             Html.Kendo().ComboBox().Name("kcombobox")

   3:             .HtmlAttributes(new { style = "width:250px" })

   4:             .Placeholder("Select a value...")

   5:             .DataTextField("Text")

   6:             .DataValueField("Value")

   7:             .DataSource(source =>

   8:             {

   9:                 source.Read(read =>

  10:                 {

  11:                     read.Action("GetCountries", "Home");

  12:                 });

  13:             })

  14:             .Template("<span><img src='/Content/Images/${data.Value}.jpg' " +

  15:                             "width='20' height='20' />&nbsp;${data.Text}</span>")

  16:         )

Notice the Template() method and the markup inside it. We use {data.Value} to access the value of the bound data item and {data.Text} to access the text of the bound data item. Using this method you can pretty much customize the UI if the comboxbox item.


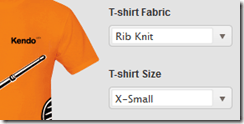
Cascading Comboboxes:

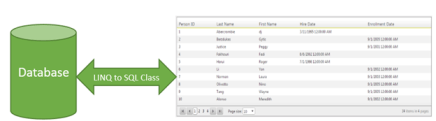
One of the typical scenarios of web is to cascade a child combobox based on the item selected in a parent combobox. for e.g. consider a categories combobox and a products combobox. We want the categories combobox to filled with items first, user should select a category and then the products belonging to that category to be shown. With Kendo Combobox this is fairly simple as it allows a method called CascadeFrom(). As the name goes we just need to pass the parent combobox based on which we need to cascade. To illustrate this, consider that we have 2 action methods named GetCategories() and GetProducts(). For getting the products we need to know the category id. So here is the code snippet for this:

   1: public JsonResult GetCascadeCategories()

   2: {

   3:     var northwind = new NorthwindDataContext();

   4:

   5:     return Json(northwind.Categories.Select(

   6:                 c => new { CategoryId = c.CategoryID,

   7:                 CategoryName = c.CategoryName }),

   8:                 JsonRequestBehavior.AllowGet);

   9: }

   1: public JsonResult GetCascadeProducts(string categories)

   2: {

   3:     var northwind = new NorthwindDataContext();

   4:     var products = northwind.Products.AsQueryable();

   5:

   6:     if (!string.IsNullOrEmpty(categories))

   7:     {

   8:         products = products.Where(p => p.CategoryID.ToString() == categories);

   9:     }

  10:

  11:     return Json(products.Select(p => new {

  12:                 ProductID = p.ProductID,

  13:                 ProductName = p.ProductName}),

  14:                 JsonRequestBehavior.AllowGet);

  15: }

Here is the combobox definition for categories:

   1: @(Html.Kendo().ComboBox()

   2:           .Name("categories")

   3:           .Placeholder("Select category...")

   4:           .DataTextField("CategoryName")

   5:           .DataValueField("CategoryId")

   6:           .DataSource(source => {

   7:                source.Read(read => {

   8:                    read.Action("GetCascadeCategories", "Home");

   9:                });

  10:           })

  11:     )

Here is the combobox definition for Products:

   1: @(Html.Kendo().ComboBox()

   2:           .Name("products")

   3:           .Placeholder("Select product...")

   4:           .DataTextField("ProductName")

   5:           .DataValueField("ProductID")

   6:           .DataSource(source => {

   7:               source.Read(read =>

   8:               {

   9:                   read.Action("GetCascadeProducts", "ComboBox")

  10:                       .Data("filterProducts");

  11:               })

  12:               .ServerFiltering(true);

  13:           })

  14:           .Enable(false)

  15:           .AutoBind(false)

  16:           .CascadeFrom("categories")

  17:     )

  18:     <script>

  19:         function filterProducts() {

  20:             return {

  21:                 categories: $("#categories").val()

  22:             };

  23:         }

  24:     </script>

Note the usage of CascadeFrom() method. We pass in the name of the categories combobox. The AutoBind() is set to false. So these two settings make sure that products combobox is not loaded when no categories is selected. When user selects a category, that’s when products combobox will issue the AJAX request for getting list of products. Since we need to know what category is selected, we make use of the additional data concept on the data source read and pass in the selected categories value. This is done using the filterProducts() javascript method.

Here is the output of the same:

imageimage

Client side access to combobox:

Using the Jquery data() method we can access the Keno Combobox from the client side. You may have a scenario where in you want to load the combobox based on a button click. Here is the code to achieve that:

   1: <script>

   2:     var kendoComboBox = null;

   3:     $(document).ready(function () {

   4:

   5:         kendoComboBox = $("#kcombobox").data("kendoComboBox");

   6:

   7:         $("#button").click(function () {

   8:             kcb.dataSource.read();

   9:         });

  10:     })

  11: </script>

First we declare a global variable which will hold the reference of the combobox. Then on page load we make use of the data() method to get access to the control. On a button click, we just access the dataSource property and issue a read() method on it.

For a complete list of client side API, have a look at this help documentation.

Summary:

In this post, we looked at how easy it is to instantiate a combobox control and set it up for data binding. We also looked at some of the features such as auto bind i.e. control when the data is bound to the control, different ways of data binding the control, cascading based on a item selection of another combobox and last but not the least how to access the combobox from the client side. Hope this gives you a jumpstart at using the Kendo Combobox Wrapper for ASP.NET MVC .

Till next time – Happy Coding!

Kendo Calendar Wrapper for ASP.NET MVC

Overview:

In this post we will learn about one more wrapper from Kendo UI library called Calendar. If you are starting new on Kendo UI, make sure to go through the blog post – Jump starting Development with Kendo UI for ASP.NET MVC. We will look at the usage of the Calendar widget and how to program the Calendar widget. If you are looking for the index post on this getting started series, click here.

To follow this blog post, just create a “C# Kendo UI for MVC Web Application” project type and work along.

What is Calendar Widget:

The Calendar Widget renders a graphical calendar that supports navigation and selection. It supports custom templates for its “month” view, configurable options for a minimum and maximum date, start view and the depth of the navigation.

image

Instantiating a Calendar:

To instantiate a Calendar widget on any page, we just make use of the Calendar builder available within the Kendo helper. Here is the code snippet to instantiate a  Calendar:

   1: @(Html.Kendo().Calendar()

   2:               .Name("kcalendar")

   3: )

Note that the “Name” is mandatory setting. This defines the ID of the control on the client side. So here is the output of the code we wrote:

image

That’s it – with just one line of code we have a Calendar on our page. Next lets see how we can control the Calendar View.

Calendar View Settings:

Be default if nothing is said about the view we need to see on the Calendar, it is going to use Month view i.e. the current month is shown in the calendar. The Calendar widget has the following view options to choose from:

  • Century – When selected, Calendar will show decades of the current century
  • Decade – When selected, Calendar will show years of the the current decade
  • Month – When selected, Calendar will show days of the current month
  • Year – When selected, Calendar will show months of the current year

The way we set the view is through a method called Start(). The different view settings are available as a CalendarView enum. Here is the code snippet to set the view of the calendar:

   1: @(Html.Kendo().Calendar()

   2:               .Name("kcalendarCentury")

   3:               .Start(CalendarView.Century)

   4:             )

Here is the output of the above code:

image

Setting Calendar Value:

So far we have been able to instantiate a calendar on the page. But if you notice clearly the current date is not highlighted by default. The current date is displayed at the footer of the calendar but the day is not highlighted. That is because, calendar has a property called Value() and to have a date highlighted this property needs to provided with a DateTime instance. It can be current day or any other day. Here is the code snippet to set the value of the calendar:

   1: @(Html.Kendo().Calendar()

   2:               .Name("kcalendarvalue")

   3:               .Value(DateTime.Today)

   4:  )

All we are doing is setting the Value of the calenda to DateTime.Today instance. Here is output of that code:
image

Setting Calendar Value:
Many a times when using calendar we will have scenarios where we need to restrict the dates that the user can select. For e.g. lets assume that we want to user to select the dates between 19 Nov and 23 Nov only. That means the minimum date that can be selected is 19 Nov and maximum date that can be selected is 23 Nov. Well to achieve this scenario, the calendar provides Min() and Max() property and both of this method accept either a string representing a date  or an instance of DateTime. Here is the code snippet for setting Min & Max property:
   1: @(Html.Kendo().Calendar()

   2:               .Name("kcalendarrestriction")

   3:               .Min("2012/11/19")

   4:               .Max("2012/11/23")

   5:  )

And here is the output of the changes we made:
image
As you can see it does not show the dates outside of the allowed Min and Max date settings.
Accessing Calendar from client side:
You may have a scenario where you want to get hold of the calendar widget from JavaScript. This can be achieved by using the jquery.data() method. Assume that we had named our calendar as “kcalendar”, here is the code snippet to access that from JavaScript:
   1: var calendar = $("#kcalendar").data("kendoCalendar");

As you can see, we just use jquery’s data() syntax to get the Kendo Calendar object. The Kendo controls all have very rich client side API that you can work with. For e.g. if we have to set the value of the calendar from client side you can use the value() method on the control. Here is the code snippet for the same:
   1: var calendar = $("#kcalendar").data("kendoCalendar");

   2: calendar.value(new Date(2012, 0, 1));

Configuring client side events:
Kendo Calendar exposes two client side events which can be hooked into while instantiating the control. The event exposed are:
  • Change – occurs when the value is changed
  • Navigate – occurs when any navigation is performed by the user i.e. month change, year change etc.
When we hook into the events exposed, we just configure the JavaScript function which will handle the event on the client side. Here is the code snippet to handle the value change event of the calendar:
   1: @(Html.Kendo().Calendar()

   2:               .Name("kcalendarevents")

   3:               .Events(evnt => evnt.Change("onValueChange"))

   4:  )

   5: <script>

   6:     function onValueChange(e)

   7:     {

   8:         var kcal = $("#kcalendarevents").data("kendoCalendar");

   9:         alert(kcal.value());

  10:     }

  11: </script>

Similarly you can handle the Navigate event also.
Summary:
Kendo Calendar is yet another wrapper available in the Kendo UI library – which lets you create a graphical calendar on a web page. We saw how simple it is to instantiate on any page. We also saw some of the properties supported by the control. We also saw how to work with the control from client side i.e. from JavaScript. Hope this provides you with a kind of quick start to work with Kendo UI Wrappers. Stay tuned for many more of these posts on Kendo UI Wrapper usage.
Till next time – Happy coding!

Kendo AutoComplete Wrapper for ASP.NET MVC

Overview:

This is the first post in the series “Getting Started Series on Kendo UI Wrappers for ASP.NET MVC”. In this post we will look at Kendo AutoComplete wrapper. If you are new to Kendo UI Wrappers for ASP.NET MVC, I suggest that you go through “Jumpstarting Development with Kendo UI for ASP.NET MVC” by Abhishek Kant . This post, as the name suggests will give you a jumpstart on Kendo UI Wrappers for ASP.NET MVC.

image

Lets go ahead and look at the AutoComplete Wrapper in detail.

What is The AutoComplete control?

The AutoComplete control provides suggestions depending on the typed text. It also allows multiple value entries. As the user types, the autocomplete control will suggest items from source that the control is bound to. The user can then select one or many items depending on the configuration. Multiple values will be separated by a delimiter.

image

Creating ASP.NET MVC Project:

If you have installed the Kendo UI Complete using the installer, you will find project templates to create a new ASP.NET MVC project with Kendo UI Wrappers. This template makes it easy to work with wrappers as it sets up all the right references to the assemblies. If you select File > New Project, select Telerik > Web from the installed template and select “C# Kendo UI for MVC Web Application” from the project template and select Ok.

SNAGHTML1af6f00

If you have the extensions but not the installer, then make sure you follow the instructions here to add the assembly’s and correct js/css references.

Instantiating Kendo AutoComplete:

Now that we have created an ASP.NET MVC project, lets see how we can use the Kendo AutoComplete control. For this post, I will be using the Razor syntax and all code will be written in Home/Index view. Now lets instantiate a Kendo AutoComplete control on the page. Here is the code snippet of how that can be done:

@(Html.Kendo().AutoComplete().Name("kautocomplete"))

As you can see we support the Fluent interface so you can chain the calls. All we have done here is to use the Kendo helper and instantiate an AutoComplete. Technically the AutoComplete() is actually a builder which knows how to spit out the Kendo AutoComplete UI js/css on the client side. One more thing that is necessary is to name the control. So we use the Name() method to provide a name to the control. With the above lines placed, we see the following output:

SNAGHTML218a5ab

Providing a Place Holder:

Placeholder is nothing but a default text that will be shown on the control when no value is selected by the user. The AutoComplete supports a PlaceHolder() method which takes a text as input. Here is a code snippet of how to use the Placeholder:

   1: @(

   2:     Html.Kendo().AutoComplete()

   3:                 .Name("kautocomplete")

   4:                 .Placeholder("Select contry...")

   5: )

The output will be as below’:

SNAGHTML2206ea5

Providing Data Source to AutoComplete control:

Now that we have the auto complete on the page lets do some data binding to the control. Currently it does nothing as it does not have a data source to work with. We can provide data in two ways.

  • Provide a data at the time of instantiating the control using the BindTo() method
  • Hooking up a controller action method which will provide data using DataSource() option.

Data binding using BindTo() method:

The signature of BindTo() method is as below:

image

The input to BindTo() method is an IEnumerable, which means you can just pass any IEnumerable data you may have during the instantiation itself and the control will be bound to that. For instance say we want to bind the auto complete control to list of country names which are held in string array. Here is the code snippet to do that:

   1: @(

   2:     Html.Kendo().AutoComplete()

   3:                 .Name("kautocomplete")

   4:                 .Placeholder("Select contry...")

   5:                 .BindTo(new string[] {"Bulgaria","USA","India","Australia","UK"})

   6: )

As you can see I have just bound a simple string array to the auto complete control and this will be the data source now. Here is the output of the above changes:

SNAGHTML22f7d64

The autocomplete control filtered the data source based on what the user has typed and presented only those items which matched the input. We will look at the filtering mechanism in a minute.

Data Binding using DataSource() option:

Another way to provide data to autocomplete control is using the DataSource() method. The DataSource method accepts a read only data source provider. We just need to configure which action method on which controller is responsible to provide the data for the control. Autocomplete will automatically issue an AJAX request to the configured action method and retrieve the data, then bind it to autocomplete. Note that the action method should return a JsonResult as autocomplete will make AJAX request to retrieve the data. Here are the code snippets to achieve this:

Controller Action Method:

   1: public JsonResult GetCountries()

   2: {

   3:     var countries = new string[] { "Bulgaria", "USA", "India", "Australia", "UK" };

   4:     return Json(countries, JsonRequestBehavior.AllowGet);

   5: }

View:

   1: @(

   2:     Html.Kendo().AutoComplete()

   3:                 .Name("kautocomplete")

   4:                 .Placeholder("Select contry...")

   5:                 .DataSource(source  => {

   6:                     source.Read(read =>

   7:                         { read.Action("GetCountries", "Home"); });

   8:                 })

   9: )

As you can see we just set the action method name & the controller name on the data source. Here is how the JSON data looks like at runtime. I have used Developer Tools inside IE to look at the payload. Just press F12 on the page, get to Network tab and start capturing the network traffic:

image

Custom Templates:

AutoComplete also has a flexibility to style the suggestion that is shown by providing your own template. For e.g. in our demo code we have written so far, we have bound the autocomplete to country names. What if we want to show the country flag before the country name when the suggestion is made. Well we can do that by providing an HTML template. We can access the data with a ${data} pattern. Here is the code snippet for providing the custom template:

   1: @(

   2:     Html.Kendo().AutoComplete()

   3:                 .Name("kautocomplete1")

   4:                 .Placeholder("Select contry...")

   5:                 .BindTo(new string[] { "Bulgaria", "USA", "India", "Australia", "UK" })

   6:                 .Template("<span><img src='/Content/Images/${data}.jpg' " +

   7:                             "width='20' height='20' />&nbsp;${data}</span>")

   8: )

Here is the output of the same:
SNAGHTML32a02fd

Filtering the results:

By default the autocomplete filters the suggestions based on a logic “Starts With” i.e. it searches for the items which starts with the user typed text. Autocomplete provides a way to control this filtering by means of Filter() method. The Filter method has 2 overloads – one accepts the string “StartsWith” & “Contains” and another accepts a enum of type FilterType. So here is the code snippet to set the filter type to be “Contains”:

   1: @(

   2:  Html.Kendo().AutoComplete()

   3:                 .Name("kautocomplete1")

   4:                 .Placeholder("Select contry...")

   5:                 .BindTo(new string[] { "Bulgaria", "USA", "India", "Australia", "UK" })

   6:                 .Template("<span><img src='/Content/Images/${data}.jpg' " +

   7:                             "width='20' height='20' />&nbsp;${data}</span>")

   8:                 .Filter(FilterType.Contains)

   9: )

I have the filter logic to be Contains. So here is the output of above code change:

SNAGHTML3371c85

Filtering data on Server:

By default the AutoComplete will do the filtering of items based on user typed text on the client side. This may work fine for small list of data. But if you have very huge list of  data items, this pattern may be a hit on performance because everything needs to be downloaded to the client side and then do the filter. If you ask if there is any better way, well answer is yes and the solution is server side filtering. Instead of filtering the data on the client side, autocomplete control provides a way to send the user typed text to server side. The server side code can then filter the data based on the text passed and return only the matching items. Lets look at the code to achieve this:

For the same of the demo, assume we have a EF context created for Northwind database and we want to list the products in an autocomplete control based on user typed text. We will have a GetProducts action method which accepts a single parameter of type string and lets call it as queryText. Here is the controller action method code snippet:

   1: public JsonResult GetProducts(string text)

   2: {

   3:     var northwind = new NorthwindDataContext();

   4:     var products = northwind.Products.Select(product =>

   5:                                     new ProductViewModel

   6:     {

   7:         ProductID = product.ProductID,

   8:         ProductName = product.ProductName,

   9:         UnitPrice = product.UnitPrice ?? 0,

  10:         UnitsInStock = product.UnitsInStock ?? 0,

  11:         UnitsOnOrder = product.UnitsOnOrder ?? 0,

  12:         Discontinued = product.Discontinued

  13:     });

  14:     if (!string.IsNullOrEmpty(text))

  15:     {

  16:         products = products.Where(p => p.ProductName.Contains(text));

  17:     }

  18:     return Json(products, JsonRequestBehavior.AllowGet);

  19: }

We first instantiate the EF context and get the products. We then check if any text has been passed and if passed, filter the products based on the text and return only the matching list.

Now we will see how to configure the autocomplete to support this. Here is the code snippet for this change:

   1: @(Html.Kendo().AutoComplete()

   2:           .Name("products")

   3:           .DataTextField("ProductName")

   4:           .Filter("contains")

   5:           .DataSource(source => {

   6:               source.Read(read =>

   7:               {

   8:                   read.Action("GetProducts", "Home")

   9:                       .Data("onAdditionalData");

  10:               })

  11:               .ServerFiltering(true);

  12:           })

  13:     )

  14:

  15: <script>

  16: function onAdditionalData()

  17: {

  18:     return {

  19:             text: $("#products").val()

  20:            };

  21: }

  22: </script>

First we have created autocomplete control with name “products”. Then for the read action we have given the action method name and the controller name. One addition to the read method is the Data() method. This in-fact is a hook to the read action of autocomplete and allows us to stick any additional data we want to pass on to the action. Take a look at the action method GetProducts, it has a parameter by name text. We are passing whatever user types as a parameter to the method and get back a filtered list. That’s all there it is to achieve a server side filtering.

Accessing AutoComplete control on the client side:

All Kendo wrappers have a very rich client side API. Using the client side API’s we can access the kendo control on the client side and access a rich set of properties, methods and events. Kendo wrappers are built on the latest and greatest HTML5 standards, so the client side code generated makes use of the new “data-“ (data dash) attributes. We can use the jquery data() method and retrieve them. Here is the code to access a autocomplete control on page load:

   1: var autocomplete = $("#kautocomplete").data("kendoAutoComplete"),

Here “kautocomplete” is the id of the control and we use the jquery data() method to retrieve the kendo control by passing the string “kendoAutoComplete”. This is pretty much a pattern we use to get access to any kendo wrapper from JavaScript.

This comes in handy for instance, when we want to refresh the auto complete on page load. As you saw in the example of data source binding, an AJAX request is issued to get the items the first time a user types in the textbox. What if you want to load the items on page load and keep the autocomplete ready for filtering. This can be done with the following code snippet:

   1: var kac = $("#kautocomplete").data("kendoAutoComplete");

   2: kac.refresh();

You can find the complete list of client side API supported by Kendo AutoComplete widget here.

Summary:

In the first of the many posts to come on Kendo Wrappers for ASP.NET MVC, in this post, we looked at AutoComplete control. We looked at the basics of the using the control and various features like Data Binding, Filtering, Custom Templates and accessing the control from the client side. Hope this excites you to take a dig at the Kendo Wrappers for ASP.NET MVC. Download the free 30 day trial and kick start your kendo adventure.

Till next time – Happy Coding.

Getting Started Series on Kendo UI Wrappers for ASP.NET MVC

Kendo UI is a flag ship product from Telerik. Kendo UI is everything you need to build super-fast HTML5 web apps. It is a JavaScript UI library and has only one dependency and that is JQuery. With Kendo UI, gone are the days of slow and server heavy web UI page creations. Using Kendo UI you can build web apps in one compact easy-to-use package which includes: UI Widgets, Data Source, Validation and MVVM Framework. As you can see Kendo UI is one package you need and nothing else to cater to your UI needs.

image

Kendo UI doesn’t just stop at being a client side UI framework. If you are one of those many who love server side programming, we do have Kendo UI Server Side Wrappers for ASP.NET MVC development. These wrappers help you produce Awesome HTML5 apps powered by Kendo UI without forcing you to write javaScript. Simply program on the server and the Kendo UI wrappers will handle the HTML and JavsScript.

Here is a example of Kendo UI JavaScript Widgets Vs Kendo UI Server Side Wrappers code:

JavaScript:

   1: <div id="calendar"></div>

   2: <script>
   1:

   2:     $(document).ready(function() {

   3:         // create Calendar from div HTML element

   4:         $("#calendar").kendoCalendar();

   5:     });

</script>

Kendo UI Wrapper for ASP.NET MVC:

   1: @(Html.Kendo().Calendar().Name("kcal"))

As you can see the wrappers makes it easy for you to write code in Razor or ASP.NET syntax and without forcing you to write JavaScript.

So with this blog post we are starting what we call “Getting Started Series on Kendo UI Wrappers for ASP.NET MVC”. Following is the list of blog post that we will be covering in next 4 weeks time. They are:

AutoComplete Wrapper NumericTextBox Wrapper
Calendar Wrapper PanelBar Wrapper
ComboBox Wrapper Slider Wrapper
DatePicker Wrapper Splitter Wrapper
DateTimePicker Wrapper TabStrip Wrapper
DropDownList Wrapper TimePicker Wrapper
Editor Wrapper TreeView Wrapper
Grid Wrapper Upload Wrapper
ListView Wrapper Window Wrapper
Menu Wrapper

As and when the post for individual wrappers are ready we will be updating the above table with the links. So if you are starting on ASP.NET MVC with Kendo UI Wrappers, you may want to book mark this post. This will become an index post for the wrappers.

Hope this series will give you a jump start on using kendo UI Wrappers in ASP.NET MVC development.

Till next – Happy Coding!

Reading NotficationTemplate controls value in RadHubTile for Windows 8

In this post we will take a look on how to read values NotificationTemplate controls in RadHubTile. Let us say, you are working with RadHubTile and you have set the NotificationTemplate as following,


<telerik:RadHubTile x:Name="rdRunsHubTiles"
 Title="Score"
 Message="India/Eng Score"
 ImageSource="/Assets/indengmatchlogo.JPG"
 BackContent="Score of India England first Test"
 Margin="93,209,0,388">
 <telerik:RadHubTile.NotificationTemplate>
 <DataTemplate>
 <StackPanel Orientation="Horizontal" >
 <TextBlock Text="{Binding Runs}" />
 <TextBlock Text="{Binding Country}" />
 </StackPanel>
 </DataTemplate>
 </telerik:RadHubTile.NotificationTemplate>
 </telerik:RadHubTile>

There are two TextBlock Controls inside the NotificationTemplate. Both TextBlock are data bind. RadHubTile DataCoontext is set as following


protected override void OnNavigatedTo(NavigationEventArgs e)
 {
 rdRunsHubTiles.DataContext = GetRun();

 }

Data GetRun()
 {
 return new Data ()
 {
 Runs = 200,
 Country = "India"
 };

 }

And Data class is defined as following,


public class Data
 {
 public int Runs { get; set; }
 public string Country { get; set; }
 }

Now when user tapd RadHubTile you need to read values of NotficationTemplate TextBlocks. To do this you need to handle tap event. Register tap event to RadHubTile as following ,


public MainPage()
 {
 this.InitializeComponent();
 rdRunsHubTiles.Tapped += rdRunsHubTiles_Tapped;

 }

Now in the Tap event we can read controls values as following,


void rdRunsHubTiles_Tapped(object sender, TappedRoutedEventArgs e)
 {

Data valueOfNotification = (sender as RadHubTile).DataContext as Data ;
 var runsettocontrol = valueOfNotification.Runs;
 var countrysettocontrol = valueOfNotification.Country;
 }

In above code we are

1. Typecasting sender as RadHubTile

2. Reading DataContext of RadHubTile as Data

3. Reading set values as property

So in this way we can read NotificationTemplate controls value. I hope you find this post useful. Thanks for reading.

Working with RadHubTile in XAML based Windows Store Application

In this post we will take a look on working with RadHubTile in XAML based Windows Store Application. RadHubTile gives you same immersive experience as you see on the home screen of Windows 8. You can display message, notification, title and message on flipping of tile using RadHubTiles. RadHubTile gives you experience like below image.

image

To start working with RadHubTile let us start with Creating Application for Windows Store. To create this choose Blank App from Windows Store project tab. After creating project you need to add reference Of Rad Control for Windows 8 in the project. To do that right click on the reference and select Add Reference. From the Reference Manager Dialog box select Rad Control for Windows8.

image

After adding reference in the project, you need to add namespace on the XAML page. You can do that as following,

image

You can create a HubTile on XAML as following ,

image

Since you have not set any propery of RadHubTile like Message , Title etc , so as output you will get a simple rectangular tile as below,

image

Some of the important properties of RadHubTiles are as following ,

image

Now let us go ahead and set properties of RadHubTiles ,

 <telerik:RadHubTile Title="Score"
 Message="India/Eng Score"
 ImageSource="/Assets/indengmatchlogo.JPG"
 Notification="100/0"
 BackContent="Score of India England first Test"
 >

 </telerik:RadHubTile>

Above we have set several properties of RadHubTiles . Now let us go ahead and run the application to see the output

image

Now let is go ahead and create template for BackContent. We crate template to show information in back of the RadHubTile as we want. Let us say , we want to display Image and Title in the back of the RadHubTile. We can do that by creating a DataTemplate and then setting that as value of BackContentTemplate. We can do that as following ,

image

You see that in above code we have created DataTemplate . There is StackPanel and one Image control along with TextBlock have put vertically in the StackPanel. When you run the application , you will get RadHubTile back content as following ,

image

For your reference full code with BackContent Template is given below,

 <telerik:RadHubTile Title="Score"
 Message="India/Eng Score"
 ImageSource="/Assets/indengmatchlogo.JPG"
 Notification="100/0"
 BackContent="Score of India England first Test"
 Margin="93,209,0,388">
 <telerik:RadHubTile.BackContentTemplate>
 <DataTemplate>
 <StackPanel Orientation="Vertical">
 <TextBlock Text="India England Test Series" />
 <Image Source="/Assets/indengmatchlogo.JPG" />
 </StackPanel>
 </DataTemplate>
 </telerik:RadHubTile.BackContentTemplate>

</telerik:RadHubTile>

As we set BackContentTemplate , we can set

  • NotificationTemplate
  • MessageTemplate

As well. Let us go ahead and create the NotificationTemplate. We will bind controls in NotificationTemplate with the data coming from the background. Let us say there is function returning Data. In this case I am hard coding the data value, however in real time scenario you will like to fetch data from a remote service.

 Data GetRun()
 {
 // Put code here to fetch data from remote service
 return new Data ()
 {
 Runs = 200,
 Country = "India"
 };

 }

Data class is defined as following,


namespace HubTilesXaml
{
 public class Data
 {
 public int Runs { get; set; }
 public string Country { get; set; }
 }
}

We need to set DataContext of RadHubTile as given below,


protected override void OnNavigatedTo(NavigationEventArgs e)
 {

rdRunsHubTiles.DataContext = GetRun();

}

Now let us go ahead and create NotificationTemplate . NotficationTemplate can be created as following.

image

We are creating a DataTemplate and setting it as value of NotificationTemplate property of RadHubTile. For your reference full code with BackContentTemplate and NotficationTemplate for RadHubTile is given below,

<telerik:RadHubTile x:Name="rdRunsHubTiles"
 Title="Score"
 Message="India/Eng Score"
 ImageSource="/Assets/indengmatchlogo.JPG"

 BackContent="Score of India England first Test"
 DataContext=""
 Margin="93,209,0,388">
 <telerik:RadHubTile.BackContentTemplate>
 <DataTemplate>
 <StackPanel Orientation="Vertical">
 <TextBlock Text="India England Test Series" />
 <Image Source="/Assets/indengmatchlogo.JPG" />
 </StackPanel>
 </DataTemplate>
 </telerik:RadHubTile.BackContentTemplate>
 <telerik:RadHubTile.NotificationTemplate>
 <DataTemplate>
 <StackPanel Orientation="Horizontal" >
 <TextBlock Text="{Binding Runs}" />
 <TextBlock Text="{Binding Country}" />
 </StackPanel>
 </DataTemplate>
 </telerik:RadHubTile.NotificationTemplate>

</telerik:RadHubTile>

At this point if you run the application you should get a RadHubTile with BackContentTemplate , NotficationTemplate , Message and Image.

image

We can get all the information from RadHubTile in code behind and can use them. For example let us say when user is tapping on the RadHubTile , we want to display the NotificationCount. We can do that as following,


void rdRunsHubTiles_Tapped(object sender, TappedRoutedEventArgs e)
 {

var runset = (sender as RadHubTile).Notification;
 }

In this way we can work with RadHubTile in Application for Windows Store. I hope you find this post useful. Thanks for reading.

Conditional Navigation between Views in Kendo UI Mobile

Recently while working with Kendo UI Mobile, I had to navigate from one view to other view inside if else condition. I had scenario, something like following

image

To achieve this, first I tried something like following,

image

In above approach, I was able to navigate to views. However after navigating views were not adhering to the layout set for the application because I was creating new instance of the Application. So certainly this approach was not a suitable solution to go ahead with.

To solve this, you need to navigate on instance which you already created while initializing the html for mobile application. You create something like this on HTML.

image

To navigate conditionally just call navigate function on app. essentially you do not need to recreate instance of application. So if we modify above solution, you do not need first line of the code. Point to be noted here is that app is the variable name we are using while initializing the application on the html.

image

In this way you can navigate to different views from JavScript in KendoUI Mobile. I hope you find this post useful. Thanks for reading.

How to find which button is selected in KendoUI Mobile ButtonGroup

In this post we will take a look on, how to find which button is selected in KendoUI Mobile ButtonGroup . Let us suppose we have a ButtonGroup like following,

image

ButtonGroup will look like following

image

In JavaScript we can find index of selected button as following.

image

buttonsearchgroupis the id of the ButtonGroup. We can check for the selected index in if condition to perform a task according to the selected button in ButtonGroup. This can be done as following,


if ( $("#buttonsearchgroup").data("kendoMobileButtonGroup").current().index() == 1)
 {
 console.log("session button selected");
 }
 else
 {
 console.log("speaker button selected");
 }

In this way you can find which button is selected in KendoUI Mobile ButtonGroup. I hope you find this post useful. Thanks for reading.

Webinar on Telerik Tools for Ninja Developer: Windows 8 RadControls

Register for the Webinar here

Date: 21st November 2012

Time: 3PM to 4PM (IST)

Launch of Windows 8 has brought enormous enthusiasm among developers along with normal users. Developers are aspired to write fascinating killer apps and want to reach maximum Windows 8 users. If you are one of those aspired developer then this webinar is for you. In this webinar we will talk and learn about Rad Controls for Windows 8. Rad Controls for Windows 8 allows you to write fascinating touch enabled Windows 8 Application which your users will love. It helps you to shorten development time, quickly take application to market and get better ranking.  There are 15+ native controls available for you to use in your application.  You can use controls natively in your application regardless you are developing in XAML or HTML.

Read more about RadControls for Windows 8 here

This will be demo oriented webinar. In webinar we will write code from scratch and learn how different Rad Controls can be used in application.

Register for the Webniar here

For any query do send a mail to Dhananjay.kumar@telerik.com . Hope to see you in the webinar.

Working with RadNumericBox in JavaScript Windows 8 Application

In this post we will take a look on working with RadNumericBox. If first time you are working with RadControls in JavaScript based Windows 8 Application, I recommend you to read this post .

To work with RadNumericBox simply set data-win-control property of a div or span as Telerik.UI.RadNumericBox


You will get RadNumericBox configured with default values as following,

You can work with RadNumericBox from JavaScript as well.


Here agebox is id of span.

You can set different options for RadNumericBox. Some of those options are as following,

Options can be set as following,

Now when you run the application, you should get RadNumericBox configured with default value 40, minimum value 0, maximum value 255 and step as 10. While working with RadNumericBox there are two important events,

In code behind you can attach event to RadNumericBox as following,

You can work with spin event as following

And showmessage function is written as below,


For your reference code is given below,

Default.html

<!DOCTYPE html>
<html>
<head>
 <meta charset="utf-8" />
 <title>javascriptAutoComplete</title>

<!-- WinJS references -->
 <link href="//Microsoft.WinJS.1.0/css/ui-dark.css" rel="stylesheet" />
 <script src="//Microsoft.WinJS.1.0/js/base.js"></script>
 <script src="//Microsoft.WinJS.1.0/js/ui.js"></script>

<!--Telerik references -->
 <script src="///Telerik.UI/js/jquery.js"></script>
 <script src="/Telerik.UI/js/ui.js"></script>
 <link href="/Telerik.UI/css/dark.css" rel="stylesheet" />
 <link href="/Telerik.UI/css/common.css" rel="stylesheet" />

<!-- javascriptAutoComplete references -->
 <link href="/css/default.css" rel="stylesheet" />
 <script src="/js/default.js"></script>
</head>
<body>
 <h1>Numeric Box Demo</h1>
 <div id="agebox"
 data-win-control="Telerik.UI.RadNumericBox"
 data-win-options="{value: 40,
 min: 0,
 max: 255,
 step: 10,
 decimals: 2,
 format: 'n0',
 }">
 </div>
 <br />
 <span id="output" >

 </span>
</body>
</html>

&nbsp;

Default.js


if (args.detail.kind === activation.ActivationKind.launch) {
 if (args.detail.previousExecutionState !== activation.ApplicationExecutionState.terminated) {
 // TODO: This application has been newly launched. Initialize
 // your application here.
 } else {
 // TODO: This application has been reactivated from suspension.
 // Restore application state here.
 }
 args.setPromise(WinJS.UI.processAll());
 var nbage = document.getElementById("agebox").winControl;
 nbage.addEventListener("spin", showmessage);
 nbage.addEventListener("change", function (e) {
 document.getElementById("output").innerText = "You have selected" + nbage.value;
 });
 }
 };

 function showmessage(e) {

document.getElementById("output").innerText = "You have selected" + e.target.value;
 }

I hope you find this post useful. Thanks for reading.

Working with LINQ to SQL Class and AJAX RadGrid

In this post we will take a look on working with RadGrid and LINQ to SQL Class. We will display data in RadGrid using LINQ to SQL Class from SQL Server database.

image

Very first let us create DataSource to be used with RadGrid. We will use LINQ to SQL class to create data model here. To create data model using LINQ to SQL class right click on the project and select Add then New Item. From Data tab, choose LINQ to SQL Classes

image

If you want you can change name of the LINQ to SQL class, however I am leaving default name and clicking on the Add button. Choose Server Explorer on the design surface to create data classes.

image

In Server Explorer right click on the Data Connection and Add Connection. In Add Connection dialog box provide database server name and choose the database to create data model. Click on Ok to add a new Data Connection in Server Explorer.

image

On successfully adding of data connection , you can see that in server explorer

image

Next drag and drop Tables, Views , Stored Procedures and Functions from Server Explorer on dbml design surface to make a part of data model. In this case , I am going ahead with only one table Person. Now you can see that Person is added on dbml file.

image

As of now we have added the data model in the project. Now let us go ahead and add a RadGrid on the page. To add RadGrid on the page drag and drop it from Toolbox on the page. If you don’t find RadControls in toolbox then right click on the General tab in tool box and select Add Tab

image

Give name of the tab . Right click on newly created tab and selecte Choose Items. Then browse to

C:\Program Files (x86)\Telerik\RadControls for ASP.NET AJAX Q1 2012 SP1\Bin40

and choose Telerik.Web.UI.dll and after selecting dll click on Ok button to add the controls in toolbox.

image

In toolbox you can see that RadControls are successfully added.

image


Next from the Telerik AJAX Data Component tab , drag and drop RadGrid on the page.

<pre><asp:Content runat="server" ID="BodyContent" ContentPlaceHolderID="MainContent">
<telerik:RadGrid ID="RadGrid1" runat="server" AllowPaging="True">

</telerik:RadGrid>
</asp:Content>


As of now we have added RadGrid on the page . Next we need to create data source from the data model and bind to the RadGrid. Below is the function returning List of Person.


private List<Person> GetStudents()
{
DataClasses1DataContext context = new DataClasses1DataContext();
return  context.Persons.ToList();
}

In function we are creating instance of DataContext class and returning list of person on that. Now we need to bind data returning from this function to RadGrid. We can do that as following


using System;
using System.Collections.Generic;
using System.Linq;
using System.Web.UI;

namespace GridSample
{
public partial class _Default : Page
{
protected void Page_Load(object sender, EventArgs e)
{
RadGrid1.AllowPaging = true;
RadGrid1.NeedDataSource += RadGrid1_NeedDataSource;


}

void RadGrid1_NeedDataSource(object sender, Telerik.Web.UI.GridNeedDataSourceEventArgs e)
{
RadGrid1.DataSource = GetStudents();
}


private List<Person> GetStudents()
{
DataClasses1DataContext context = new DataClasses1DataContext();
// return context.Persons.SortBy("FirstName").ToList();
return context.Persons.ToList();
}
}
}

Now when you press F5 to run the application , you should get data in RadGrid using LINQ to SQL class.

image

In this way you can pull data from database using LINQ to SQL class and bind to a RadGrid. I hope you find this post useful. Thanks for reading.

Rendering Report Designed in Standalone End User Report Designer

Overview:

In this post we will take a look at how a report designed in Standalone End User Report Designer, can be rendered from your applications – be it WPF, WinForms, SilverLight or ASP.NET. One of the customer I was working with had this requirement of end users to design the report and that report should be rendered within the application. The end users who design the report will have the flexibility to upload the designed report to the application. The application had to render the uploaded report in a reporting module. So we will see how to achieve this. If this requirement has excited you, then read through rest of this post.

Pre Requisites:

In order to design reports using the standalone end user report designer, you will need to first download the Telerik Reporting solution. This is available as a free 30 day trial download. Here is the download link:

in order to mimic the scenario of End User connecting to a staging DB and designing the report on their desktop – I will be making use of 2 Databases. So you will need a RDBMS product of your choice. In my example I will be using SQL Server 2012.

Creating Staging and Production DB:

For the sake of the demo, I will create 2 database and name them as StagingDB and ProductionDB respectively. The database will have only one table named Contacts. It will have 2 columns an Id and Name. Here is the code snippet for the table:

CREATE TABLE [dbo].[contacts]
(
[Id] [int] IDENTITY(1,1) NOT NULL,
[Name] [varchar](50) NOT NULL,
CONSTRAINT [PK_contacts] PRIMARY KEY CLUSTERED
(
[Id] ASC
)WITH (PAD_INDEX = OFF, STATISTICS_NORECOMPUTE = OFF, IGNORE_DUP_KEY = OFF, ALLOW_ROW_LOCKS = ON, ALLOW_PAGE_LOCKS = ON) ON [PRIMARY]
) ON [PRIMARY]
GO

So at his time, if you are following along, you should have created 2 databases – StagingDB and ProductionDB and in both the DB you should have 1 table named Contacts. In staging DB contacts table I will fill some dummy data and it looks like below:

image

Similarly in the Contacts table of production DB, I have inserted the following data:

image

We will mimic a scenario where in the end users will connect to the StagingDB->Contacts table and design the report using the Standalone Report Designer. After designing it they will upload to the application. And application will connect to production DB and render the report.

Designing the report:

when you install the Telerik Reporting suite, we will also install the Standalone report designer for end users. This is an executable which can be run on any system. It can be in a folder named Report Designer at the root of Telerik Reporting installation folder. When you launch the ReportDesigner,exe, you will see the following interface:

SNAGHTML11b7d9

Click on New Report, give a name for the report and select a path to save the report.

image

Next, we will be presented with a Report Wizard. In the “Choose Data Source” dialog, create a new data source and connect to the Staging DB we have created earlier. In order to connect to our SQL Server database, select SQL Data Source in the data source selection dialog and give it a name.

SNAGHTML16b193

In the data connection selection page, configure the connection settings to your Staging DB.

SNAGHTML183745SNAGHTML19189e

Next we configure the command i.e. the select query to fetch the report data. For this demo it’s a simple statement – “Select * from Contacts”.  Next you can preview the results of the query

SNAGHTML1aa821SNAGHTML1b276d

Click on finish to finish the connection settings configuration.

Now you will see that we have set up a data source for the report and following dialog shows the details:

SNAGHTML1cebe4

Click next to select the report type. I have select a standard report typeSNAGHTML1d87e4

Next we will configure the data layout of the report, In this example, we have only two columns in the table and I will show both the column in the body of the report.

SNAGHTML1ef7b7

Next select the report layout i.e. is the report a stepped report or outline or left aligned. I have selected Stepped report i.e. items are arranges in columns and they don’t overlap vertically.

SNAGHTML20e87b

Next you can select a report style and finish the wizard.

SNAGHTML258555

At this point we have successfully designed a report using the report designer. In order to preview the report, click the Preview button on the Home tab. The report will be executed and shown as below:

SNAGHTML2706d3

As you can see we have connected to our staging db and pulling data from the contacts table.I have named the report as DemoReport and is saved as DemoReport.trdx. The TRDX is a custom file format that Telerik Reporting uses. It stands for Telerik Reporting Definition XML. Next we will see how we can upload this file to a application and render the report inside the application.

Building a WPF client:

In order to mimic a production application, I have built the following WPF app.

SNAGHTML3c5c82

Although I have selected WPF app for this demo, it can be anything in real world – ASP.NET Web App, WinForms or SL. Here is the work flow of this app:

  • An end user uploads the .TRDX report file he designed using the Standalone Report Designer, in the app.
  • The app saves the file in the application folder.
  • App will list the uploaded report file in a list box.
  • When the report is selected in the list box, the report will be rendered in the report viewer.

For the sake of the time, I will not be describing the portion of the app which allows us to browse and select a .TRDX file, Saves the uploaded .TRDX file in one of the application folder and listing of the uploaded report in list box. Those are pretty straight forward code that you will be familiar with. We will pay our attention to how do we render the .TRDX file inside the Report Viewer in the coming sections.

TRDX Report Rendering using URI:

The report viewer has the capability to just take a URI of a .TRDX file and render it. The ReportViewer exposes a property called ReportSource. One of the supported report source is UriReportSource. As the name goes, we are supposed to create an instance of UriReportSource and set the URI to the .TRDX file. Be it a WPF app as the one we are dealing with now or a web scenario – you just need to get the complete URI of the .TRDX file. Here is the code snippet to achieve this:

var uriReportSource = new UriReportSource();
uriReportSource.Uri = "<URI of .TRDX file>";
reportViewer.ReportSource = uriReportSource;
reportViewer.RefreshReport();
view raw gistfile1.cs hosted with ❤ by GitHub

TRDX Report Rendering Using XML Source:

In previous section we saw UriReportSource as the report source for the report viewer. The report viewer also supports XML as a report source. We can pretty much give a XML literal string which confronts to Teelrik Reporting Definition XML schema and the report viewer will be able to parse and render the same. The .TRDX report file is nothing but a XML in itself. Here is the content of the DemoReport we designed in its XML form:

<?xml version="1.0" encoding="utf-8"?>
<Report DataSourceName="ReportDataSource" Width="6.45833333333333in" Name="DemoReport" xmlns="http://schemas.telerik.com/reporting/2012/2"&gt;
<DataSources>
<SqlDataSource ConnectionString="stagingdb1" SelectCommand="select * from contacts" Name="ReportDataSource" />
</DataSources>
<Items>
<PageHeaderSection Height="0.28125in" Name="pageHeader">
<Items>
<TextBox Value="DemoReport" Size="6.41666666666667in, 0.200000027815501in" Location="0.0208333333333333in, 0.0208333333333333in" Name="reportNameTextBox" StyleName="PageInfo" />
</Items>
</PageHeaderSection>
<PageFooterSection Height="0.28125in" Name="pageFooter">
<Items>
<TextBox Value="=NOW()" Size="3.19791666666667in, 0.200000027815501in" Location="0.0208333333333333in, 0.0208333333333333in" Name="currentTimeTextBox" StyleName="PageInfo" />
<TextBox Value="=PageNumber" Size="3.19791666666667in, 0.200000027815501in" Location="3.23958333333333in, 0.0208333333333333in" Name="pageInfoTextBox" StyleName="PageInfo">
<Style TextAlign="Right" />
</TextBox>
</Items>
</PageFooterSection>
<ReportHeaderSection Height="0.808234930038452in" Name="reportHeader">
<Items>
<TextBox Value="DemoReport" Size="6.45833333333333in, 0.787401596705119in" Location="0in, 0in" Name="titleTextBox" StyleName="Title" />
</Items>
</ReportHeaderSection>
<ReportFooterSection Height="0.28125in" Name="reportFooter" />
<DetailSection Height="0.28125in" Name="detail">
<Items>
<TextBox Value="=Fields.Id" CanGrow="True" Size="3.19791666666667in, 0.200000027815501in" Location="0.0208333333333333in, 0.0208333333333333in" Name="idDataTextBox" StyleName="Data" />
<TextBox Value="=Fields.Name" CanGrow="True" Size="3.19791666666667in, 0.200000027815501in" Location="3.23958333333333in, 0.0208333333333333in" Name="nameDataTextBox" StyleName="Data" />
</Items>
</DetailSection>
</Items>
<StyleSheet>
<StyleRule>
<Style Color="Black">
<Font Name="Tahoma" Size="18pt" Bold="True" Italic="False" Underline="False" Strikeout="False" />
</Style>
<Selectors>
<StyleSelector Type="ReportItemBase" StyleName="Title" />
</Selectors>
</StyleRule>
<StyleRule>
<Style Color="Black" VerticalAlign="Middle">
<Font Name="Tahoma" Size="10pt" />
</Style>
<Selectors>
<StyleSelector Type="ReportItemBase" StyleName="Caption" />
</Selectors>
</StyleRule>
<StyleRule>
<Style VerticalAlign="Middle">
<Font Name="Tahoma" Size="9pt" />
</Style>
<Selectors>
<StyleSelector Type="ReportItemBase" StyleName="Data" />
</Selectors>
</StyleRule>
<StyleRule>
<Style VerticalAlign="Middle">
<Font Name="Tahoma" Size="8pt" />
</Style>
<Selectors>
<StyleSelector Type="ReportItemBase" StyleName="PageInfo" />
</Selectors>
</StyleRule>
</StyleSheet>
<PageSettings>
<PageSettings PaperKind="Letter">
<Margins>
<MarginsU Left="1in" Right="1in" Top="1in" Bottom="1in" />
</Margins>
</PageSettings>
</PageSettings>
<Groups>
<Group Name="labelsGroup">
<GroupHeader>
<GroupHeaderSection PrintOnEveryPage="True" Height="0.28125in" Name="labelsGroupHeader">
<Items>
<TextBox Value="Id" CanGrow="True" Size="3.19791666666667in, 0.200000027815501in" Location="0.0208333333333333in, 0.0208333333333333in" Name="idCaptionTextBox" StyleName="Caption" />
<TextBox Value="Name" CanGrow="True" Size="3.19791666666667in, 0.200000027815501in" Location="3.23958333333333in, 0.0208333333333333in" Name="nameCaptionTextBox" StyleName="Caption" />
</Items>
</GroupHeaderSection>
</GroupHeader>
<GroupFooter>
<GroupFooterSection Height="0.28125in" Name="labelsGroupFooter">
<Style Visible="False" />
</GroupFooterSection>
</GroupFooter>
</Group>
</Groups>
</Report>
view raw gistfile1.xml hosted with ❤ by GitHub

Here is the code snippet to prepare the XmlReportSource and bind that to ReportViewer ReportSource.

XmlReportSource xmlReportSource = new XmlReportSource();
xmlReportSource.Xml = "<Contents of .TRDX file>";
reportViewer.ReportSource = xmlReportSource;
reportViewer.RefreshReport();
view raw gistfile1.cs hosted with ❤ by GitHub

Wait, What about the data source?

Well, if you followed the post so far, you will probably be getting this question for sure. Well remember that when we designed the report using Standalone Report Designer we did set up a data source and a connection string. But that points to our staging database. Meaning the schema of the staging db and the production db are the same but they will be two different environments when it comes to reality. You will never allow somebody to work with a production environment for design. Instead you will allow people to play around in the staging or local setup and finally deploy the code to production. So when we rendered the report using the URI Report Source or XML Report Source – the report does contain the data source object embed within the report and will use that when executing in the production. Remember that the connection string set up during design points to our staging or local setup. So when the report is rendered in the production, report viewer will search for the connection string name given during the design. It may be there or may not be there – whatever it is, this is not ideal scenario to support. So how can we overcome this. In the next section, we will see what is the solution for this.

Report Xml Serializer:

when we looked at XmlReportSource, we understood the .TRDX file is nothing but a XML content. It is nothing but the report definition. The Telerik Reporting solution comes with a ready made XmlSerializer which can read this XML definition and gives us an instance of Telerik.Reporting.Report – an object representation of the Report we designed. The Report class exposes the Data Source we set up and the Connection String on that data source. So the solution to render a .TRDX file in production environment will be as follows:

  • Read the content of the .TRDX file as XML string
  • Use ReportXmlSerializer to serialize the XML to Report object
  • On the report object, get the SqlDataSource and change the connection string of the data source to match your production. You can either provide the complete connection string itself or the name of the connection string element from your configuration file.

Here is the code snippet on how to use the Report Xml Serializer:

XmlReaderSettings settings = new XmlReaderSettings();
settings.IgnoreWhitespace = true;
using (XmlReader xmlReader = XmlReader.Create(<.TRDX URI or .TRDX XML Content>, settings))
{
Telerik.Reporting.XmlSerialization.ReportXmlSerializer xmlSerializer =
new Telerik.Reporting.XmlSerialization.ReportXmlSerializer();
Telerik.Reporting.Report report = (Telerik.Reporting.Report)xmlSerializer.Deserialize(xmlReader);
(report.DataSource as SqlDataSource).ConnectionString = "<Connection String OR Connection String Name>";
reportViewer.Report = report;
reportViewer.RefreshReport();
}
view raw gistfile1.cs hosted with ❤ by GitHub

Summary:

Standalone Report Designer is a great tool for end users who just create reports and are not technical people. Telerik Reporting Solution has provisions to use the designed report i.e. .TRDX file and render that inside the report viewer. Since it supports both URI Report Source and XML Report Source, you can decide the way you want to store the report i.e. either store it as a physical file in your app in a separate folder or store the content of the .TRDX file in a database column. In both the cases you will be able to use the Report XML Serializer to serialize the XML as a Report instance, update the connection  string to match your production and set it to the report viewer.

With Telerik Reporting Solution, you now have the power in your apps to let the end user design adhoc reports, upload it in your app and render the same in a report viewer. Hope this post gave you some insights into Telerik Reporting capabilities.

Till next time – Happy Coding!