Kerala Microsoft User Group or KMUG as we call it is one of the active User Groups in India concentrating on Microsoft Technologies. KMUG is lead by some of the enthusiastic professionals and good friends of mine. Every year they conduct a day long technology event called “DEVCON” short for Developer Conference. This year too DEVCON will be held on Feb 15 2014.
I am delighted to say that I will be representing Telerik in this developer conference. I will be presenting the following sessions at DevCon:
Talk: Develop ASP.NET MVC Applications faster with Kendo UI
Time: 10:15AM
This talk will be primarily to show how you can develop your ASP.NET MVC applications faster with the help of Kendo UI Wrappers for ASP.NET MVC. Kendo UI Wrappers bring in the concept of controls to your MVC development environment. If you are working on MVC technology do come attend this talk and see the wow factor we bring in with Kendo UI.
Hands on Lab: Hybrid Mobile Application Development with Kendo UI
Time: 01:45PM
Kendo UI Mobile lets you build Cross Platform, Adaptive Rendering Hybrid Mobile Application which can be packaged and run on any Mobile OS platform. Kendo UI Mobile will provide you with the mobile and tablet controls and you just need to have web skills to become a mobile developer. So do join me as I show you how to develop Mobile Apps with Kendo UI Mobile.
On Jan 30, we conducted a webinar titled “Scaffolding in One Asp.Net”. This blog post is the recap of the webinar.
Scaffolding in ASP.NET:
ASP.NET Scaffolding is a code generation framework for ASP.NET Web applications. Visual Studio 2013 includes pre-installed code generators for MVC and Web API projects. You add scaffolding to your project when you want to quickly add code that interacts with data models. Using scaffolding can reduce the amount of time to develop standard data operations in your project.
So in this webinar I went about showcasing how scaffolding can be use in MVC scenario, Web API scenario and Web Forms scenario.
As with every webinar we have done, we have selected 2 random persons from the audience and they will get our .NET Ninja T Shirts. Congratulations to the winners.
Rajesh Haramkar
Ramesh Pyru
Our office will contact you to get your postal address so that we can ship them to you.
On Jan 16 2014 we conducted the very first webinar of 2014 titled “Achieve Responsive Web Application with Ease using Kendo UI”. This blog post will provide you some of the resources from the webinar like Slide Deck, Video recording of the webinar and lastly the Q&A section.
Responsive Web Design:
Responsive Web Design or RWD as it is known as, is an interesting topic in the landscape of modern day web application development. With the proliferation of mobile phones and tablets, your web page is seen not just in one screen i.e. Desktop Browser but also in Mobile Browsers and Tablet Browsers. Because of the screen size or form factor differences, it is important for your as a app developer to provide the right experience across the form factors. So in this webinar we looked at how Kendo UI is responsive and how you can build responsive screens using Kendo UI.
Slide Deck:
Here is the slide deck from the webinar:
Video:
As with every webinar, we have recorded this one too. Here is the video recording of the webinar for your leisure viewing:
Questions & Answers:
There was a lot of questions asked during this webinar. we were able to answer some of them during the live webinar. Here is the complete list of questions and answers to those questions:
Q: can we mix azure mobile services Apis with kendo?
A: Absolutely. Kendo UI is a client side framework. You can use it with any backend.
Q: can we integrate with Silverlight? A: Sorry, Silverlight is a very different framework. Kendo UI is a HTML 5 framework.
Q: We have existing clients having content added in tables , can we make existing content responsive using CSS?
A: Yes. Kendo Grid provides adaptive layouts as well.
Q: Is Kendo UI necessary to develop responsive web design?
A: No not necessary. It is a framework that enables writing web applications to deliver responsive design much easier.
Q: What is the difference between Kendo UI and other similar services like Sencha? A: Kendo UI is an HTML 5 framework for the web, mobile and data visualizations. I am not as knowledgeable about Sencha but it could be just a mobile development framework.
Q: Is it necessary to use visual studio or we can use other IDE also?
A: Any IDE can be used – Eclipse, Sublime or simply notepad 🙂
Q: Required to import Kendo UI framework/library in projects?
A: yes. that’s what gives the functionality of being responsive.
Q: Does Kendo do any polyfill ?
A: Yes. We do polyfilling under the hood. We sniff the browser and see if it supports HTML5. If not we polyfill. This is pertaining only Kendo UI controls and behaviors only.
Q: When we design a responsive web design application, is it like we wont see horizontal scroll bar? A: Horizontal scroll bars are not considered good usability. So, responsive design avoid having them.
Q: Can Kendo UI be used with android as well?
A: Kendo UI Mobile controls can be used to create cross platform hybrid mobile applications.
Q: How does the old browsers behave with Media queries?
A: While some polyfill is available, Kendo does require modern browsers with HTML5 support to function correctly. We support IE7+, FF, Chrome and other major browsers.
Q: Does all the controls in Kendo are responsive in nature, or not?
A: Yes, they are. And then there are adaptive layouts for Grid etc.
Q: Can Kendo UI be used with android as well? A: Yes. We have a specific module for mobile applications – Kendo UI mobile. http://www.kendoui.com/mobile.aspx
Q: How will be the performance of Kendo UI control? A: We have optimized Kendo UI for extremely fast performance. In our studies it may be perform a lot better than some other frameworks.
Q: Is Kendo UI based on twitter bootstrap? A: No. We have out of the box 11 themes that we ship. We have also released a Kendo UI Twitter Bootstrap theme and with this theme all our widgets will look and feel like a bootstrap scheme.
Q: Is it light weight? A: yes, this framework is very light weight with option to assemble only the functionality that you require (reducing the size even further)
Q: Is it mandatory to know HTML5 in order to use Kendo UI?
A: yes, Kendo UI is based on HTML 5 capabilities.
Q: Is it compatible with Windows phone too? A: Kendo UI Web controls are supported on latest and greatest browsers which support HTML5. We also have Kendo UI Mobile controls which can be used to develop cross platform hybrid mobile apps. Kendo UI Mobile are supported on all major Mobile OS.
Q: Is there any difference between ASP.NET MVC Kedo UI controls and simple Kendo UI controls?
A: The functionality is the same in both. The programming model is different. Kendo UI needs JS programming while MVC controls are programmed with Razor syntax.
Q: Can we use Kendo UI with Asp.Net MVC 4?
A: Yes. We support MVC 3+.
Q: Kendo UI is browser specific?
A: Nope. Just requires a HTML 5 enabled browser.
Q: I’m using fusionchart component for data visualization.. i want to make it responsive as my app works on iPad and desktop.. is it possible with Kendo?
A: Yes. You can use Kendo DataViz for the same. http://www.kendoui.com/dataviz.aspx
Q: can we integrate with PHP site? A: Absolutely. There is specific wrapper for PHP as well that will allow you to continue to write PHP code. http://www.kendoui.com/server-wrappers/php.aspx
Q: Can we use Kendo UI in xcode? A: Kendo UI is a web framework. You would be building native app with XCOde. In that case, you can use Kendo in a WebView only.
Q: How can we customize Kendo Ui to adapt style sheet css from our web application, Requirement is Kendo ui controls use the web site theme ?
A: You can use our themebuilder to customize the stylesheet instead of using the theme we ship. Take a look at our theme builder here: http://demos.kendoui.com/themebuilder/web.html
Q: can we create custom controls using Keno UI? A: Yes. We support plugin architecture. So you can create a custom plugin and use it as a Kendo UI Widget.
Q: Is all Kendo UI controls are responsive? A: Yes.
Q: Can Kendo UI be used with PhoneGap? A: Yes. The specific control set for mobiles is Kendo UI mobile: http://www.kendoui.com/mobile.aspx
Q: What is right database connectivity for developing browser application using Kendo UI A: You will need to develop a server side application that spits out REST based JSON data. In .NET, you can use WebAPI or WCF Data Services.
Every webinar we give away two .NET Ninja T-Shirts which have become quite popular among developers. In this webinar we have selected the following 2 persons to receive our t-shirt.
Dhiraj Gautame
Tejendra Chaturvedi
Congratulations to the winners. We will contact you on the email address you have provided to us. We will ship the t-shirt to your address. Others don’t feel bad. There are plenty of webinars to come. So keep participating and try your luck next time
In this blog post I will be exploring how to get started with our Kendo UI Grid Wrapper for ASP.NET MVC. We will take a basic usage of displaying data in a grid format in an ASP.NET MVC view. To know more about Kendo UI Web controls head over to www.kendoui.com. If you want to follow along with this blog post, you can do so by downloading a 30 day free trial of Kendo UI Complete for ASP.NET MVC.
Getting Started:
First lets create a ASP.NET MVC project. I am using Visual Studio 2012. When you install Kendo UI, we also install certain project templates which make it easy to create kendo UI based ASP.NET MVC project. I assuming you have installed Kendo UI Web for the rest of the post. In Visual Studio, select File > New Project > Web > Kendo UI for ASP.NET MVC. Give it a name and wait for Visual Studio to spin up the new project.
Datasource:
For the sake of this blog post, I will be using Northwind database. I will also be using ADO.NET Entity Model to Northwind database and use Customers table data. So go ahead and add a ADO.NET Entity Model to your project. We will use the entity data model to fetch data and bind it to the grid. I have also created a CustomerViewModel so that I can use this as the Model to the view. Here is the code for the CustomerViewModel:
public class CustomerViewModel
{
public string CustomerID { get; set; }
public string CompanyName { get; set; }
public string ContactName { get; set; }
public string ContactTitle { get; set; }
public string Country { get; set; }
}
Home Controller & Index Action method changes:
We will read the customers data, build CustomerViewModel list and add this to view as a Model. Here is the Index Action method code snippet:
public ActionResult Index()
{
var customerViewModelList = GetCustomers();
return View(customerViewModelList);
}
GetCustomers is a helper method which converts Customers entity to CustomerViewModel entity and return a list. Here is the code snippet of GetCustomers method:
private IEnumerable<CustomerViewModel> GetCustomers()
{
var context = new NORTHWINDEntities();
var customers = context.Customers.Select(customer => new CustomerViewModel
{
CustomerID = customer.CustomerID,
CompanyName = customer.CompanyName,
ContactName = customer.ContactName,
ContactTitle = customer.ContactTitle,
Country = customer.Country,
});
return customers;
}
Adding Grid to View:
In order to use a grid on a view, you will use the GridBuilder. GridBuilder supports the following overloaded methods for creating the grid:
public virtual GridBuilder<T> Grid<T>() where T : class;

public virtual GridBuilder<DataRowView> Grid(DataTable dataSource);

public virtual GridBuilder<DataRowView> Grid(DataView dataSource);

public virtual GridBuilder<T> Grid<T>(IEnumerable<T> dataSource) where T : class;

public virtual GridBuilder<T> Grid<T>(string dataSourceViewDataKey) where T : class;
in this blog post we will be using the method where it allows us to pass a IEnumerable as the data source. First lets take a look at the code snippet. Following the snippet I will explain the code in detail:
Well that’s all it takes to create a grid in MVC. Now lets go over the code in detail.
We pass the Model which is IEnumerable<CustomerViewModel> in this case to the GridBuilder
All widgets in Kendo UI needs to be named, so we provide a name using the Name() method
We define columns of the grid using the Columns() method. We can provide lambda expression to indicate which columns should be bound
In order to allow paging on the grid, we just add the Pageable() method
Sorting on the grid is enabled by adding the Sorting() method
Grouping is enabled by adding the Groupable() method
Similarly, filtering is provided by adding the Filterable() method
Now build the project and run the application. Following is the output of the code we just wrote:
Server Operation False:
At this moment if you click on a pager link or try to sort or try to group, Kendo UI Grid will be default send a request back to Server. That’s the default behavior that the grid works with. It assumes that Server would like to perform operation before getting the data. In this scenario that is not intended for me. I have got all the data that I need and I have given it to the grid. So it should do all the operation at client side rather than sending a request to server. For this to happen we just need to let the Grid DataSource not to perform server operation. This can be done by setting the Grid DataSource setting as below:
now when you run the project and perform any operations, grid will not send a request to the server but do it client side.
Conclusion:
This blog post was like a primer to anybody who would like to get started with Kendo UI Grid Wrapper for ASP.NET MVC. With just 15 lines of settings you will have a full fledged grid in your app within no time. If you are interested in Kendo UI Grid, do download a 30 day free trial at www.kendoui.com.
In this blog post we will take a look at one of the new widgets we have released as part of Kendo UI Web controls suite. For long people have been asking about why we didn’t have a Kendo UI Button in the arsenal. Well we already have a <button> element in HTML specs so we didn’t want to reinvent things. But when it comes to using Kendo UI for your app you may want to keep things in your app consistent with respect to styling. So instead of you using regular button and styling it to have a look and feel of Kendo UI style sheet, we have gone ahead and released a Button widget for you. You just instantiate the button as any other widget you have been using. The button automatically takes the style of the current Kendo UI theme you are using. So this blog post will be your primer for using the Button Widget in your ASP.NET MVC apps.
About Button Wrapper:
Kendo UI Button Wrapper for ASP.NET MVC provides a styled clickable UI widget with any arbitrary content. With Kendo UI Button Wrapper you get a consistent Kendo UI styling.
Basic Button Usage:
In order to create a Button, you will use the Button() builder. You will need to provide a name to the widget and the content which needs to be shown on the button. Here is the code:
Kendo UI Button wrapper allows you to also specify a icon as part of the button content. The icons can be provided to the button in three ways. They are:
SpriteCssClass Method
Icon Method
ImageUrl Method
SpriteCssClass Method Usage:
You can use the SpriteCssClass() method to provide a icon to the content. In this method the icon is provided by using a background image (usually a sprite). From web standards point of view, using a background image is better. In the below example I am using a sprite which contains flags of different country. I will create a class to point to a specific country lets say Netherlands and use that class in the Button SpriteCssClass() method. Here is the code for this scenario:
You should use Icon() method when you want to use one of the predefined icons we pack as part of Kendo UI control set. You can refer our Icons Demo to get a glimpse of all the pre packaged icons. Here is the code to use the Icon() method and provide an Kendo UI Icon for the button:
Here is the screen shot of the buttons with all the above 3 icon methods being employed:
Handling Client Side Events:
You can handle the client side event using the ButtonEventBuilder. Button has a Click event exposed. You can provide the name of the client side JavaScript function which will handle the event. Here is the code snippet for handling click event on the client side:
Similar to all kendo UI Widgets, an existing Button instance can be accessed via the .data() jQuery method, executed by the jQuery object on the originating element. Here is code snippet of how to access a button instance:
In this blog post we looked at how easy it is to work with the Kendo UI Button wrapper for ASP.NET MVC. We looked at the feature of providing icons to the button. We support 3 different types using which you can provide the icons. You can look at more Kendo UI Button demos here. Give it a spin and let us know if you have any feedback or comment.
This content was originally posted on Telerik’s blogs here.
Overview:
Telerik’s ASP.NET AJAX Cloud Upload is a brand new control in the arsenal of ASP.NET controls which provides you the ability to support uploading of files to Cloud providers. What’s best about this control is, you don’t have to write any code i.e. this is codeless uploading of files. If this excites you, then read on.
In rest of the sections, we will see how to use Cloud Upload with Everlive.
What is Everlive?
Everlive is Telerik’s Backend as a Service or BaaS. Everlive links your application to backend cloud storage and provides User management, push notifications, Social networking services integration etc. Some of the benefits are:
One portal to manager your entire app background
Data & file security
Target every mobile platform with ease
Frictionless login with social authentication services
You can sign up for free and you get a developers account which gives you unlimited API calls, 10K push notifications, 100MB of DB space, 1GB of file storage and 5GB of bandwidth. Once you log into your Everlive account, you can create a new project. Click on “Create a Project” from the Everlive dashboard.
In the “New Project” dialog, enter project name, description, select “Start from scratch” radio button and click on “Create Project” button.
Here is the project dashboard once Everlive creates our new project:
Notice that, Everlive has out of the box added Files, Users and Roles entity types. Files entity type is like container to which you can readily add files. Click on Files link on the left hand menu to look at Files screen:
You can click on “Upload Files” to upload a new file from the portal itself.
API Keys for accessing Everlive:
In order to integrate with Everlive i.e. uploading to or reading files from Everlive from any application, you will need to have access keys. You can get access keys to your projects, by clicking on “API Keys” in your project dashboard. Note down the application name and the application key. We will need this information when we integrate with RadCloudUpload.
Create a Web Application:
Fire up a Visual Studio 2013 and select File > New Project. In web templates select “RadControls Web Application”, give it a name, location and click Ok. Visual Studio will go ahead and create our project. By default a default.aspx page is already added to the project. We will use this page for the demo purpose.
Adding Everlive Client Library:
To integrate with Everlive Cloud Storage, we need to reference the assembly Telerik.Everlive.Sdk.Net35dll. You can download the files from here. Download the zip file, extract it and add reference to Telerik.Everlive.Sdk.Net35.dll in the web project. We also need Newtonsoft.Json.dll, so add a reference for that too.
Using the Cloud Upload control:
From the tool box drag and drop RadCloudUpload control on to Default.aspx page. Access the smart tag of the control and choose Everlive as the provider type. Then click on the “Open Everlive’s Configuration Wizard”.
In Configuration Wizard dialog enter Everlive API Key.
Specifying the Uncommitted Files Expiration Period (hours), you could easily configure the time, after which the unprocessed files will be removed from the storage.
This will add configuration setting in the web.config file:
We are all set now. Just run the application. You will see a select button. Click on the select button to select a file. As soon as a file is selected, the upload will start. Here is the snapshot of file being uploaded:
And here is the snapshot of file upload being finished:
At this point if we jump back in to Everlive project dashboard and Files section, you should see the file we just uploaded. Here is the screenshot of the Files on Everlive:
Conclusion:
That’s it. We are done. I did not write single line of code but was able to upload files to Everlive file storage. That is as easy as it can get with Telerik’s Cloud Upload for ASP.NET AJAX. Give it a spin or check out the demos and let us know what you feel about this control.
Recently when talking to one of our clients, I had a question from them. They said your demos are great and covers most of the scenarios but when I take a particular control lets say Grid, how do I get started. Well that question prompted me to write this blog post. So if you are one of those who get the exact question in your mind about our controls, then do read on.
About Telerik’s ASP.NET AJAX Controls:
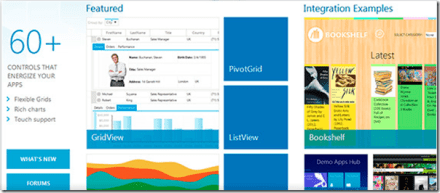
RadControls for ASP.NET AJAX is a complete development tool set for developing web sites or web apps based on ASP.NET AJAX technology. Our suite for ASP.NET AJAX contains nearly 70+ controls and helps you in rapid UI development. We also provide you with nearly 15 themes out of the box. If this excites you, check out the product page here: http://www.telerik.com/products/aspnet-ajax.aspx
ASP.NET AJAX Controls Help Documentation:
Almost all suites of Telerik have a very rich documentation support. Various formats of help is available. You can choose which mode you want to use the help documentation. If you navigate to page – http://telerik.com/help, it will list all suites help options. We will concentrate on ASP.NET AJAX controls for now. Here is the screen shot of the page with ASP.NET AJAX Controls Help Documentation Options:
Lets spend a moment here to understand the help options. For ASP.NET AJAX we have the following resources:
Online Help or you can download a copy of CHM format, MS Help 2 format or MS Help 3 format. Clicking on “Online Help” will give you the documentation online. Where as other options you can download the help documentation on to your hard disks.
Step-by-step tutorial – the name says it all
Knowledge Base – a vast base of knowledge articles for you to do a quick glance at
Code Library – a vast library of codes for specific scenarios or requirements
For this blog post I will consider the “Online Help” option and point you to resources there. This will be the same for other formats too.
Navigating Help Documentation:
If you are starting new on a specific control, first thing you should do is to head over to the help documentation and get to the section which deals with the control you want work with. II f you navigate to online help link which is at http://www.telerik.com/help/aspnet-ajax/introduction.html, you will see the following page:
If you notice the help documentation page, we have a tree on the left hand side. This tree lists down a lot options for you to get help on. I have highlighted 2 sections, namely – RadControls for ASP.NET AJAX Fundamentals and RadControls. The RadControls for ASP.NET AJAX Fundamentals will give you fundamental details about ASP.NET AJAX and about the RadControls itself. If you want to get to the documentation of controls you will need to expand the section “RadControls” which then will list all of our controls. As a shortcut, on the center section of the online help page, you will see links to controls directly and you can click on your control of interest. You will be navigated to that controls Documentation now.
Getting Started with a Control:
Now that you know how to navigate to the Help Documentation, the next step is to figure out getting started with a control. Remember the short cut I said that is available on the help documentation home page – well find the control you want to learn and click on it (the control name is a hyperlink which will take you to its documentation). For this exercise I will take our most popular control Grid and walk you through. Once I click on the RadGrid hyperlink, it will take me to RadGrid for ASP.NET AJAX Overview page. The left side tree on the page will now have the node RadGrid under RadControls be default selected and the sub nodes under it would have been expanded.
Now you will see a sub node called Getting Started. Click on it to expand the node. You will now see a child node which says “Getting Started with RadGrid for ASP.NET AJAX”. Click on the link and you will get a step by step guide on how to start working with our Grid.
And that’s it – now you can first go through the getting started, understand steps required to get a Grid on your page and start using the grid.
Looking at the Demos:
Now that you know how to get started with the Telerik RadGrid, next step would be to start looking at our demos to understand different features and how to work with those features. In our demos we try to provide you with all the scenarios in which a Grid will be used in real world applications. So take a look at the demos online here – http://demos.telerik.com/aspnet-ajax/. Note that, when you download our product, the same online demo is shipped and installed on your hard disk. So you can just open the local demos right from your hard disk and go through them.
Telerik TV:
Another great resource for anybody getting started with our Telerik Suites is to look at our Telerik TV. This is a public site available on the internet and you don’t need to be a licensee of Telerik to access the site. Telerik TV has videos on all of our products which are short in nature and very focused on a particular feature of a control. These videos are created by evangelists like me in Telerik. Personally I use this a lot to quickly understand how to work with a control. I highly recommend book marking this one in your browsers. Here is the Telerik TV URL: http://tv.telerik.com
Conclusion:
Whenever you are starting new, without knowing the right resources and guide its little tough to get started. Idea of this blog post was to hold your hand and walk you through various resources we here at Telerik have to make your experience of developing with Telerik controls an easy one. Personally as a developer at heart first place I go to is our documentation to understand the control and to go over its API exposed. Next stop would be Telerik TV and finally a look at the demos to understand different features and scenario in which the control can be used. Hope these simple steps will help you all with your evaluation of Telerik controls and make it much more easier and simpler to evaluate. Do feel free to get in touch with us in case you need further assistance.
On Nov 28 2013 we conducted a webinar on the topic “Adaptive Rendering Mobile Web Apps using ASP.NET MVC”. In this blog post we will provide the resources from the webinar.
ASP.NET MVC has a fantastic feature which allows you to design web pages for traditional web browser or for a mobile browser. In order to support Mobile browsers, all you need to do is to create a page with “.mobile” in the file name i.e. if I have index.cshtml view just create a index.mobile.cshtml and ASP.NET MVC pipeline will serve this page when some body requests index view from a mobile browser.
Kendo UI Mobile is a flagship product from Telerik which is a HTML5 based cross platform adaptive rendering mobile controls. Kendo UI Mobile controls when uses will adapt to the platform they are running on and will give you the look and feel of that platform. So you write your application only once and deploy to platforms like Android, iOS, Windows Phone and Blackberry without any code changes.
Slide Deck:
One of the things I tried with this webinar was – Only Action No Theory. Well what I meant was I didn’t have a slide deck for this webinar. It was completely demo oriented.
Video Recording:
If you had missed attending the the live event or you want to go over it once again don’t worry we record every one of our webinars. So here is the video recording of the webinar:
Q&A:
As with every webinar, this webinar too had many questions from the attendees. We tried our best to address most of them during the webinar. With the lack of time, we might not have been able to answer every question. So we list them here with the answers.
Q: Is adaptive rendering same as responsive design? A: No. Responsive design is where you design a web page which reacts to different dimensions of the browser. For e.g. If you create a web page using Twitter’s bootstrap style sheets they have rules which make your page realign to different dimension. Where as adaptive rendering is about rendering controls which look native on the platform they run. For e.g. if you use a button, when the page is seen from a iOS browser, button should look the blue shade button or when it is seen from a Android browser, it should look like a black shade android button etc.
Q: How does kendo recognize the mobile or device in which app is running? A: Each browser will let you know information about the platform through user agent strings. So we rely on that.
Q: Can we override the native look and feel. Like if we have requirement to show app similar to android in IOS
A: Yes you can. We have a special skin or theme called Flat. If you use this flat theme the UI will be same across platforms. You can customize the Flat theme CSS to have your own color combination.
Q: Can we use Kendo UI without using Asp .net MVC? A: Yes you can. Kendo UI is a HTML5 powered Client Side UI framework. You can use Kendo UI Web Controls in a plain HTML page also. Kendo UI Mobile controls are used for developing Mobile Applications.
Q: Why there is a need to add Jquery mobile script file separately and why can’t we make it as part of kendo scripts ?
A: Kendo UI depends only on Jquery and nothing else. So its necessary to first add Jquery before referencing Kendo UI scripts.
Q: Is it possible to create iOS/Android apps like messaging, file sharing using KENDO UI? A: Yes you can.
Q: when you Customize/override the layout by making skin ‘Flat’ , the tabs were in the bottom in Android UI too, so it means Kendo UI will not work if we override or customize it?
A: When we use Flat skin, the UI looks consistent across platforms which includes the tab strip too. The tab strip will be at bottom. But if you want the tab strip to be on top for android or other platforms you can easily customize the flat theme CSS for a particular platform.
Q: I can build Mobile Web using such adaptive layout with Jquery mobile + ASP.net MVC , what are the key features for Kendo Web UI?
A: Kendo UI Mobile controls are adaptive in nature. i.e. you write once and deploy on different platforms, the controls will look like native UI. For more information visit: http://www.kendoui.com/mobile.aspx
Q: Does Kendo UI supports HTML5 features? A: Yes.
Q: how to convert mobile web app to hybrid app? A: You can just take the HTML/JS/CSS files, package it and deploy it to respective marketplace.
Q: What all kind of app we can develop using Kendo UI? A: kendo UI comes with 3 flavors. Kendo UI Web – used to develop HTML5 based web apps/sites, Kendo UI DataViz – used to develop data visualizations for web and mobile and Kendo UI Mobile – used for developing Hybrid Mobile Apps. For more information visit – www.KendoUI.com
T-Shirt Giveaway:
With every webinar we select 2 random attendees to receive a give away from our side. The give away is a .NET Ninja t-shirt from Telerik. So here are the 2 winners from this webinar:
Sivakumar SS
Mahesh Darga
For those of you who are feeling sad about not winning the t-shirt, don’t worry. We have a lot of webinars planned ahead. So keep looking out for our next webinar.
I started my web programming in 2001 and I have pretty much seen all the versions of Visual Studio over the past 12 years. Microsoft released yet another version of the IDE this October – Visual Studio 2013.
As with any other release, Visual Studio 2013 brings in a lot of framework and language enhancements for different project types and development environments. But I am more excited with this release than any other for a single reason: there are lots of enhancements for ASP.NET as a platform. Web as a platform is moving very fast and Visual Studio as an IDE needs to catch up. I feel Visual Studio 2013 is now packed with all the things a web developer needs to build a modern web application conforming to all modern standards.
In this Telerik whitepaper, we identify and explore the top 10 features in Visual Studio 2013 we think are valuable for ASP.NET developers. Some of the items we tackle are as follows:
One ASP.NET No more confusion in creating web applications, there will be only one choice now.
Scaffolding for WebForms, MVC, WebAPI, SignalR We call it Scaffolding on steroids as we can scaffold pretty much anything in ASP.NET.
BrowserLink You can now say good bye to design view. BrowserLink makes it possible to do live update to your pages.
Bootstrap Templates Bootstrap template is the default template for all new ASP.NET projects in VS2013 now.
CodeLens You now have the spy lens at your disposal called CodeLens. This lets you know how many places a function/class is referenced right above your function/class definitions.
And others!
I am super excited about Visual Studio 2013 for all the ASP.NET features & enhancements. My favorite being the One ASP.NET feature. If you are also excited as I am then go ahead, download this whitepaper and get to know the new things in Visual Studio 2013.
Download Today
You can grab a copy of the whitepaper here. We hope you too enjoy the 10 features of Visual Studio 2013 that we mention. As always, we would love to hear your feedback. Is there a feature you like and we haven’t covered it, feel free to write a comment below.
Microsoft has released yet another version of Visual Studio and is called as Visual Studio 2013. Through this webinar we took a lap around some of the newest feature that every developer should be aware of. A lot of enhancements have been made in the language as well as the IDE itself. You can know more about Visual Studio 2013 here: http://www.microsoft.com/visualstudio/eng#visual-studio-2013
Slide Deck:
As usual the webinar was demo oriented as I spent most of the time show casing the new features of the new IDE. The slide deck contains just the pointers to my talk. So I suggest you watch the recorded video of the webinar along with the slide deck.
Video Recording:
We record all our webinars so that those of you who couldn’t attend the live event or you had some audio issues can come back and view the webinar at your leisure time. Below is the recorded version of this webinar:
Whats New in Visual Studio 2013
Webinar Giveaway:
If you have attended our webinars you will know that we usually pick 2 attendees from the participants list and they will receive our .NET Ninja T-Shirt shipped. For this webinar we have picked the following 2 attendees who receive the t-shirt:
Ravi Tyagi
Robin Banga
Congratulations to the winners. We will contact you for your address and will ship the t-shirt. Rest of you don’t feel bad. You can be the next winner and for that you will need to attend out next webinar.
This content was originally posted on Telerik’s blogs here.
Overview:
Ever wondered if there was a way a file upload could be done in your application without writing a single line of code. As a web programmer for 12 years, I have always wondered this myself. I would like to let a control know where it needs to upload and it should do the rest for me. I am happy to say that today that thought of mine is possible with Telerik’s Cloud Upload for ASP.NET AJAX. In this blog post we will see how you can upload files to your Windows Azure Storage BLOBs without writing a single line of code.
About Cloud Upload for ASP.NET AJAX:
RadCloudUpload is an ASP.NET AJAX control that provides you and your application the ability to upload files directly to your cloud providers. With the 2013 Q3 release, we support – Amazon S3, Azure Blob Storage and Everlive (Telerik’s Backend as a Service). On modern browsers, the control makes use of the File API and falls back to an IFrame upload module on older browsers. Some of the key features of the control are:
Multiple File Selection
Validation
Progress Monitoring
Large file uploading
Localization
Customization etc.
In rest of the sections, we will see how to use RadCloudUpload with a Windows Azure Storage account.
Setting up Windows Storage Account:
In this section, we will see how to set up a storage account on Windows Azure. I am assuming that you have a Windows Azure account, if not you can register for a trial account and follow along.
First thing to do is to log in to your azure management portal at http://manage.windowsazure.com. After logging in, click on the “New” button available at bottom left hand corner of the page.
You will be presented with a new item dialog. Select Data Service > Storage > Quick Create. Enter a name for your storage account and select which location you want the account to be created. You can optionally enable the Geo Replication feature. Once you have completed the form, click on Create Storage Account.
Azure will go ahead and provision your account.
Once your storage account is created, navigate to the storage account and access the Containers tab. We will create a container to hold our files. I will name my container pictures for this demo. The idea is to upload and save pictures as blobs in my storage container.
Write down the container name you have assigned, as we will need this to set up the RadCloudControl in our application.
Identifying Azure Storage Account Name and Key:
For the RadCloudUpload control to work – it needs three things. Namely:
Storage Account Name
Storage Account Key
Storage Container Name
Now let us see how to get to the account name and key.
In your azure management portal, navigate to your storage account that we created in the previous section. Bottom of the page you should see a link which says “Manage Access Keys” – click on that link.
You will be presented with the Manage Access keys dialog. From this dialog write down the Storage Account Name and Primary Access Key. Secondary Access key is also provided if you want to share the account to your 3rd party associates.
Next, we see the RadCloudUpload in action.
Create a Web Application:
I am using Visual Studio 2013 as our RadControls are VS2013 compliant. However, you can also do this with 2012. Fire up a VS and select File > New Project. In web templates select “RadControls Web Application”, give it a name & location and click Ok. Visual Studio will spin up the new project with a default.aspx already added to the project. We will use this page for the demo.
Adding Azure Storage Client Library:
In order for the RadCloudUpload to work with Azure Storage, it needs Azure Storage Client Libraries. You can get those from NuGet. Right click on References node in Solution explorer and select Manage NuGet Packges. In the NuGet Package Manager, search for “WindowsAzure.Storage” and add the package to the application. The package will install 2 dlls – Microsoft.WindowsAzure.StorgaeClient.dll and Microsoft.WindowsAzure.Configuration.dll. For this demo we don’t need the Configuration assembly. Therefore, we can remove its reference.
Using the Cloud Upload control:
From the toolbox drag and drop RadCloudUpload control on to Default.aspx page. Access the smart tag of the control and choose Azure as the provider type. Then click on the “Open Azure’s Configuration Wizard”.
In Configuration Wizard dialog enter Azure Storage Account Key, Storage Account Name and the Storage Blob Container Name. In this demo the Account Name is clouduploaddemo and container name is pictures.
Specifying the Uncommitted Files Expiration Period (hours), you could easily configure the time, after which the unprocessed files will be removed from the storage.
When Ensure Container is checked, the control will create a new Container if it does not exist. In the scenario where it is not checked and the Container does not exists – an exception will be thrown.
This will add the following configuration setting in the web.config file:
We are all set now. Just run the application. You will see a select button. Click on the select button to select a file. As soon as a file is selected, the upload will start. Here is the snapshot of file being uploaded:
Here is the snapshot of file upload being finished:
Here is the blob container meta data properties of the file we uploaded:
Conclusion:
As you have seen in the post, I did not write even a single line of code. Apart from dragging and dropping the control on to the page, the rest of the things were just settings. Codeless file uploading is a reality with Telerik’s Cloud Upload for ASP.NET AJAX. Check out more demos of Cloud Upload at http://demos.telerik.com/aspnet-ajax/cloud-upload/examples/overview/defaultcs.aspx
On September 5th we conducted a webinar on our Icenium extension for Visual Studio. The webinar was titled “Building iOS and Android apps using Visual Studio”. This is part of the ongoing webinar series we here at Telerik India have been doing almost every Thursday of the month. If you want to know our webinar schedule, take a look at this blog post: https://telerikhelper.net/2013/10/04/technology-to-keep-you-company-in-the-holiday-season/
About Icenium:
Icenium is a product from Telerik which makes cross platform mobile development simplified. Icenium enables you to use HTML5, CSS and JavaScript to develop, test, and publish applications that run natively on the Apple iOS and Google Android mobile platforms. It combines the convenience of a local coding environment with cloud-based services powered by the Apache Cordova framework. Icenium also provides the seamless creation of a backend for your apps with data storage, user management, and email and push notifications.
As promised, here is the video recording of the webinar:
Q & A:
We had a lot of questions asked during the webinar. Our team was able to answer as much as we can during the webinar. We normally do a recap of the questions and try to provide answers to all of them through this blog post. So here are the questions from the webinar along with the answers:
Q: Are these native apps we are talking about?
A: We are talking about a model of Mobile App development called Hybrid Application Model. In this model you develop app using HTML5/JavaScript/CSS. You package this and it runs on the device pretty muck like a native app.
Q: Can we use Express Edition to practice this? A: Sorry. This needs a non-Express VS edition
Q: Can we practice it on any other ide other than VS or is it only for it?
A: The webinar featured a extension we have for Visual Studio. But Icenium comes as a stand alone IDE also. We have Windows Client called Icenium Graphite or you can use Icenium on the browser itself. Currently supported only on Chrome.
Q: For android development with visual studio can we do it without any explicit plugin?
A: Yes. It depends mostly on your application feature and design. If you are building a simple data entry application which does not require any custom plugin you can do it easily with just a HTML markup and a JavaScript code to handle service calls.
Q: How difficult/easy it is to design my app once, and create ios application and android application PARALLELY?
A: With Icenium and Kendo UI Mobile controls, you write your code only once. Icenium lets you build packages for Android and iOS right within Icenium. Kendo UI Mobile controls provide you the adaptive rendering capability i.e. Kendo UI Mobile controls adapt to platform they are running on and give you native look and feel.
Q: what is Icenium?
A: Icenium – Mobile application development tool from Telerik. More details: http://www.icenium.com
Q: Can the jQuery version file be changed at any time?
A: Yes you can.
Q: Is Icenium different from Kendo control set ?
A: Icenium = Cloud IDE + Build Services + Simulators + Debug Capabilitie + Mobile BaaS + Kendo Mobile
Q: Will Icenium Support design and development of Web Services or the same will have to be developed seperately in .NET?
A: This will need to be developed separately. We have a Visual Studio addin avaialble to do the same called OpenAccess. http://www.telerik.com/products/orm.aspx
Q: Is Icenium an opensource? A: No. Icenium is licensed product. It is per developer subscription based.
Q: Since iOS 7 is released, how do we set the version to 7.0 in iOS simulator? A:. Work is under way. We will update the simulator once we are ready. In fact we already have a flat theme in Kendo UI Mobile control set from past year or so. So you already have a flat theme to apply to your apps.
Q: Which Visual Studio version we are going to discuss to achieve this?
A: Icenium Extension for Visual Studio supports only Visual Studio 2012 at the moment.
Q: Can we run tis apps on windows phone 8 also?
A: Yes. But Icenium cannot make the package for you. You will need to copy the complete source code. use Windows Phone project template for HTML5 and dump your code. Then create the XAP file and put it to market place.
Q: this will be compatible with all device of Android and iPhone? A: Yes. Icenium also provides adaptive rendering for individual platform.
Q: Only VS 2012 is enough or do we need to install any plugins?
A: You will need to install Icenium Extension for Visual Studio from Visual Studio Gallery.
Q: From where can we download Icenium Plugin? We already have a license of telerik, do we need to buy a separate one?
A: You can download the Icenium extension from Visual Studio Gallery. You can develop an app and test in Icenium simulator. But when it comes to packaging you will need to buy Icenium subscription which is per developer and on monthly basis.
Q: Can we deploy directly to physical phone if its connected ?
A: Yes, you will be able to. LiveSync enables immidiate sync to all devices attached to the machine.
Q: An application developed on Telerik Silverlight, can it be replicated to Icenium app
A: No direct migration from Silverlight to Icenium.
Q: Can we access hardware including Camera, GPS and other sensors?
A: Yes, via the cordova library. Part of Icenium.
Q: I have a Kendo app (browser app) can we migrate it to Icenium?
A: Kendo Browser Apps using Kendo UI Web controls which is meant for running on desktop browsers. For mobile, we recommend using Kendo UI Mobile controls.
Q: Can we use debugger on trial version of Icenium A: Yes, the trials are fully featured trials.
Q: Does Icenium support windows mobile A: WP is supported by a slightly different procedure. Please write to sales@telerikindia.com in case you would like to explore this further.
Q: Does the API has support to access device specific functionalities A: Yes, via the plugin architecture.
Q: Can we create system apps via Icenium A: Sorry, Icenium can only build mobile apps.
Q: Where is the div attributes coming from (like data-role, data-icon) A: There are known as “data-“ attributes in HTML5 specification. HTML 5 makes provision for it. Icenium makes it functional.
Q: Can we get a trial version of Icenium? A: Yes, one month trial of Icenium is available at: http://www.icenium.com
Q: The difference between Jquey Mobile / Cordova app & Kendo UI is nativeness A: Yes. In addition, we have SPA framework + MVVM framework + Client side DataSource + Templates and more
Q: We need to know how to use ListView and how to bind a data to listview practically? A: Please write to sales@telerikindia.com and we will help you specifically.
Q: Are you using any MVVM framework like backbone.js A: Kendo UI framework has its own MVVM framework. This further reduces the size of the application by removing the need for adding more frameworks like backbone.js
Q: Is this a stand-alone or web based Mobille App? A: This is being like a web based app. Upon compilation/ build it will become a stand alone app (apk/ipa) that can be put on respective app stores.
Q: Just to confirm the support for ODATA using these controls? A: Yes, ODATA is supported. Use DataSource to connect to Odata services and controls can bind to this datasource
Q: Will a single code will work for both IOs and Android? A: Yes, it will. that’s magical, isn’t it?
Q: Any ETA to remove this BETA ? A: Icenium is a live app (not in BETA). The VS plugins is in BETA.
Q: Can we use VS2012 to write Objective C code using Icenium? A: No. This is not possible.
Q: Will kendo ui mobile and jQuery mobile work together? A: There is nothing that prevents jQuery Mobile from working with Kendo UI. However, it is needless as most capabilities are available in Kendo UI.
Q: is it support local database ie sqllite etc ? A: Yes. Icenium has support for SQLite plugin which can be included in your project.
Q: How Icenium plugin is aligned with iphone/android/windowsPhone design elements ? A: Icenium is just the IDE for developing Hybrid Mobile Apps. It’s the Kendo UI Mobile control set which adheres to design principles of the Mobile Platform and render the controls accordingly.
Q: do you have icenium extention for Eclipse/JBuilder/IntelliJ.? A: Not immidiately. you can use the Windows client of Icenium: http://www.icenium.com/product/graphite
Q: How we can publish our app for iOS? A: Publishing for Apple Store is directly supported from Icenium. No need for a Mac.
Q: To publish a app in Apple store, I need a mac device & Xcode? A: You will be excited to know that Icenium supports deployment to Apple Store directly. so, you don’t need a Mac or XCode for publishing. You can develop and deploy completely without the need for a Mac.
Q: Who does the magic behind the scene from different phone sets? is it Kendo, which recognizes and builds the layout A: Yes, Kendo is the magic behind support for different platforms/ form factors.
Q: Can you name any application developed using kendo UI and deployed in different markets for iOS,Android and Microsoft
A: SafeBridge, DevReach. Check out our showcase apps: http://www.icenium.com/resources/showcase
Q: How abt symbian apps A: sorry not supported by Icenium.
Q: An important question: What is % degrade in performance using Kendo UI v/s native html/css apps ? A: It is quite the opposite. We have seen improvements of 200 – 300% in performance when using Kendo versus other HTML/ CSS apps (not native)
Q: we have to write all the codes in one single page i.e. index.html A: it is a Single Page app :). However, we support browsing to other pages and hence you can have code in another page as well.
Q: Did you develop the KENDO framework by your own? A: Yes, Telerik developed it by itself 🙂
Q: Where can I get the help related to Kendo UI? A: Extensive documentation available at: http://docs.kendoui.com
Q: Can We Use Web Services in Icenium? A: Yes, we support REST/ OData services.
Q: Can I create ASP.NET MVC4 project, where I build views using cshtml files, however use the Kendo UI controls on views ?
A: Absolutely. You can use Kendo UI Web controls for serving to desktop browsers. You can develop .mobile.cshtml files and use Kendo UI Mobile controls.
Q: As you told like look and feel vary between android and iOS devices .. but if I want to make theme consistant across all platform what I will have to do? A: You can use our Flat theme which gives consistent theme across all the platforms. Otherwise you can always use our Theme Builder and build your own theme.
Q: Can we write custom plugin to ICENIUM like we can do in Cordova? A: Yes. Icenium allows you to import custom plugins too.
Q: Instead of using emulators, can we test the app on real mobile w/o submitting it to store? A: Yes. it is fully supported. On Android the deployment is direct and on iOS you can use Icenium Ion: http://www.icenium.com/product/ion
Q: How we can use Kendo Ui for WP8 ? A: Quickly, you got to use the PhoneGap template in VS. Insert the Kendo UI files in WWW folder. Compile the project to get WP8 app.
Webinar Giveaway:
In each of our webinars we pick random 2 people from the attendee list and they get out cool .NET Ninja T-Shirt. This webinar, we have picked the following folks:
Ajay Negi
Jaish Mathews
Congratulations to the winners. Our office will contact you for your details and we will ship your t-shirts.
For those of you who are felling sad about not winning, well try your luck next time by attending our next webinar on Oct 31.
Kendo UI is a flagship product from Telerik which is a HTML5 powered client side JavaScript framework. We have Widgets/Controls apart from a plethora of framework level goodies like MVVM, Validation, Globalization etc. out of the box. Although this is a client side framework which means that you program against Kendo UI using JavaScript – obviously. But Kendo UI also has a server side wrapper for ASP.NET MVC very similar to HtmlHelper extensions available from Microsoft (TextBox, CheckBox etc.). What this means is, the wrappers shield you from writing JavaScript yourself and instead you code in your natural comfort zone of C# and Razor and the wrappers output the JavaScript for you. These JavaScript are the initialization scripts for the widgets.
Widget Initialization Scripts:
Kendo UI relies on 2 things – JQuery framework and Kendo Web JavaScript file. Before you can start working with Kendo you need these 2 JavaScript file references added to your page. Assume that we have referenced the 2 script files in the head section of the page.
When you use wrappers to code on the server side, the wrappers output the necessary JavaScript code required for Kendo UI to work on the client side. Note: the wrappers do not out put the markup rather output the JavaScript which is required to initiate a widget on the client side. But the initialization code blocks are rendered right at the place where the widget was defined in your source code.
To illustrate this – lets take a simplest of the code as an example. We will use the AutoComplete Widget and see the rendered code on the client side. Here is the Razor syntax using AutoComplete Kendo UI Wrapper:
@(Html.Kendo().AutoComplete()
.Name("countries")
.Filter("startswith")
.Placeholder("Select country...")
.BindTo(new string[] {
"Bulgaria",
"India",
"Australia",
"Germany",
"USA",
"UK",
"Hong Kong"
})
.Separator(", ")
)
<div class="hint">Start typing the name of an European country</div>
Notice that we have a div after the autocomplete widget. Now at run time right click on the browser and view the source code. Here is the code that gets generated:
<input id="countries" name="countries" type="text" /><script>

jQuery(function(){jQuery("#countries").kendoAutoComplete({"dataSource":["Bulgaria","India","Australia","Germany","USA","UK"],"filter":"startswith","placeholder":"Select country...","separator":", "});});

</script>

<div class="hint">Start typing the name of an European country</div>
As you can see the initialization script code is rendered right at the place where we had defined the wrapper in our source code. This works fine as long as the Jquery and Kendo script references are done at the head level of the document. In next section we will see what happens when we move the script reference to the end of the page.
Following Best Practice for Script References:
One of the best practice of the web development is to load any scripts we need at the end of the page. What this does is it doesn’t block the page from loading. Page continues to load & render and the scripts gets loaded at the end and user does not see any blockings in the page load. But we have a problem. As seen in the previous section, the widget initialization script gets rendered at the position where the widget was defined in source code and gets executed immediately. if the Jquery and Kendo scripts are loaded at the end of the page, the initialization script will fail with errors as the frameworks are not yet loaded. Here is the error we get:
Deferring Initialization Scripts:
Luckily, Kendo UI Wrappers have a answer to the initialization scenario we saw in the previous section. Each of the widget wrappers expose a method called Deferred(). It’s a fluent method and will suppress immediate script statement rendering. The next question we may have is – we deferred the initialization, but how do we initialize the widget once page is loaded. Answer is, Kendo wrappers expose one more fluent method called DeferredScripts(). DeferredScripts method will output all the previously deferred initialization statements.
Here is the updated code to handle deferring the scripts:
First, I moved the Jquery and Kendo script reference to end of the page and made a call to RenderSection. This is the section where we will out put the initialization scripts from the pages.
Second, I have called the Deferred() fluent method on the auto complete wrapper. Declared a section PageScripts and called DeferredScripts() fluent method to output the deferred statements.
@(Html.Kendo().AutoComplete()
.Name("countries")
.Filter("startswith")
.Placeholder("Select country...")
.BindTo(new string[] {
"Bulgaria",
"India",
"Australia",
"Germany",
"USA",
"UK",
"Hong Kong"
})
.Separator(", ")
.Deferred()
)
<div class="hint">Start typing the name of an European country</div>
@section PageScripts {
@Html.Kendo().DeferredScripts()
}
With the above code changes, we now have the initialization statements deferred till we explicitly call the DeferredScripts() fluent method in the PageScripts section. Here is the generated code at run time:
<input id="countries" name="countries" type="text" />
<div class="hint">Start typing the name of an European country</div>
<script src="<a href="http://localhost:39897/Scripts/kendo/2013.2.716/jquery.min.js">/Scripts/kendo/2013.2.716/jquery.min.js</a>"></script>
<script src="<a href="http://localhost:39897/Scripts/kendo/2013.2.716/kendo.all.min.js">/Scripts/kendo/2013.2.716/kendo.all.min.js</a>"></script>
<script>jQuery(function(){jQuery("#countries").kendoAutoComplete({"dataSource":["Bulgaria","India","Australia","Germany","USA","UK","Hong Kong"],"filter":"startswith","placeholder":"Select country...","separator":", "});});</script>
Conclusion:
When using Kendo UI ASP.NET MVC wrappers, you should pay attention to how you want to use the widgets. Since the wrappers output the initialization statements immediately at the position of the wrappers definition, it needs the JQuery and kendo scripts to be available upfront. If you follow the best practice of loading the scripts at the end of the page, you will need to defer the initialization statement and manually output all deferred statements after you have loaded the JQuery and Kendo scripts. This blog post introduces you to Deferred() and DeferredScripts() fluent method supported in Kendo. Hope this information is useful to you. If you have not experienced Kendo UI, encourage you to visit www.kendoui.com and take a look at our demos.
On September 5th we conducted a webinar on our RadControls for WinForms suite. The webinar was titled “Make Windows Forms speak the Windows 8 Modern UI design”. This is part of the ongoing webinar series we here at Telerik India have been doing almost every Thursday of the month. If you want to know our webinar schedule, take a look at this blog post: https://telerikhelper.net/2013/07/29/telerik-india-webinarsmonsoon-edition/
Telerik RadPanorama is a control that displays elements of type RadTileElement in a mosaic manner. Basically, this control allows you to represent a small amount of data in the form of tiles that the end-user is able to smoothly scroll left or right with a gesture, just like in Windows 8, and to reorder the tiles with drag and drop. With its help, in just a few minutes you can achieve Modern Style UI for your WinForms applications, similar to the Start Menu screen of Windows 8.
In the webinar I just showcased how you get started with the Panorama control. We looked at created groups, creating tiles within the group and also how to create live tiles. If you want to know more about the Panorama control, have a look at the control page here: http://www.telerik.com/products/winforms/panorama.aspx
Here is the link to video recording of the webinar:
Questions & Answers:
As with every webinar, we might not have been able to answer all the questions that were asked during the webinar. We make it a practice to collate all questions asked during webinar and answer them in these recap blog posts. So here are the questions and answers from this webinar:
Q: Does this control work with windows form & even WPF i.e. xaml? A: This webinar talks about our Panorama control for WinForms. We have a separate suite for WPF and it contains a similar control on XAML.
Q: Is there any limit for tiles in panorama? A: No
Q: Will this work with Visual Studio2010? A: Yes. It is supported on VS2010 environment also.
Q: Can we place tiles of one group to another group? A: Yes. Control will automatically do that out of the box without any special coding.
Q: Can we do resizing of Tile? A: At the moment we don’t have the capability to resize the tile similar to what Windows 8 OS provides. However during design time you can set the size of the tiles.
Q: Is it necessary to have .png format or any photo format like.jpeg or .gif will work? A: Any image format will work. But PNG is preferred.
Q: Can we rotate the tiles ? A: No. Moreover if you rotate you are violating the Modern UI design philosophy.
Q: If we have more tiles in a window will the scroll bar appears? A: Yes. Panorama will automatically provide the horizontal scroll bar.
Q: The Tiles added can be independent of RadPanorama or it should be contained in it? A: Tiles can be added directly to Panorama or can be added to the groups.
Ninja T-Shirt Giveaway:
In each of our webinars we give away 2 of our very popular .NET Ninja T-Shirts. We have picked the following 2 people from the webinar audience as the winners of our T-Shirts:
Farjana Parveen
Upendra M
Congratulations to the winners. We will get in touch with you to get your details and we will ship your T-Shirt. Rest of you folks, don’t worry – attend our future webinars to win a T-Shirt. We look forward to your presence in our future webinars.
This blog post is in response to one of the customer queries we received a couple of days back. One of our India customer called us up and said that they are seeing slowness in couple of pages where they are using RadGrid. Problem statement was – when they click on “Add New Row” button it takes nearly 1.5 minutes for the row to appear on the grid. This made it even scary for them as they had moved the code to production. Through this blog post I will try to outline what I found out and what could have been done better to resolve the problem.
Analysis:
I went in to a call with the customer and took a look at their code. There were couple of things they were doing. Let me list them down:
DataSource for the RadGrid was a SqlDataSource control defined in the .ASPX page
They were handling OnItemCommand and OnItemDataBound. They had some logic in this method which would execute on every data bound and every item command
The new item template had lot of drop down lists and each of them were bound to SqlDataSource control as their data source.
Now, next thing I did was to take look at the timing. We used IE Developer Tools and captured the network traffic when Add New button was clicked. What I found out was, server was taking close to 10 seconds to finish its server side processing. That’s a lot of time if you ask me. What was surprising for them was, they had paging enabled on the grid. So they were thinking that paging is happening correctly but still why is the add new row scenario slow.
So this made me to delve little bit deeper into what exactly is happening in this scenario. So rest of this blog post is all about my observation. Read on if you have faced a similar problem.
Observations:
Did two experiments to figure out what was happening. First I use a RadGrid and bind it to SqlDataSource control and look at the query executed at the DB side. Second was to use entity data source instead of SQL data source and look at the query executed at the DB.
For my experiments I am using Northwind Database and in particular Order Details table. Order Details table contains nearly 2155 records. So this makes a good candidate to mimic a scenario where you are paging the RadGrid lets say 10 records per page.
I assume that you have RadControls for ASP.NET AJAX suite installed on your system. If not, you can always download from our products page – www.telerik.com/products/aspnet-ajax.aspx. You will need that if you want to follow along with this post. Also in order to trace the SQL Queries executed, I am making use of a open source tool called “Express Profiler” which is available at CodePlex here: http://expressprofiler.codeplex.com/. I had to use this as I have a SQL Server 2012 express edition and express edition does not come with Profiler option. You need a full blown SQL server to get the profiler.
I have created a RadControls Web Application for my experiments. When you install the RadControls for ASP.NET AJAX suite, you will get project templates in Visual Studio, using which you can create a web application.
Fig 1: RadControls Web Application Project Template
DataBinding with SqlDataSource control:
First experiment was placing a RadGrid and bind it to SqlDataSource control. I placed a RadGrid and set its basic properties. Then added a SqlDataSource control to the page and set its connection string and provided a select command. Here is the code snippet for grid and SQL data source control:
Now, before you run the application, lets get ready to trace the SQL queries that get executed. You should have downloaded the Express Profiler. Start the express profiler – Set the server details, select the authentication mechanism and finally select the events you want to trace. Here is the screen shot:
Fig 2: Express Profiler Settings
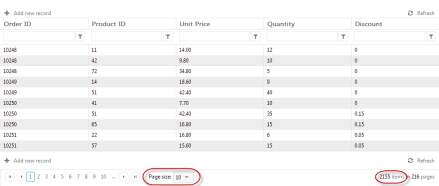
Run the web application. Notice that if we just set AllowPaging=true on RadGrid and do not provide a page size, by default RadGrid puts 10 as the PageSize. So in my case I should see only 10 rows on my first page of the RadGrid. Here is the Grid output:
Fig 3: RadGrid output
When I ran the app and looked at the trace, here is what I get:
Fig 4: SQL Query Trace for SQL Data Source Control bound to RadGrid
What you see here is a call to retrieve all the records from the table. You may be asking but the page size is set to 10. That is correct but what really happens is this: RadGrid will go ahead and ask SQL Data Source to get the data. SQL Data Source will blindly execute the query that has been set for the select command. RadGrid will not be able to do any tinkering with query because the SQL Data Source does not provide us a chance to put paging related statements.
Now lets do a page change on the grid. I will go ahead and click on Page 2. RadGrid will now navigate to Page 2. Here is the trace that is generated for this:
Fig 5: SQL Trace for Page Change Event
What you notice is, the SQL Data Source goes ahead and brings all the records from the table. RadGrid will then pick up only the second page rows and displays it.
Now lets go ahead and click on the Add New Row button and trace the query executed:
Fig 6: SQL Trace for Add New Record Event
As you can see it again retrieves all the records from the table.
What this tells us is the time taken is due to the fact that its going and getting all the table records no matter whatever is the situation we have. Now hitting DB and getting everything does call for some time although small but it till takes up time on the server.
Now lets do the same experiment but with Entity Data Source.
DataBinding with Entity Data Source:
I will use the same data grid but instead of SQL Data Source I will use a Entity Data Source. In order to work with Entity Data Source, you need a Entity Data Model. I will not get into how to create a Entity Data Model but assume that you know how to do it. Just create a ADO.NET Entity Data Model and generate the models from the database and use the same Northwind database. Once you have the ADO.NET Entity Data Model created, create a Entity Data Source on the page. Here is the Entity Data Source code snippet that I have:
I am making use of the OnContextCreating event to set the DbContext of ADO.NET Data Model to Entity Data Source ObjectContext. Here is the code for the event handler of OnContextCreating:
protected void EDS_ContextCreating(object sender, EntityDataSourceContextCreatingEventArgs e)
{
    var db = new NORTHWINDEntities();
    e.Context = (db as IObjectContextAdapter).ObjectContext;
}
Here NORTHWINDEntities is my Entity Data Model context. I am just casting it to ObjectContext since Entity Data Source works with ObjectContext. I set this entity data source as the data source of the RadGrid.
Analyzing the Queries:
Now lets run the app and trace SQL queries for the same set of actions we did with SQL Data Source control.
As you can see we have put in a “SELECT TOP 10” statement in the query. So its not bringing all 2155 records rather only 10 records. So time spent to do this will be very negligible. We also execute one additional query to get the total record count.
Now lets see what happens when we do a paging:
Fig 8: Entity Data Source – Paging – Query Trace
Now, lets trace the query when we do ‘’Add new record” scenario:
Fig 9: Entity Data Source – Add New Record – Query Trace
Notice that, in this scenario, we automatically page to the last row and add a blank record.
As you can see from the above experiments, RadGrid is intelligent enough to optimize the queries based on the scenario you are dealing with.
Conclusion:
It was very evident from the experiments that if you are using SQL Data Source as your data source choice, there is not much RadGrid can do to optimize the query before it gets executed. Where as with Entity Data Source, RadGrid is smart enough to optimize the query and always have a optimized data fetch. I personally recommend using an ORM in the project for the data access scenarios and use the Entity Data Source as your data source choice. We i.e at Telerik have a free ORM called OpenAccess. Its free for life so you can pretty much use this in your production without any hassle at all. Do give it a try and let us know how you feel about it.
I hope this blog post does give you information on things you need to take care while doing data binding to Grids. This is just not in particular to RadGrid, this is mostly about any data binding scenario. Trace your queries and be sure that write and optimized queries are getting executed in your apps.