Learn more about Test Studio here
Inserting data from application is very prominent task. You will find this functionality in all kind of applications. In this post we will take a look on automating the test to verify insertion of data in database.
Let us assume you have following application to insert data in database,

And you have recorded test steps for insertion operation as following. As you see that all the test steps are passed and data got inserted in database.

At this point there is no step to verify that whether data got inserted to database successfully or not? Only manually Tester can verify that data being inserted or not. Now let us see that how can we automate this test.
We will automate this test using
- Coded step
- Performing database verification operation in coded step. We will choose LINQ to verify that whether data got inserted successfully not. You can choose any other data base technology like ADO.Net or other library to perform operation against database.
- We will use NUnit for assertion
Very first we need to add a Coded step. To add coded step select Test from menu and then Script Step from ribbon as given in below image.

You will be asked to select scripting language. I am selecting C# as scripting language here.

Once Code step is added export test project to Visual Studio. To export to visual studio from menu click on Export to Visual Studio as shown in image below,

Next select Visual Studio version to export project.

Creating Library to work with LINQ
Now in visual studio you need to add operations related to LINQ in different class library. Idea is that we will create separate library for LINQ operation and later we will add that library to Test Studio.

Assume that we have created a library with name DataLibrary. This Library got
- LINQ data context classes
- We added a static class in which operation is being performed to verify that whether data exist with given user name or not? If data does not exist static function will return false else true.
So DataHelper class contains following code to verify that whether data exist or not.
public static class DataHelper
 {
 public static bool VerifyInsertion(string username)
 {
 DataClasses1DataContext conext = new DataClasses1DataContext();
 var result = (from r in conext.User_Login_Datas
 where
 r.username.Equals(username)
 select r).FirstOrDefault();
 if (result == null)
 return false;
 else
 return true;

}
 }
Adding Reference in Test Project
There are in two ways you can work on Test Studio. Either on Visual Studio plugin or on Test Studio Desktop.
Adding reference in Visual Studio is simpler. Right click on test project and from context menu select Add Reference. Browse to DataHelper.dll library and add reference in test project.
Even though you have added reference in Visual Studio make sure that you have added reference in test project opened in Test Studio desktop version else you will get exception.
To add DataHelper.dll assembly in Test Studio desktop version you need to follow following steps,
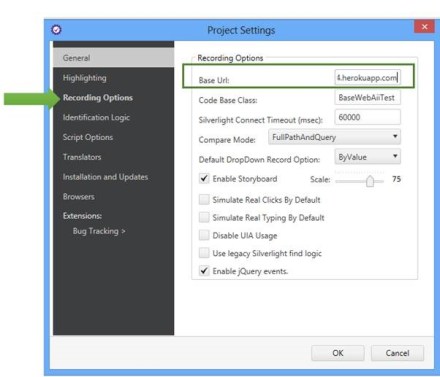
In project tab or project dashboard select Settings option from ribbon
![clip_image002[6]](https://telerikhelper.net/wp-content/uploads/2013/07/clip_image0026_thumb.jpg?w=602&h=186 "clip_image002[6]")
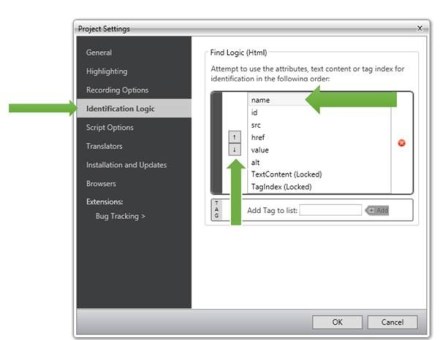
In dialog box click on Script Options. To add assembly reference click on Add Reference.

The way you added DataHelper library add Add reference of nunit.framework dll in Test Project as well. Make sure to add this in Test Studio desktop version also.
After adding references you need to write codes for coded steps. We need add two coded steps,
First coded step to read username value before Post back or Form get submitted. In this particular application when user will click on Insert Data button, a post back will occurred or form will get submitted and this will clear value of all the elements in DOM. So we need to read value before form submission. We can do that in coded step as following,

We are reading text of UserName field using TestStudio Framework API.
Second coded step will call VerifyInsertion function from DataHelper library and using NUnit we will assert the validation. We can do that as following,

For your reference both coded steps are as follows,
string insertedValue = string.Empty;

 [CodedStep(@"New Coded Step")]
 public void Data_Insert_Test_CodedStep()
 {

 bool result = DataHelper.VerifyInsertion(insertedValue);
 NUnit.Framework.Assert.AreEqual(true, result);
 }

[CodedStep(@"New Coded Step")]
 public void Data_Insert_Test_CodedStep1()
 {
 insertedValue = Find.ById<HtmlInputText>("MainContent_txtUserName").Text;

}
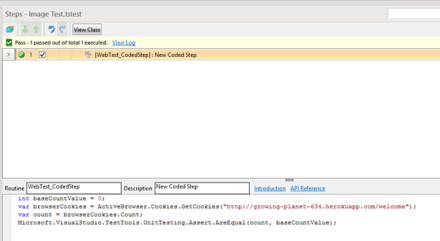
Your test should be like following

In this way you can automate data insertion test in database. I hope you find this post useful. Thanks for reading.
Learn more about Test Studio here


![clip_image002[6]](https://telerikhelper.net/wp-content/uploads/2013/07/clip_image0026.jpg "clip_image002[6]")


![clip_image001[6]](https://telerikhelper.net/wp-content/uploads/2013/06/clip_image00162.png "clip_image001[6]")