Read – Revamping Web Applications: Implementing RadAutoComplete
This post is a summary of the previous 12 blog posts where we have talked on how to upgrade our web application using the Telerik Ajax ASP.NET controls.We took an example of an Event Networking Application which is further explained in the first article. We started with testing the application to set a benchmark followed by implementing the Data Access Layer. Then we replaced almost all the controls with Rad controls. And in the end we have finally changed our interface to a new design. To do so we have used basic twitter bootstrap responsive css. To know more about implementing bootstrap click here.
Here we have elaborated on the following features of the application:
Directory
Sessions
MyScheduler
Messages
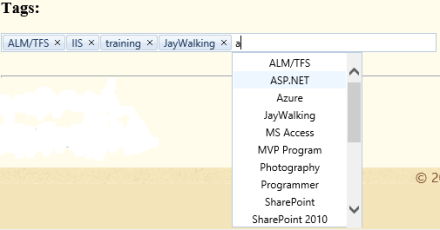
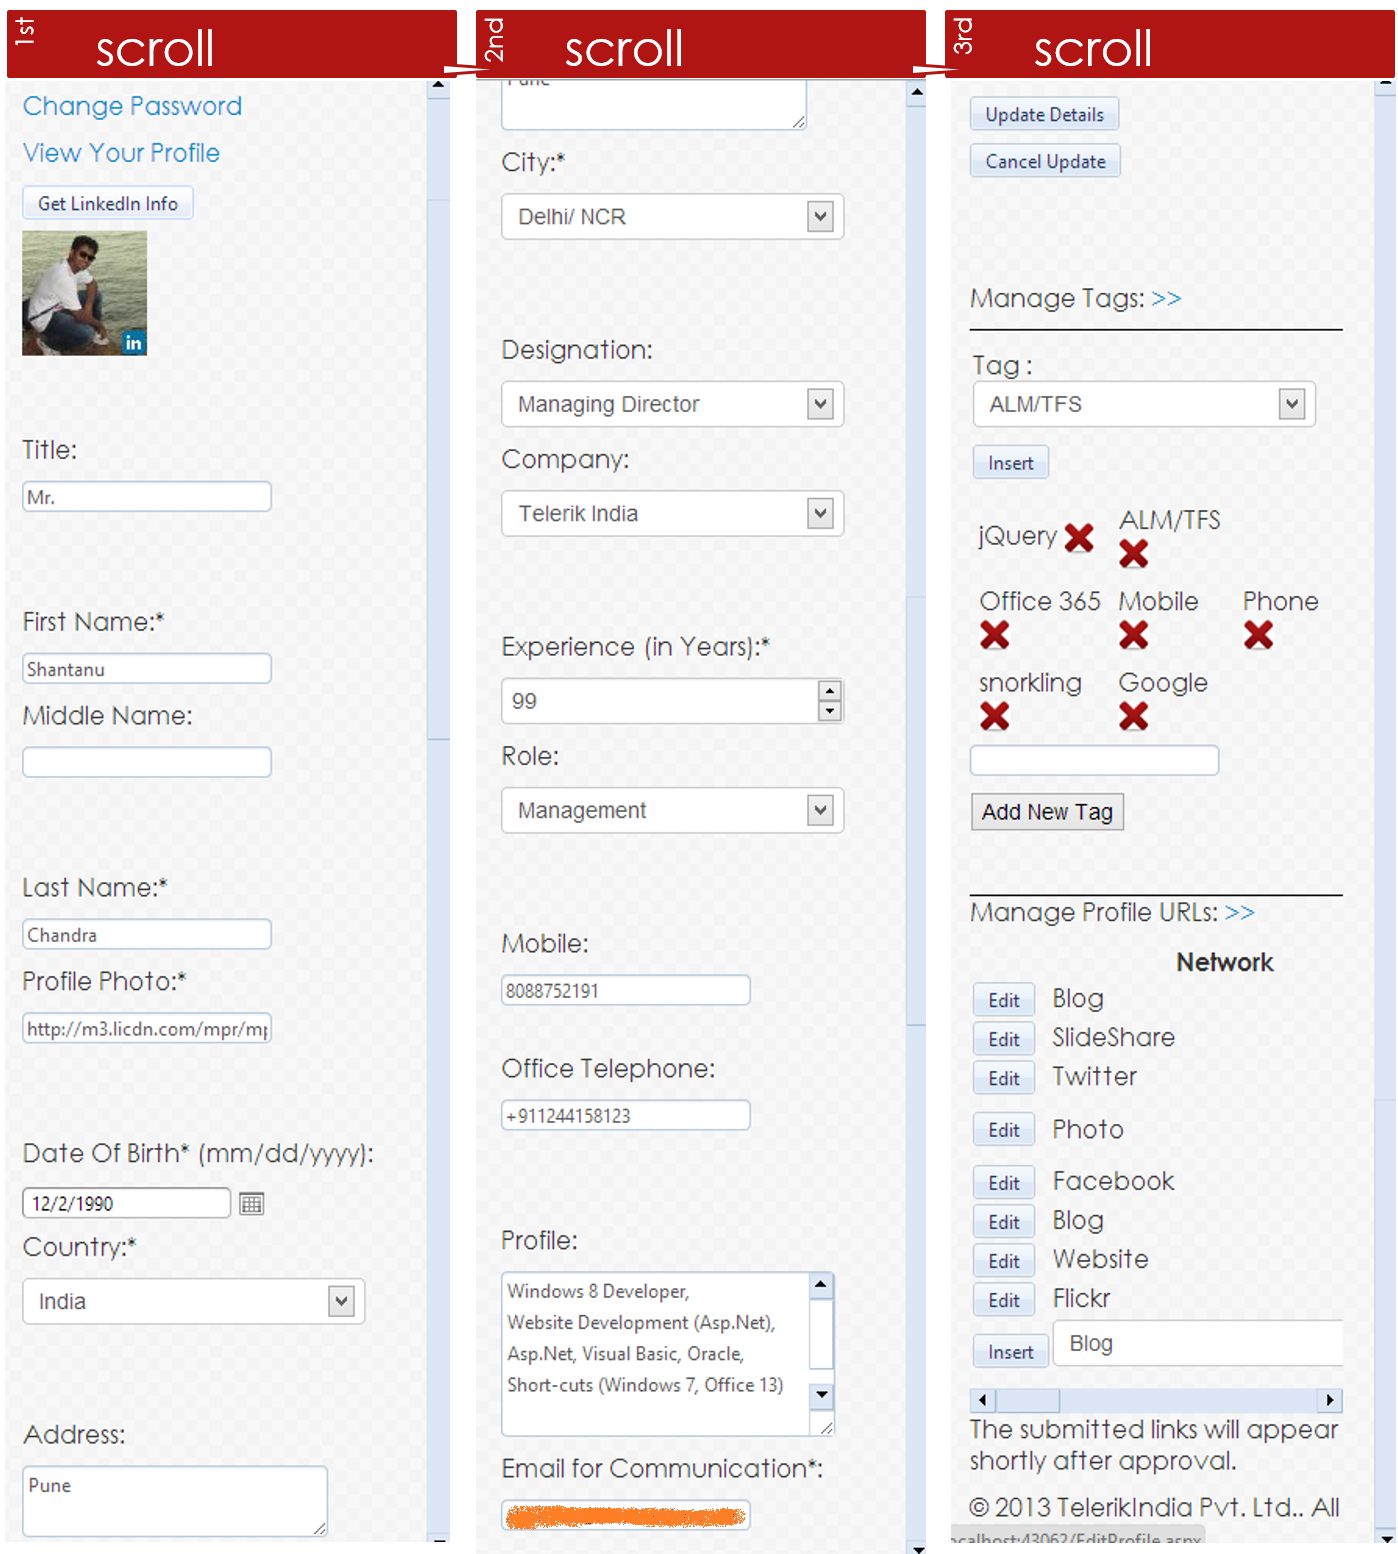
Edit Profile
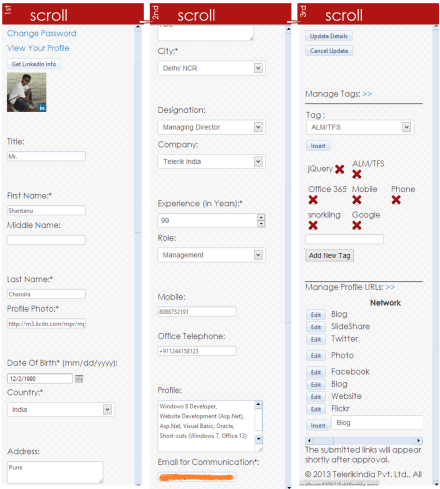
Edit Profile (Mobile Version)
To see the difference in the User Interface changes between the old and the new web application we have highlighted some of the major features.
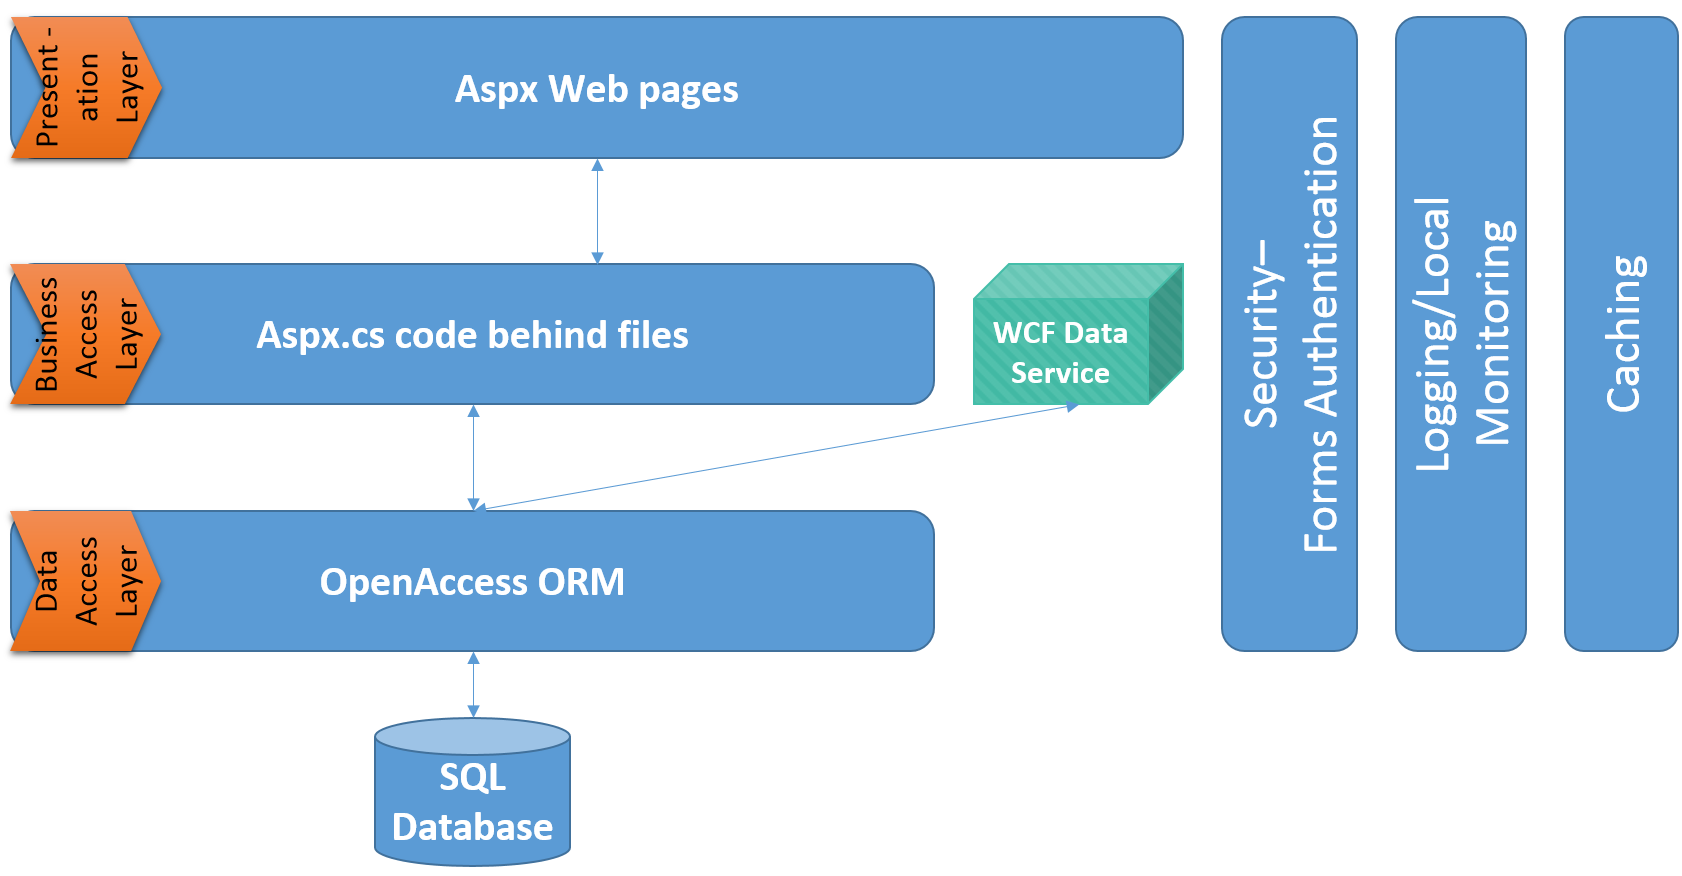
At the DAL we can see a new layer being created in the form of a project named EventNetworking.Data.

Following from the above we have a new architecture for our application.
A different UI can be seen as the bootstrap CSS has been implemented providing a responsive-UI. The visual changes can be seen as follows:
Directory
There is a new search criteria based on the Attendee name. Even the list can now be sorted only on the basis of the speakers.


Sessions
The basic UX has been modified to a RadGrid interface providing a better sorting, multiple-grouping as well as paging options.


MyScheduler
The scheduler where all the registered sessions were stored is now represented in a calendar form. Using RadScheduler the UI has turned very interactive and smooth.


Messages
The extensive vertical scrolling has been split into two pages namely inbox and outbox with almost a similar UI.


Edit Profile
The bootstrap CSS has made all the difference in this page.


Edit Profile (Mobile Version)
The following snippet displays the responsiveness of our application. Edit profile, when viewed in a mobile browser, we could experience the details have automatically shrunk to fit on the screen. This reduces the navigation to one dimension hence increasing the user experience.
The back-end does not really affect a user. What affects the user is the interface and the smooth performance of the Web Application. That is what we have tried to justify in our application. These are not all but the major features that have made difference in our application. Please comment on where else can we tweak the UI.