RadTileList

Resources for Webinar “Modern UI in ASP.NET Applications using RadTileList”

On Aug 8 we conducted a webinar “Modern UI in ASP.NET Applications using RadTileList”. This is part of the ongoing webinar series we here at Telerik India are doing targeting the APAC region. We call this the Telerik .NET Ninja Developer Webinar series. You can take a look at the Jun-Jul schedule here: https://telerikhelper.net/2013/05/24/telerik-webcasts-june-july/.

image

About RadTileList:

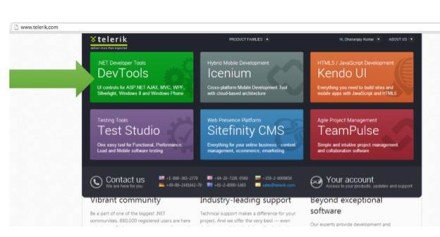
Build modern, Windows-8-like navigation easier and faster. With its first version the TileList control supports out of the box:

  • Single and multiple selection
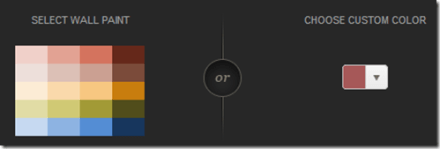
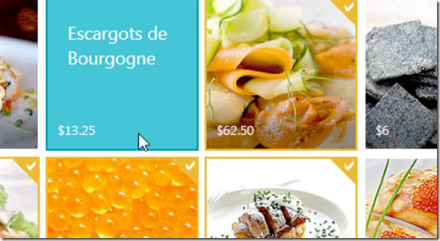
  • 4 tile types: image, text, image and text, and template tiles
  • Peek templates and animations
  • Drag to reorder
  • Tile groups and more

Slide Deck:

Here is the slide deck from the webinar:


Webinar Video:

Here is the recorded video of the webinar:

Questions & Answers:

As with all the webinars, we too had a bunch of questions in this webinar too. We answered a few and we couldn’t answer many of them. So we will try to answer as much questions as possible here:

Q: Any size restriction for the Image and Text tile?
A: The tiles are of 2 types – – Wide and Square. Wide tiles have a dimension of 350x150px and Square tiles are of 150x150px dimension.

Q: we can use any type of image?
A: Yes. Any image types can be used in the Image tiles.

Q: Difference between ContentTemplate and Text Tile?
A: You can take a look at the Tiles overview here: http://www.telerik.com/help/aspnet-ajax/tilelist-tiles-overview.html

Q: Image and Text Tile, title will always be at bottom or we can arrange the position?
A: The Title is always at the bottom. You cannot customize that.

Q: Can we format text in the image and text tile control?
A: Yes. The content text of the tiles can be customized.

Q: Can the badge be mapped to any other page say a link?
A: No. The linking is on the tile itself. The Modern UI philosophy is all about using the Tiles as a navigational item. The Badge is used as a additional information display.

Q: Whether Tile can be customized to various size?
A: No. The tiles come in two dimension: Wide – 350x150px and Square – 150x150px.

Q: Can these tiles be resized?
A: No. They come in standard dimension as per the Modern UI guidelines – Wide and Square.

Q: can we use effects the way tile appears?
A: Yes. We have the concept of Peek Templates. Peek Templates have settings which control how the template should appear. You can find more info here: http://www.telerik.com/help/aspnet-ajax/tilelist-tiles-peek-template.html

Q: what all languages you support in RAD?
A: C# and VB.NET

Q: We have Telerik license for developers. Do we need to install it on production server also ?
A: No. the app build will contain all that is required for Telerik controls to work. No need to install it on production server.

Q: Can I change the positions of Title and Badge ?
A: No. This is as per the Modern UI guidelines and it dictates that the Title and Badge have to be in the lower portion of the tile.

Q: I am curious about its interoperability along with several other controls in Telerik?
A: You can work with this control programmatically too. You can wrap this control and create your sub classed controls too.

Q: Can I use RadTilelist control in sharepoint 2010/2013 applications?
A: All of our ASP.NET AJAX controls suite is SharePoint compatible. You can use our AJAX controls in custom WebParts and host them in Sharepoint.

Q: If the content exceeds the height of the content tile how we have to control the text flow?
A: As per the design principles, when using ContentTemplate Tile, the text or content you provide should be a short and informational text. You can use CSS to control the overflow – but then it will bring in the scroll bars and the whole tile concept wont look good.

Q: How it works in Desktop app UI design. We don’t deal much with Web app coding?
A: We have Windows Presentation Foundation control suite and Windows Forms controls suite for desktop applications. WPF has TileList control and Windows Forms has RadPanirama control. Both of these controls help you build a Modern UI like navigation using Tiles in your windows applications.

Q: Once Tiles are re-arranged,, whether this can be persist or re-set after page refresh?
A: Yes. The selections can be persisted. You can integrate with the RadPersistenceFramework.

Q: Is this also part of ASP.net MVC?
A: No. This is part of ASP.NET Webforms.

Q: how to resize the tile as in windows 8 using rad controls?
A; At the moment we don’t support resizing.

Q: Can we bind these values to some data source so that frequently that can be refreshed, like we have in Mail tile in Windows 8?
A: Yes absolutely. You can do that certainly.

Q: Am using Telerik controls version: 2013.1.403.40, but this doesn’t contain Rad tile List control in toolbox?
A: This was released as part of our Q2 release. So upgrade yourself to 2013 Q2 release and you will see the control.

Q: do we documentation available for RadTileList ?
A: Yes very much. You can find the documentation here: http://www.telerik.com/help/aspnet-ajax/tilelist-overview.html

Q: Can Tile be created as dynamic as similar to number of rows in Grid?
A: Yes. You can programmatically create the Tiles too. You don’t have to place them on designer like the way I did in the demo.

Q: Why is it called RADControls?
A: RAD stands for Rapid Application Development. We help you build things faster. We help you improve your productivity through our controls. Our controls contains out of the box many features that otherwise you will need to build them by yourself.

Q: can we create a link on image to redirect to another page?
A: All the tile types support NavigateUrl property which when set, clicking the tile will navigate to that page.

Telerik .NET Ninja T-Shirt Giveaway:

We select 2 persons from the audience in every webinar and give away a Telerik .NET Ninja T-Shirt. So from this webinar we have randomly selected the following 2 persons:

  • Himanshu Garg
  • Kothainayaki Krishnamoorthy

Congratulations to the winners. We will be contacting you shortly to get your postal address. We will ship you your T-Shirt soon. Rest of the folks, don’t worry we have a lot of webinars coming up. So try your luck in next webinars.

Till next time – Happy Coding.

RadHtmlChart

How to bind RadHtmlChart for ASP.NET AJAX to EntityDataSource control

Introduction:

This is the 3rd blog post in the series on RadHtmlChart, our HTML5 based charting control for ASP.NET AJAX and its data binding options. So far we have seen data binding the RadHtmlChart control with SQLDataSource and LinqDataSource. In this blog post we will look at one more data binding option namely binding to EntityDataSource.

In this blog post we will focus on how to create a EDM or entity Data Model using Entity Framework, then adding the EntityDataSource control to the web page and finally binding it to the RadHtmlChart. For the rest of this post it is assumed that you have already installed our RadControls for ASP.NET AJAX suite and also our free ORM called OpenAccess.

About EntityDataSource:

EntityDataSource is a control that was made available during the days of Visual Studio 2008 SP1 i.e. .NET 3.5. According to MSDN EntityDataSource control is defines as:

A control which can be used together with a data-bound control to retrieve data from an EDM and to display, edit, and sort data on a Web page by using little or no code.

I wont be spending too much time on discussing EntityDataSource control in this blog post. I suggest you to go through the overview article from MSDN available here: http://msdn.microsoft.com/en-us/library/cc488502.aspx. The article will get you up to speed with the EntityDataSource control.

Getting Started:

To start with, lets create a “C# RadControls Web Application”. Open a Visual Studio and navigate to File > New Project > Telerik > Web and select “C# RadControls Web Application”. Give it a name & click finish so that VS can go ahead and create the project for us.

SNAGHTML13df131b

Figure 1: New Project Dialog

Adding ADO.NET Entity Data Model:

Entity Data Source control requires a ADO.NET Entity Data Model to work with. Entity Data Source can be configured to work with a Entity Data Context for reading, creating, updating and deleting data with little or no code from the web page. In order to create a EDM, we need to first add Entity Framework bits to our project. Use the Nuget Package Manager to add a package named EntityFramework.

SNAGHTML1424992c

Figure 2: Nuget Package Manager

One of the best practice is to create a Models folder at the root of the web application. So lets create a folder called Models. Right click on the Models folder and select Add > New Item. In the new item dialog, under Data category select “ADO.NET Entity Data Model”, give it a name and click Add.

SNAGHTML142c24a9

Figure 3: Add New Item Dialog

Next we will be presented with a EDM Wizard. In the interest of the time, I will post my settings in the wizard as a serious of images below:

SNAGHTML142e40e0

Figure 4: Entity Data Model Contents

SNAGHTML142f47a3

Figure 5: Data Connection

SNAGHTML1430a6f2

Figure 6: Database objects

Once we finish with the wizard, NorthwindEntityDataModel.edmx is created in the Models folder. Double clicking that we will be presented with a visual designer with one object called Product placed. Remember we had selected only one Table for this demo called Product. Here is the screen shot of the EDMX designer:

image

Figure 7: EDMX Designer

Now that we have the EDM created, next is to add the Entity Data Source control to the page.

Adding Entity Data Source Control:

Open Default.aspx page and add EntityDataSource control to the page. You can either drag and drop the entity data source control from toolbar and you can write the declarative code by hand. I will drag and drop it from the toolbox onto the page. Use the Entity Data Source control smart tag (either from the ASPX page or from the designer) to configure data source settings. Here is my settings for the data source:

SNAGHTML144def19

Figure 8: Object Context Configuration

SNAGHTML144ee98e

Fig 9: Data Selection Configuration

When we finish the configuration wizard, following code will be generated by the Visual Studio

 
<asp:entitydatasource id="NorthwindEntityDataSource" runat="server" 
defaultcontainername="NORTHWINDEntities" connectionstring="name=NORTHWINDEntities" 
enableflattening="False" entitysetname="Products" 
entitytypefilter="Product" 
select="it.[ProductName], it.[UnitPrice]">
</asp:entitydatasource>

Note that we couldn’t add the top 10 keywords when configuring using the wizard and also there was no way to provide the orderby clause. In order to specify the top keyword just prepend “top(10)”  to the Select text. EntityDataSource supports OrderBy property. So add the property and provide the value “it.UnitPrice DESC”. Here is the final code:

 
<asp:EntityDataSource ID="NorthwindEntityDataSource" runat="server"
                DefaultContainerName="NORTHWINDEntities"
                ConnectionString="name=NORTHWINDEntities"
                EnableFlattening="False"
                EntitySetName="Products"
                EntityTypeFilter="Product"
                Select="top(10) it.[ProductName], it.[UnitPrice]"
                OrderBy="it.UnitPrice DESC" >
            </asp:EntityDataSource>

Add RadHtmlChart:

You can add a RadHtmlChart either by dragging and dropping from the toolbox onto the page or by writing the declarative code on the page. I will be dragging and dropping the control on to the page. Following 3 things need to be taken care while data binding to a EntityDataSource. They are:

  • DataSourceID: Set the DataSourceID property of the RadHtmlChart to the name of the Entity Data Source you want to bind to.
  • DataFieldY: Set the DataFieldY property of the data series to the column name from which the data points have to plotted on the Y axis. I am plotting the UnitPrice on the Y axis so I will set the DataFieldY property to “UnitPrice
  • DataLabelsfield: Set the DataFieldsLabel property of the XAxis to the column name from which we need the X axis data points to be plotted. I am having the products name on the XAxis so I will set the DataLabelsField property to “ProductName”.

Here is the complete code for the RadHtmlChart:

 
<telerik:RadHtmlChart ID="RadHtmlChart1" runat="server" 
                DataSourceID="NorthwindEntityDataSource" 
                Height="600px" Width="1000px">
                <ChartTitle Text="Top 10 Products By Price">
                    <Appearance>
                        <TextStyle FontSize="16px"></TextStyle>
                    </Appearance>
                </ChartTitle>
                <Legend>
                    <Appearance Position="Top">
                    </Appearance>
                </Legend>
                <PlotArea>
                    <Series>
                        <telerik:ColumnSeries Name="UnitPrice" DataFieldY="UnitPrice">
                        </telerik:ColumnSeries>
                    </Series>
                    <XAxis DataLabelsField="ProductName">
                        <LabelsAppearance RotationAngle="90" />
                        <MinorGridLines Visible="false" />
                        <MajorGridLines Visible="false" />
                    </XAxis>
                    <YAxis>
                        <TitleAppearance Text="Price" />
                        <MinorGridLines Visible="false" />
                    </YAxis>
                </PlotArea>
            </telerik:RadHtmlChart>

Here is the output of the chart:

image

Figure 10: RadHtmlChart Output

Summary:

In this post we looked at one more data binding technique with RadHtmlChart. We looked at EntityDataSource, how to configure entity data source and finally how to bind it with RadHtmlChart. With just 3 things to take care its very easy to bind the chart with entity data source. Hope this makes you excited to start working with RadHtmlChart. Do let us know your experience with the RadHtmlChart.

Till next time – Happy Coding !

RadHtmlChart LinqDataSource

How to bind LinqDataSource to RadHtmlChart for ASP.NET AJAX

Introduction:

RadHtmlChart which is a charting component in RadControls for ASP.NET AJAX suite supports binding to variety of data sources. In this post we will look at a scenario where we will see how to bind the RadHtmlChart to LinqDataSource. So the rest of this post is about how to achieve databinding linq data source to RadHtmlChatrt. So lets get started. First we will look at creating a new project in Visual Studio, then we will add a Data Context to the project, then add a LinqDataSource & use the data context to return top 10 products from Northwind database and finally add RadHtmlChart and see how to use LinqDataSource as the source of the chart.

Creating New Project:

To get started, let’s first create a new “C# RadControls Web Application”. Note you need to have our RadControls for ASP.NET suite installed before you can do this. Open a Visual Studio, select File > New Project > Telerik > Web and C# RadControls Web Application.

imageFigure 1: New Project Dialog

Visual Studio will go ahead and create a Web Application. It will have a single page named Default.aspx. For the rest of the demo, we will work with this page.

Add Northwind Data Context:

In order to work with Linq Data Source, I will create a Entity Data Context using our OpenAccess ORM. OpenAccess is a free tool to download and you can use this in your production too without any licensing involved. First Add New Item to your project of type “Telerik OpenAccess Domain Model”. Give it a name and click Ok.

SNAGHTML20d3224b

Figure 2: Add New Item dialog

You will next be presented with a wizard. Here is the wizard dialog screen shots and the settings I have done:

SNAGHTML20d8441d

Figure 3: OpenAccess Model Type

SNAGHTML20d8e599

Figure 4: Database Connection

SNAGHTML20da3474

Figure 5: Database Items – Products Table Selected

SNAGHTML20dafe38Figure 6: Naming Rules

SNAGHTML20dd52ec

Figure 7: Code Generation Settings

Once you click finish, the wizard will create a .rlinq file in your project. If you double click the rlinq file, you will get a visual designer. For this post I have selected only Products table. So you will see the products table visually laid out:

image

Figure 8: OpenAccess Data Model

Next we will see how to add a LinqDataSource and hook that with our data model to return the products data.

Add LinqDataSource:

In order to add LinqDataSource to your page, you can either drag and drop from the tool box or directly code the tag in the source file. What we will do for this demo is, we will handle a specific event called OnSelecting. In the event handler we will instantiate our OpenAccess data model and return the top 10 products ordered by UnitPrice in descending order. Here is the code which defines LinqDataSource control on the page:

<asp:LinqDataSource ID="LinqDataSource1"
        runat="server"
        OnSelecting="LinqDataSource1_Selecting">
    </asp:LinqDataSource>

Here is the event handler definition:

protected void LinqDataSource1_Selecting(object sender, LinqDataSourceSelectEventArgs e)
    {
        NorthwindDataModel context = new NorthwindDataModel();
        e.Result = context.Products
                          .OrderByDescending(p => p.UnitPrice)
                          .Take(10);
    }

Now that we have the data model and the linq data source only thing left out is to add the RadHtmlChart and bind it to linq data source.

Add RadHtmlChart:

So now we are ready to add the chart. You can either drag & drop the chart from the toolbox on to the page or code the chart definition directly on the page. In this post I will just add the RadHtmlChart code and highlight the main points you need to take care while wiring it with LinqDataSource.

So here is my chart definition:

<telerik:RadHtmlChart runat="server" ID="RadHtmlChart1"
                DataSourceID="LinqDataSource1" Width="1000" Height="700">
                <PlotArea>
                    <Series>
                        <telerik:ColumnSeries DataFieldY="UnitPrice" Name="Price">
                            <LabelsAppearance>
                                <TextStyle Bold="true" FontSize="15" Color="Orange" />
                            </LabelsAppearance>
                            <TooltipsAppearance Visible="false" />
                        </telerik:ColumnSeries>
                    </Series>
                    <XAxis DataLabelsField="ProductName">
                        <LabelsAppearance RotationAngle="90" />
                        <MajorGridLines Visible="false" />
                        <MinorGridLines Visible="false" />
                    </XAxis>
                    <YAxis>
                        <LabelsAppearance><TextStyle Bold="true" /></LabelsAppearance>
                        <TitleAppearance Text="Units" />
                        <MinorGridLines Visible="false" />
                    </YAxis>
                </PlotArea>
                <Legend>
                    <Appearance Visible="false" />
                </Legend>
                <ChartTitle Text="Top 10 Products by Price">
                </ChartTitle>
            </telerik:RadHtmlChart>

Here are the things you need to do for wiring up the chart with LinqDataSource:

  • On the chart set the DataSourceID property to the ID of the LinqDataSource
  • When you define a series, set the DataFieldY property to a value “UnitPrice”. Here UnitPrice is the column in my data source which I want to bind and plot the points on Y axis
  • On the XAxis definition, set the DataLabelsField property to a value “ProductName”. Here ProductName is the column to which I want to bind and plot the XAxis points.

And that’s all its there to wiring up the RadHtmlChart to LinqDataSource. Now build the project and run to see the output. Here is a screenshot of the chart we just created:

image

Figure 9: RadHtmlChart output

Summary:

In this blog post I wanted to show one of the data binding option that RadHtmlChart supports – namely LinqDataSource. As we have seen it is very easy to create a LinqDataSource and bind it to RadHtmlChart. We just need to take care of 3 things to make the chart work with the LinqDataSource. I hope this blog post gives you a head start if you are working with LinqDataSource and the RadHtmlChart. Do let us know your feedback/comment you may have on this post.

Till next time – Happy Coding.

RadHtmlChart

How to Bind RadHtmlChart for ASP.NET AJAX to SQL Data Source Control

Introduction:

RadControls for ASP.NET AJAX contains a HTML5 powered charting control known as RadHtmlChart. This charting component outputs SVG and is completely client side rendering of the chart. The charting component will output SVG on modern browsers and falls back to VML when running in older browsers. When it comes to data binding the chart, it supports a wide range of data binding mechanism starting from simple array to your custom object collection. In this blog post we will take a look at one of the data binding mechanism namely binding to SqlDataSource.

Pre-Requisites:

In order to follow this post, you will need our RadControls for ASP.NET AJAX suite. You can download a 30 day free trial from http://www.telerik.com/products/aspnet-ajax.aspx. So download the trial and install it on your system. If you already have a licensed version installed that’s even better. Following sections assume that you have done this.

Getting Started:

First lets create a “C# RadControls Web Application”. Fire up a Visual Studio and do the customary File > New Project action. In the new project dialog, you will see Telerik as one of the installed template. Expand Telerik and you will see Web as one of the nodes. Select Web and you will presented with different project templates. Select “C# RadControls Web Application”. Give your project a name and click Ok.

SNAGHTML1665f329Fig 1: New Project Dialog

You will be presented with 2 more dialogs to select theme and web settings. Select appropriately and finish the wizard. Visual Studio will go ahead and create the project.

Adding SQL Data Source to the page:

The project template will add all references required for Telerik ASP.NET Ajax controls, necessary updates to Web.config and create a Default.aspx page. We will be working with Default.aspx for this blog post. Since we need to bind the chart to a SqlDataSource control, lets go ahead and add one to the page. You can configure the data source using the smart tag option in the ASPX page or just go to design and select the smart tag on the control.

image

Fig 2: Configuring SqlDataSource

Clicking on Configure Data Source, will open “Choose Your Data Connection” dialog. So go ahead and set up your connection for the data source. For this example I will be using Northwind as the database and Products table. Once you pass the connection settings dialog, you will be required to configure the select statement. For this demo I will just do a select of top 10 products by their price in descending order. Here is how my test query looks like:

SNAGHTML1678372cFig 3: Test Query Dialog

Click Finish to finish configuring the SqlDataSource. Next we will see how to work with RadHtmlChart.

Adding RadHtmlChart to the page:

From the Toolbox, drag and drop a RadHtmlChart on the page. In the ASPX page, select the smart tag on the RadHtmlChart. It will open a configuration window. We will configure the RadHtmlChart now to work with SqlDataSource control.

image

Fig 4: RadHtmlChart Smart Tasks

Select the DataSource from the Choose Data Source drop down.Then click on the Open Configuration Wizard. You will see the following Configuration Wizard pop up:

SNAGHTML167ef05cFig 5: RadHtmlChart Configuration Wizard

We will go through the configuration one by one.

Chart Type:

For this blog post I will be going with Column chart. So in the Type tab, select Column Chart.

SNAGHTML1680fd76Fig 6: Chart Type selection

Data:

Now to let the chart know where to read the data from, select the Data tab. The data source would have been defaulted to the sql data source we had added in previous section. Now we need to add a series to the chart. Click on the “+” button next to the Series section. Provide Name, AxisName, Type of the series and what field in the data source should the Y axis data point be read from. For this example UnitPrice will be my Y axis data point. I will be plotting the price on the Y axis. Here is how my settings look like:

SNAGHTML1684d53e

Fig 7: Series configuration

X Axis:

Now we need to configure how our X axis will look like. If you want to customize the Min Value, Max Value, Step and Axis Crossing Value or you want to hard code the X axis items, you can do so in the XAxis tab.

SNAGHTML168eec95

Fig 8: XAxis Configuration

Once done with the settings click Apply. Now we need to show the product name as the X axis data point. For that we will need to get back to the code, add a property called “DataLabelsField” and value of this property will be the column name from the data source which will contain the data points. In our case this will be ProductName column. Here is the code:

<XAxis DataLabelsField="ProductName"></XAxis>

Y Axis:

Similar to XAxis you can customize how you want the YAxis to look. The YAxis tab provides you options to customize the axis and also allows you to add additional Y Axis to the chart.

SNAGHTML1694c8e0

Fig 9: YAxis Configuration

In our current example, we don’t have to do anything here. The Min and Max value and Step will be calculated automatically based on the data source.

Legend, Title:

Last but not the least, we can customize how the Legend and the Title of chart should look like. Click on the Legend/Title tab and provide the appropriate data. Here is my settings:

SNAGHTML169795df

Fig 10: Legend, Title Configuration

Click Ok when done. This will generate the following code in the ASPX:

<telerik:RadHtmlChart ID="RadHtmlChart1"
runat="server" DataSourceID="SqlDataSource1">
 <ChartTitle Text="Top 10 Products By Price">
 <Appearance>
 <TextStyle FontSize="16px"></TextStyle>
 </Appearance>
 </ChartTitle>
 <Legend>
 <Appearance Position="Top"></Appearance>
 </Legend>
 <PlotArea>
 <XAxis DataLabelsField="ProductName">
 </XAxis>
 <YAxis Name="Price">
 </YAxis>
 <Series>
 <telerik:ColumnSeries Name="Price"
 DataFieldY="UnitPrice" />
 </Series>
 </PlotArea>
 </telerik:RadHtmlChart>

So we are now done with the RadHtmlChart configuration. We have configured it to work with the Sql Data Source we added in the previous section. We have set what chart we want and configured the series, XAxis, YAxis and Legend/Title. Its time now to look at the output.

Output:

Build and run the project. It should open up a browser and show you the following chart output:

image

Fig 11: RadHtmlChart output

Conclusion:

In this post we saw how easy it is to configure RadHtmlChart to work with Sql Data Source. Also we looked at the RadHtmlChart configuration wizard which makes it super easy to configure the chart with various settings and best of all you don’t have to write any code. The configuration wizard gives you a GUI and when you are done with the settings, it will generate the code for you. I say this is a productivity gainer. Let us know how you are using RadHtmlChart in your projects. We will love to hear your feedback or suggestions. So do drop in a line in the comments.

Till next time, Happy Coding.

Radcontrols for ASP.NET AJAX

Resources for Webinar “HTML5 Charting with RadControls for ASP.NET AJAX”

On Jul 25 we conducted a webinar titled “HTML5 Charting with RadControls for ASP.NET AJAX”. This is part of the ongoing webinar series we here at Telerik India are doing targeting the APAC region. We call this the Telerik .NET Ninja Developer Webinar series.

RadControls for ASP.NET AJAX is one of our most sought out suite of controls. With over 70+ controls on ASP.NET AJAX platform, this gives you a complete development toolset and also a rapid UI development suite for your project needs. You can know more about our RadControls for ASP.NET AJAX suite at: http://www.telerik.com/products/aspnet-ajax.aspx

Slide Decks:

Here is the slide deck used in the webinar:

Webinar Video:

Many of you had asked whether the webinar will be available as a recorded video for later viewing. We record all our webinars and here is the video of this webinar:

Q & A:

A lot of questions were asked in the webinar. We were able to answer some of the them. So I will be trying to collate all the questions asked during the webinar and put them here in this blog post. So here are the questions from the webinar and their answers:

Q: Can we add series items dynamically and show legend with this dynamic name?
A: Yes this is supported. You can use data source for dynamically creating a chart based on the data in the DB.

Q: Can these charts be exported?
A: Yes you can. Take a look at the following example: http://www.telerik.com/community/code-library/aspnet-ajax/html-chart/exporting-radhtmlchart-to-png-and-pdf.aspx

Q: Is there a version available for MVC?
A: Yes we do. Please look at http://www.kendoui.com/server-wrappers/mvc.aspx

Q: is there a option for additional x-axis?
A: No. We support additional Y axis

Q: How many Additional Y Axis we can add?
A: Unlimited.

Q: Do we need to install SVG viewer?
A: No. All browsers support SVG. So no need to install anything. Older browsers support VML. So we fallback to VML when we see that its an older browser.

Q: We already have Telerik controls, do we have chart control there?
A: Yes you have. RadHtmlChart is supported from Q2 2012 onwards.

Q: Can we zoom or pan this chart or lines?
A: RadHtmlChart at the moment does not support the Zoom or Pan feature.

Q: Are these printer freindly?
A: While the charts can be printed, we have a reporting suite more suitable for printing requirements that supports charts, barcodes etc. http://www.telerik.com/products/reporting.aspx

Q: Does this supports mobile development also?
A: We have another suite more suitable for mobile development called Kendo DataViz. http://www.kendoui.com/dataviz.aspx

Q: What is the benefit of HTML 5 charts than Visual Studio .net , i mean asp.net chart?
A: ASP.NET charting controls generate the charts on the server side as IMAGE and then send it to the client. Where as RadHtmlChart does client side rendering of the chart. RadHtmlChart outputs SVG which is a HTML5 standard where as ASP.NET chart is still a IMAGE.

Q: Can we create speedometer dials using the html5 instead of dojo tool kit
A: http://demos.kendoui.com/dataviz/radial-gauge/index.html

Q: Chart drill down is also possible?
A: No. Drill down is not supported at the moment. But you can implement this easily by listening to OnSeriesClicked client side event.

Q: Is there an option to update the controls periodically to fetch data from db?
A: You will need to implement this by writing some code. Since RadHtmlChart supports client side binding, you can ping a JSON end point, get the data and bind it to the RadHtmlChart on the client side. You can have a window timer and get the data periodicaly.

Q: What is the difference between HTML 5 Application Cache and regular HTML Browser Cache?
A: App Cache is a feature introduced by HTML 5 spec that is available for developers. Browser Cache is a location where browser caches all data e.g. images, HTML etc.

Q: Are more than 5 colors available in pie chart?
A: With the release of Q2 2013, RadHtmlChart now has 10 built-in colors for the series for each skin.

Webinar Giveaway – .NET Ninja T-Shirt:

We normally giveaway 2 .NET Ninja t-shirts as part of the webinar. So we have selected the following two persons to receive out t-shirts:

  • Lavanya Koduru
  • Namrata Dhanak

Congratulations to the winners. Others don’t worry, make sure you attend our next webinar and who knows you could be the winner of the t-shirt.

Thanks to one and all who made it to the webinar. We hope it was useful and looking forward to you joining us in future webinars.

Till next time – Happy Coding!

Kendo UI Logo

Resources for Webinar “Developing ASP.NET MVC Applications Quicker with Kendo UI”

On Jul 11 we conducted a webinar titled “Developing ASP.NET MVC Application Quicker with kendo UI”. This is part of the ongoing webinar series we here at Telerik India are doing targeting the APAC region. We call this the Telerik .NET Ninja Developer Webinar series. You can take a look at the Jun-Jul schedule here: https://telerikhelper.net/2013/05/24/telerik-webcasts-june-july/

image

Kendo UI is a HTML5 based JavaScript framework for developing HTML5 based sites or apps. Its everything you need to develop the sites and apps. Its one package which will give you pretty much everything you need to develop a HTML5 based apps or sites. Although it is a client side framework and that means a lot of JavaScripting, we have you covered if you want to develop on the server side. We have what we call as ASP.NET MVC Wrappers for Kendo UI. This give you the power of JavaScript but the productivity of server side. So this webinar was all about how you can build UI quicker in ASP.NET MVC using Kendo UI.

Slide Deck:

Here is the slide deck which I used for the webinar:

Webinar Video:

For those of you who missed attending the webinar live, we have it covered for you. We record all our webinars and so was this one. Here is the recording of the webinar:

Questions & Answers:

During the webinar, my team tried hard to answer as many questions as we can. With the interest of the time we normally collect all your questions and try to answer them through this recap blog post. So here is all the questions and answers for them:

Q: What is the license cost or purchase cost for Kendo ?
A: kendo UI costing is available at this page: http://www.kendoui.com/purchase.aspx

Q: Can we use Kendo UI for asp .net apps without MVC?
A: Yes you can. But note that Kendo UI is all about client side. So no server side programming of Kendo UI controls. You will need to use JavaScript way of working with Kendo UI in technology other than ASP.NET MVC. The server side wrappers are available only for ASP.NET MVC.

Q: Is Kendo UI available as part of Telerik Controls ?
A: You can buy Kendo UI as a single product. Here is the Kendo UI pricing – http://www.kendoui.com/purchase.aspx.  Also, if you buy any of our DevCraft bundles, kendo UI is included in the bundle. Here is our DevCraft bundle pricing – http://www.telerik.com/purchase.aspx

Q: Any live application developed using kendo UI?
A: You can take a look at www.kendouimusicstore.com. This is a famous reference app for ASP.NET MVC which was developed by Microsoft. We took the same and converted it to a Kendo UI application with front end being completely done using Kendo UI controls and back end powered by Web API.

Q: Before starting development, which language knowledge required?
A: If you know JavaScript, then you know Kendo UI. Kendo UI is built on JQuery. So nothing new to learn. If you want to program Kendo UI using a server side technology – we support Server Side Wrappers for ASP.NET MVC, JSP and PHP.

Q: Can we use kendo UI with Web API?
A: Yes absolutely. Kendo UI has Data Source that easily connects with Web API.

Q: To develop app in Kendo UI little bit JS is enough?
A: Yes, you do require JS knowledge especially awareness of jquery kind of syntax. But you can directly use ASP.NET MVC, PHP or JSP server side technologies too.

Q: How do we decide between jQuery UI and Kendo UI? Do we have comparison charts between these products?
A: Take a look at this article – http://jqueryuivskendoui.com/

Q: Will Kendo UI Support SharePoint 2010?
A: Kendo UI is a client side control set. As long as you develop a webpart which supports accessing external JavaScript and Stylesheet, Kendo UI can be used anywhere.

Q: Can we use knockout.js in Kendo UI or it’s not required because it’s different JavaScript library similar to knockout.js
A: Kendo UI has all the capabilities that you require (even of KO). But you can also use KO with Kendo UI.

Q: What kindsof data sources are supported?
A: Out of the box Kendo UI Data Source can handle JSON and XML.

Q: Does it support multiple cultures?
A: Globalization is one of the features in built in Kendo UI. So you can include the appropriate culture Kendo UI JS file and set the culture you want to work with. Rest will be handled by Kendo UI.

Q: Is Kendo UI a jquery plugin?
A: Kendo UI is not a Jquery plugin or a clone. Kendo UI is written from ground up but is based on Jquery. Jquery is the only dependency Kendo UI has. All the constructs in Kendo UI are similar to Jquery so that the learning curve is less.

Q: What are the key features of Kendo UI Mobile?
A: You can take a look at our Kendo UI Mobile product page – http://www.kendoui.com/mobile.aspx

Q: Is there any Kendo Controls for Winforms?
A: No. Kendo UI is for Desktop Browser based application and Cross Platform Hybrid Mobile Application development. for WinForms we have a separate control suite which you can take a look at here – http://www.telerik.com/products/winforms.aspx

Q: Can we have Scheduler control in Kendo UI?
A: Yes. Scheduler control is available as part of Q2 2013 release of Kendo UI.

Q: Can we use Kendo UI to show data in modal and provide CRUD operations with validations in Kendo UI
A: Kendo UI Grid already supports this feature. Take a look at our Grid demos online at – http://demos.kendoui.com/web/grid/index.html

Q: Kendo UI is only a Java Script library or any server side components are also involved?
A: Kendo UI is a client side HTML5 based JavaScript framework. We have server side wrappers to speed up your Kendo UI programming. The wrappers just output the necessary JavaScript code which otherwise you would have to write.

Q: Can we bind data from SQL DB?
A: You need to create Web Service or Web API which can return the data as JSON. Kendo UI has a JavaScript data source which can work out of the box with a service returning JSON payload or xml payload.

Q: Does that mean apps developed using Kendo UI can be used on mobile browser?
A: Yes. Kendo UI Web controls are touch aware and can run on all modern browsers.

Q: How do we compile to native app after completing the app in Kendo UI mobile?
A: If you are using our Cloud Based IDE – ICENIUM, it lets you build for iOS and Android platform right from the IDE. Otherwise you will need to use PhoneGap build mechanism to generate the package.

Q: How Kendo UI is different when compared with Knockout.Js ?
A: As far as I know, Knockout.js is a library to achieve data binding where as Kendo UI is a complete framework which provide Widgets/MVVM/Validation etc.

Q: Is there any project template for VS2012 from kendo UI?
A: Yes. When you install Kendo UI using our installers, we ship in a Visual Studio project template to speed up your ASP.NET MVC development with Kendo UI.

Q: Can we integrate WPF app in this Kendo UI?
A: WPF is a different technology set. Kendo UI is meant for Web applications & not WPF.

Q: What are the mandatory script files need to be included in kendo UI on working in MVC 4?
A: You need to include Kendo UI Web JavaScript and Kendo Stylesheet files into your project.

Q: Does charts in DataViz support on IE8 ?
A: Yes, it is supported.

Q: Can the CSS be modified as per our need?
A: Yes absolutely. We even provide an online tool to facilitate this: http://demos.kendoui.com/themebuilder/index.html

Q: Can you talk about Kendo UI licensing?
A: Kendo UI is licensed on per developer basis. For more details and discounts, please write to sales@telerikindia.com

Q: Do you have any facility for group license?
A: Yes, absolutely. Please write to sales@telerikindia.com

Q: In the era where the line between PC/Laptop display and mobile display getting blurred day by day, e.g. PCs getting touchscreen, mobiles/tablets getting Full HD/Retina displays, how one should plan their investment for web application? I mean if we are targetting global reach, how you recommend Kendo UI for mobile/MVC?
A: Kendo UI Mobile is used to create Cross-Platform Apps. Using that you create apps for devices and phones . Kendo MVC Wrapper is used in MVC based web apps .

Q: Is this light weight control?
A: Yes, Kendo controls are very light weight controls with no addition to ViewState etc. Since it can use the client side processing capabilities as well, the performance is phenomenonal. It also supports virtualization etc.

Q: Can you elaborate more on “Virtualization”?
A: do take a look here: http://demos.kendoui.com/web/grid/virtualization-remote-data.html

Q: what is MVVM framework?
A: Kendo comes with its own optimized MVVM framework. Please refer to the following webcast that we had done on the same: https://telerikhelper.net/2013/05/31/resources-for-webinar-mvvm-validation-using-kendo-ui-in-web-applications/

Q: Can we use trail version control in any professional web site?
A: No, trial license explicitly forbids you from using it in live/professional web sites. Please write to sales@telerikindia.com and we can help you further with more information.

Q: Not clear how chart series changes according to data
A: Learn more about charts here http://demos.kendoui.com/dataviz/bar-charts/index.html

Q: How can we do conditional validation in KENDO UI?
A: Please do take a look at the demo here: http://demos.kendoui.com/web/validator/index.html

Q: Kendo is for web based or mobile based services?
A: Kendo UI web is meant for web apps. Kendo UI Mobile is meant for mobile. They both share a common base framework.

Q: Will there be wrapper for ASP.NET wrapper in future. We currently use ASP.NET Telerik.
A: We already have a wrapper for ASP.NET MVC. If you are using WebForms, the RadControls are the ideal controls to use. We are constantly adding & updating those controls.

Q: Can we use Kendo UI for java web application
A: Yes, we have a JSP wrapper for the same. More details here: http://www.kendoui.com/server-wrappers/jsp.aspx

Q: Can i use knockout.js with Kendo UI mvc
A: Pls take a look here: http://rniemeyer.github.io/knockout-kendo/

Q: Can we use kendo controls in VS2008
A: Sure, you can. they are simple JS libraries that can be added. It has no IDE requirements.

Q: Is there any other separate editor for Telerik development?
A: We don’t have any IDE requirement for Kendo UI. If you are doing MVC development you will want to use VS and Kendo UI wrapper for MVC

Q: Does the kendo mobile support in all the browser?
A: Yes. It only requires HTML 5 support in the browser. All modern browsers support that.

.NET Ninja T-Shirt Giveaway:

we select 2 person from the webinar attendees and give away our .NET Ninja T-Shirt in each of our webinars. we have picked up 2 lucky persons in this webinar too. They are:

  • Karthikeyan R

  • Harvinder Singh

Congratulations to the winners. We will be contacting you shortly and we will ship your t-shirts. Rest of the folks don’t worry – we still have loads of webinars lined up for this year. So do attend our future webinars without fail and try your luck to be the .NET Ninja.

Till next time – Happy Coding.

RadControls for Silverlight

Silverlight RadCartesianChart: Reading data from WCF Service

Overview:

As part of evangelism job I speak to a lot of customer and try to tell them how they can use our controls. Couple of days back I was speaking one customer who was evaluating our RadControls for Silverlight suite and in particular was working with RadCartesianChart control. He saw all our demos of RadCartesianChart we ship and said that they all provide data from the code behind and are static in nature. They were looking for examples which tell them how to consume data from a WCF service and provide it to RadCartesianChart. So this blog post is all about how do we provide data to ChartView from a WCF Service. So lets get started.

Create RadControls Silverlight Application:

First thing to do, is to create a new project of type RadControls Silverlight Application. I am using Visual Studio 2012 for the rest of this blog post. You can do this in VS2010 too. Open Visual Studio IDE and select File > New Project. In the New Project dialog select Telerik > Silverlight > C# RadControls Silverlight Application. Give a name for the project and click ok.

SNAGHTMLf99013 Fig 1. New Project Dialog

Next, Visual Studio will ask you whether to host the SL app in a new web site and what should be the SL version. I am opting SL Version 5 for the sake of the demo. Here is the screenshot of the dialog:

SNAGHTMLfc02a3

Fig 2. Silverlight Application Settings Dialog

Since we have selected RadControls Silverlight Application, next you will get a “Project Configuration Wizard” where you will select the Components you require in your project. Since I am only interested in Charting, I will select only Telerik.Windows.Controls.Charting and the wizard automatically selects the dependent components for me. Here is the screenshot of the dialog:

SNAGHTML100ba2f

Fig 3: Telerik Project Configuration Wizard – Silverlight Settings Dialog

Clicking next will take you to theme settings. I am selecting Windows8 theme that comes out of the box. Click finish to let Visual Studio create the project.

SNAGHTML1023d24

Fig 4: Telerik Project Configuration Wizard – Theme Settings Dialog

Once Visual Studio finishes creating the project, here is how the solution will look like:

image

Fig 5: Solution Explorer

You can see that we have 2 projects in the solution. One is the actual Silverlight app and another is the Web app which will host the Silverlight XAP. Next we look at how to create a WCF service.

Create WCF Service:

For the sake of the demo, I will be creating a WCF service which does the following things:

  • Create a ProductModel which will act as a DataContract. It will have ProductID, Name and Price as properties
  • Create a WCF Service which will connect to Northwind Database.
  • Have one Operation called GetTop10ProductsByPrice.  This will execute a simple query to fetch top 10 products price wise and convert that into list of ProductModel and return it to client

Product Model Class:

We will create the WCF service in Web App project. We App will host our service too. Create a new folder called “Model” and create the ProductModel class. Here is the code for the ProductModel class:

[DataContract]
public class ProductModel
{
private int productID;
[DataMember]
public int ProductID
{
get { return productID; }
set { productID = value; }
}

private string productName;
[DataMember]
public string ProductName
{
get { return productName; }
set { productName = value; }
}

private decimal price;
[DataMember]
public decimal Price
{
get { return price; }
set { price = value; }
}
}

Chart Data WCF Service:

First create a folder and name it as Services. Right click on Services folder and select Add > New Item. In Add New Item dialog, select Silverlight from installed templates and then Silverlight-enabled WCF Service. Lets name the service as ChartDataService.svc. Click Add to create the service.

SNAGHTML185ec2a
Fig 6: Add New Item dialog

Next, since we need to connect to Northwind database, add a connection string to Web.config in the Web project. I have named my connection string as “NorthwindConnection”.

Next, in the ChartDataService, remove the generated operation contact with name “DoWork”. Instead add a new Operation and lets call it “GetTop10ProductsByPrice”. In this function we will connect to Northwind Database using SQL Connection and execute a simple query. We will loop through the data reader and generate a list of ProductModel and return the list. Here is the code for GetTop10ProductsByPrice operation:

[OperationContract]
        public IList GetTop10Products()
        {
            string nwConn = ConfigurationManager.ConnectionStrings["NorthwindConnection"].ConnectionString;
            var prodList = new List();
            using (SqlConnection conn = new SqlConnection(nwConn))
            {
                const string sql = @"SELECT TOP 10 ProductID, ProductName, UnitPrice
                                     FROM Products
                                     ORDER BY UnitPrice DESC";
                conn.Open();
                using (SqlCommand cmd = new SqlCommand(sql, conn))
                {
                    SqlDataReader dr = cmd.ExecuteReader(CommandBehavior.CloseConnection);
                    if (dr != null)
                        while (dr.Read())
                        {
                            var cust = new ProductModel
                            {
                                ProductID = dr.GetInt32(0),
                                ProductName = dr.GetString(1),
                                Price = dr.GetDecimal(2)
                            };
                            prodList.Add(cust);
                        }
                    return prodList;
                }
            }
        }

Consuming WCF Service from Silverlight App:

Now that we have a service, next thing to do is to reference that service in our Silverlight application. Right click on Silverlight application and select “Add Service Reference”. In the Add Service Reference window, click on Discover button. The WCF Service we created in the previous section will be automatically discovered and will list down the operation it supports.

SNAGHTML125209f

Fig 7: Add Service Reference Dialog

Now click on the Advanced button located in the bottom left side of the dialog to open the service reference settings dialog. In the Service Reference Settings dialog, under Reuse types in referenced assemblies, select the System related assemblies and not the Telerik ones. Here is a screenshot of the dialog:

SNAGHTML1290d1f
Fig 8: Service Reference Settings Dialog

Clicking Ok will add a service reference in Silverlight app which can be invoked at runtime to fetch the data required for the chart.

Add RadCartesianChart Control:

Next we need to add the ChartView control on the screen. In order to do this, Open MainPage.xaml, identify the ChartView control from the toolbox, drag and drop it on to the MainPage.XAML. Give the chart a name. Here is the code to CartesianChart markup:

<telerik:RadCartesianChart Grid.Row="1" 
                            x:Name="chartView" 
                            Palette="Metro">
    <telerik:RadCartesianChart.VerticalAxis>
        <telerik:LinearAxis Title="Price (USD)"/>
    </telerik:RadCartesianChart.VerticalAxis>
    <telerik:RadCartesianChart.HorizontalAxis>
        <telerik:CategoricalAxis Title="Products"/>
    </telerik:RadCartesianChart.HorizontalAxis>
    <telerik:RadCartesianChart.Series>
        <telerik:BarSeries x:Name="barSeries1" 
                            ItemsSource="{Binding}" 
                            ValueBinding="Price" 
                            CategoryBinding="ProductName" 
                            ShowLabels="True" />
    </telerik:RadCartesianChart.Series>
</telerik:RadCartesianChart>

Lets take a closer look at the code. I first define the vertical axis and tell the chart that it’s a linear axis. I also set title to the vertical axis and call it “Price (USD)” because my vertical axis will hold the price of products. Next, I define horizontal axis and and tell the chart that it’s a Categorical axis. My horizontal axis will be used to represent the product itself, so setting the title of horizontal axis as “Products”. Now that we have finished setting the axis only thing left now is to create a series. So I define Series and create a BarSeries. I have given a name for the bar series and will use this name in code behind to perform data binding. We need to provide the data to the series – so lets set the ItemsSource to the Binding it will get at runtime. Now we need to tell what fields corresponds to the value of the series and what corresponds to the category axis of the series. Set ValueBinding to “Price” field and CategoryBining to “ProductName”.

Data Binding:

We defined the UI part of the chart. Now to provide data to the chart. We had add a service reference to our WCF service earlier. So we will have a client class created in the Silverlight project and will be known as ChartServiceClient. So we will use this client class to invoke the “GetTop10Products” operation. Here is the code to invoke the service and bind the data received to the chart view:

void MainPage_Loaded(object sender, RoutedEventArgs e)
{
            ChartServiceClient client = new ChartServiceClient();
            client.GetTop10ProductsCompleted += client_GetTop10ProductsCompleted;
            client.GetTop10ProductsAsync();
}

void client_GetTop10ProductsCompleted(object sender, GetTop10ProductsCompletedEventArgs e)
{
            var data = e.Result;
            this.chartView.DataContext = data;
}

As you can see we invoke the operation asynchronously. When the operation completes we get the data and set it as the DataContext of the Chart. Run the application and when the page loads we should get the Chart as below:

image

As you can see we get our bar series graph which will show the price (in USD) on the vertical axis and products in the horizontal axis. We see the top 10 products by price.

Conclusion:

In this blog post, what I attempted was a very specific scenario which is most common on real world. As I said in the beginning, the customer I was talking to wanted to see an example of how to connect to a WCF Service, get data from the service and bind that data to Chart. So this blog posts outlines the steps required to make the chart work with WCF Service, Hope this is useful to many of you who may be having the same scenario. Do let me know your feedback if any.

Till next time – Happy Coding!

Resources for Webinar “Reporting Solution for ASP.NET Application using Telerik Reporting”

On Jun 13th we conducted a webinar titled “Reporting Solution for ASP.NET Applications using Telerik Reporting”. This is part of an ongoing webinar series we here at Telerik India are doing targeting APAC region. We call this the Telerik .NET Ninja Developer Webinar Series. You can take a look at the Jun-Jul schedule here: https://telerikhelper.net/2013/05/24/telerik-webcasts-june-july/

image

Telerik Reporting is a lightweight reporting solution for all .NET cloud, web, and desktop platforms (Azure, Silverlight, WPF, ASP.NET and Windows Forms) which targets developers and end-users alike. Rich interactive and reusable reports can be created by developers in Visual Studio, and by end users in the desktop-based Report Designer. With the help of Telerik Reporting users can examine and probe data, export reports to Microsoft Office Word and Excel for further analysis, and even present them as PowerPoint documents.

Slide Deck:

Here is the slide deck which I used for the webinar:

Webinar Video:

As usual we have this webinar recorded. So if you missed attending the webinar live, you still have a chance to catch up and that too at your own time. Here is the video recording:

Question & Answers:

During the webinar may questions were asked by the audience. We tried our best to answer as many as we can. We will try to address each and every questions from the webinar in this section.

Q: How to save report data in cache?
A: Data is provided to a Telerik Report using the DataSource property. So you can actually make use of the ASP.NET Caching mechanisms and store your report data. Then at runtime read the data from cache and provide it to the report data source.

Q: Can Telerik Reporting be used in SharePoint?
A: Yes you can. Here is the documentation – http://www.telerik.com/help/reporting/asp-net-report-viewer-deploying-web-reportviewer-in-moss.html

Q: Can I use Telerik Reporting in ASP.NET MVC?
A: Yes you can. Take a look at the following blog post: http://blogs.telerik.com/telerikreportingteam/posts/13-03-26/telerik-reporting-in-mvc-sure-it-takes-8-quick-steps-

Q: Does report have any source code?
A: Yes. The Report is a POCO class inhering from Telerik.Reporting base class. So although you design the report using the designer, it is basically a C# class file under the hood.

Q: Is it building the app while we see the preview?
A: When you preview, yes the class library project in which the report is hosted is built.

Q: Difference between Preview and Html Preview?
A: Preview uses Windows Host and it is as if you are hosting the report in a Windows Application. Html Preview uses IE as the host and it is as if you are hosting the report in a Web Application.

Q: Can i use SSAS as data source here?
A: Yes. You can. Take a look at this: http://www.telerik.com/products/reporting/managing-data.aspx#populating-data

Q: How to create report from WCF service?
A: You can always feed the report with a data coming from WCF Service. Telerik Reporting support Business Objects as a valid data source.

Q: Can we export the report using report viewer?
A: Yes, absolutely. Export to PDF, Excel and other formats.

Q: Can we style and individual cells? and copy the style from one to other?
A: Yes each individual cells can be styled. You can copy one style to another in the designer.

Q: Can’t we add this thumbnail Image in during report creation through wizard ?
A: Yes you can. The demo was to showcase our Data Explorer window feature which makes it easy for your to drag and drop data fields on to the designer.

Q: Does it can have navigation from one report to other report like drill down?
A: Yes you can do that. Here is a short video which showcases how to do that: http://tv.telerik.com/watch/reporting/creating-drilldown-reports-with-telerik-reporting

Q: will the Telerik menu come if we install Telerik Reporting in our machine
A: Yes. when you install Telerik Reporting you will see the Menu Item inside your VS.

Q: Can we give parameter at run time?
A: You normally define the report parameters at design time itself and use the report parameters in your queries to filter. You can always set value of a parameter at run time.

Q: What is the difference between Telerik Reports and RDLC reports?
A: Here is a interesting discussion on this subject on Stack Overflow – http://stackoverflow.com/questions/1444144/telerik-reporting-over-ssrs

Q: Can we create a drop down list instead of textbox to pass a parameter?
A: Yes you can. In fact you do not have to do anything except to say that the report parameter supports MultiValues. You do this by setting the MultiValue=true in the report parameter properties.

Q: Can we convert Crystal Report and SSRS Report into Telerik reports?
A: Yes. At the moment we support Crystal/Active/Xtra report conversion but not SSRS. Take a look at this: http://www.telerik.com/support/kb/reporting/general/converting-reports-from-various-versions-of-crystalreports.aspx

Q: Where we can get those trial downloads?
A: You can get the trial downloads from the following URL: http://www.telerik.com/products/reporting.aspx

Q: If any changes is done to Report Library as in this case today, will it get auto refresh?
A: You will need to redeploy the report library DLL to you Web Application Bin folder and you will have the refreshed report.

Q: Can we schedule the report subscriptions like SSRS?
A: Nope. Telerik Reporting is not a side reporting solution. So out of the box we do not have this feature. But having said that – its easy to build it. The reports are nothing but C# classes under the hood so you can build a scheduling agent which programmatically creates the report, export it to a format of your choice and send it through email.

Q: We have similar functionalities available with SSRS, Just wanted to know what additional features we have with Telerik reporting ?
A: A great comparison is found here: http://stackoverflow.com/questions/1444144/telerik-reporting-over-ssrs

Q: Should we use Dataset in place of giving the physical database connection in Telerik report ?
A: The ObjectDataSource will let you bind to any objects that you might have in BLL. Take a look here for step to step: http://blogs.telerik.com/blogs/13-06-06/reporting-or-control-suites-what-to-use-when-part-2

Q: Can we call this report from c# code without report viewer and get result in the PDF file?
A: Yes you can. The report is basically a C# class file. You can instantiate this at runtime and export to any format of your choice.

Q: Can we edit any grid row/column as in other grid?
A: No. This is reporting so no editing feature.

Q: Can we use any of web control as input parameter for report viewer?
A: You do not need to use any web control. Report Viewer itself is a control as part of our RadControls for ASP.NET AJAX suite.

Q: Do you have loading window when you click on Print Preview?
A: Yes we have. When you click on Print Preview, we will show a “Generating  Report” loading animation.

Q: Can we expand/collapse a particular group as a bunch of values?
A: Yes you can. The Expand/Collapse feature is supported.

Q: How can we display the Telerik reports using viewer in Winforms?
A: WinForms suite also contains Report Viewer control. So the same report can be displayed on WinForms too.

Q: Can we create charts – like pie, bar charts?
A; Yes you can. Check out our demos to take a look at the charting capabilities.

Q: Can we use Telerik reporting for Analytical data source? i.e. SSAS – cube n all
A: Yes. Take a look here: http://www.telerik.com/help/reporting/cubedatasource-configuring-project.html

Q: Can we have dependency of parameters, ex: first parameter is Countries, when country is selected, States should be displayed in second parameter
A: Yes you can. The cascading of parameters is possible.

Q: Can we directly print reports without print preview?
A: Yes. The report viewer has a print report button which will invoke the OS print dialog.

Q: Export functionality is inbuilt or we need to do some coding for it?
A: Export to different formats is in built in Report Viewer control. You don’t have to do anything extra to use the feature.

Q: Can I email the report directly without showing the report to user?
A: You will need to use Reporting API to achieve this functionality.

Q: Will it also be compatible with the recent version s of any report viewer like with excel 2010 or later versions?…I am asking in terms of generating output format
A: Yes the generated reports are compatible.

Q: Can we have docs/examples to implement Telerik reporting – sample projects?
A: Sample projects are installed once you install Telerik Reporting on your machine. More demos can be found at: http://demos.telerik.com/reporting/home.aspx

Q: Can we put a calendar in filters ?
A: When you create a parameter of type Date/Time, the UI for that parameter is automatically rendered as a calendar.

.NET Ninja T-Shirt Giveaway:

we select 2 person from the webinar attendees and give away our .NET Ninja T-Shirt in each of our webinars. we have picked up 2 lucky persons in this webinar too. They are:

  • Manoj Singh
  • Sulabh Sarna

Congratulations to the winners. We will be contacting you shortly and we will ship your t-shirts. Rest of the folks don’t worry – we still have loads of webinars lined up for this year. So do attend our future webinars without fail and try your luck to be the .NET Ninja.

Till next time – Happy Coding.

Resources for webinar “Building Uncomplicated Single Page Apps (SPAs) with Kendo UI”

On Jun 6th we conducted a webinar titled “Building Uncomplicated Single Page Apps (SPA) with Kendo UI”. This is part of an ongoing webinar series we here at Telerik India are doing targeting APAC region. We call this the Telerik .NET Ninja Developer Webinar Series. You can take a look at the Jun-Jul schedule here: https://telerikhelper.net/2013/05/24/telerik-webcasts-june-july/

SPA or Single Page Application is a way of building web applications which literally consists one single html page.  The application works by creating screens on the client side which is basically nothing but templates and getting the required data at different intervals as JSON payloads. So we showcased Kendo UI power and feature of building these SPA without any complication. The backbone of Kendo UI SPA is Rouer, View and Layout. So through this webinar I showcased how a SPA can be built with much hassle and very easily. Hope you go through the slide decks and the video recording of the webinar and find it useful for you.

Slide Deck:

Here is the slide deck used for the webinar:

Video Recording:

As many of you have been asking, we did record the webinar. So here is the video of the webinar:


Questions & Answers:

During the webinar there were many questions that you guys had asked. We tried our best to answer as many as we can. As a regular practice, we answer all the questions in the recap post. So here are all the questions and answers for them:

Q: where we can use SPA?
A: Anywhere User experience is critical – both enterprise and consumer apps.

Q: How does grid adapt to mobile?
A: Grids are not ideal for mobile applications. You may want to use ListView if you are primarily targeting mobiles.

Q: What is an Observable?
A: Observable is Kendo UI object that is used for supporting MVVM.

Q: How can i design Grid View UI as look like Windows 8?
A: You need to put custom CSS on Kendo Grid to achieve Windows 8 metro GridView look

Q: Do we have any IDE intelligent enough for kendo?
A; If you are using Visual Studio as IDE you will be able to get intellisense. Since its just plain JavaScript you can actually use any editors even Notepad.

Q: Can we have SPA project template for visual studio? i think development can be much quicker using that?
A: We currently don’t have it. Having said that its as easy as adding a stylesheet and a JavaScript and you have Kendo UI in your application. So you don’t need a SPA template as such. But our product team will start looking towards this.

Q: All the data binding must happen in a script tag?
A: Data binding happens in model that ultimately uses Kendo UI DataSource. It saves you a lot of writing AJAX code.

Q: What is a Router?
A: Router is the back bone of SPA feature using Kendo UI. It is responsible for tracking application state and navigating between the app states. You can read more on Router here: http://docs.kendoui.com/getting-started/framework/spa/router

Q: If our SPA is having multiple window and each window is having some sort of datagrids, charts , different lists etc, say various aspects of sales info. So, in that case where should we keep the templates, in the same page or we can put those in other files?
A: Templates can be in the same page or created as a separate script files. When you create templates as different files, you can use concept of Template Loader and load the template as you require. It all depends on your architecture.

Q: Can we create models on the fly? like dynamic?
A: Yes you can.

Q: Is kendo SPA having support for nested template?
A: Yes you can.

Q: Is there any Visual Studio plugin for Kendo UI SPA, which we can get from NuGet Package Manager? if not, does Telerik/Kendo UI has any plan to develop it? – it can be very useful for developers
A: Note that SPA is a feature available out of the box in Kendo UI solution. Kendo UI is available as NuGet package but be aware of the licensing terms. Kendo UI is not a free product. It is a licensed product.

Q: How we can change the Paging to Server side? We have to pass the page numbers and other parameters?
A: Kendo UI data source can page client side by default. If you don’t want that you can set ServerPaging to true and it will pass all the parameters required for paging to your service end point

Q: What about the performance of application when will have millions of record ? How it will be able to load in one time?
A: As a application architect you need to be wary of your data limits. Single Page Application is just a design paradigm of modern Web Applications. You will need to make sure you do paging on the server especially when you have million records. So you take control in this scenario for data loading.

Q: how to implement Kendo UI on SharePoint?
A: Kendo UI is all about 2 style sheet and 1 JavaScript file. So you can create your custom webpart and make sure to package the style sheet and javascript to the right location. The widgets will work as long as the path to the style sheet and script files are set correctly.

Q: Is Kendo UI libraries Open Source?
A: Nope. They are built, supported and sold by Telerik.

Q: Can I use WCF instead of Web API?
A: Yes. With HTTP binding that delivers JSON/ XML payload.

Q: You have edited the items only displaying in grid, if you want to edit more labels or data?
A: By default, the pop up mode of editing in Kendo UI Grid uses the column displayed to create the edit form. If you need to edit additional columns, you will need to create separate edit form and work with that.

Q: Can we use Kendo UI for offline purpose?
A: Kendo UI DataSource along with HTML 5 localStorage can be used.

Q: Data can be any custom XML. How difficult will it be to bind a custom XML with Kendo controls?
A: Yes any custom XML will do. It is as easy as just mapping what node maps to what property of the schema.

Q: IS JS wrapper. available in trial version for our Kendo UI POC that we need to show to our client?
A: Yes. Trial version is available on http://www.kendoui.com

Q: How to upgrade the Kendo UI version, once the application is already deployed
A: The Kendo UI is all about style sheet and JavaScript file. So you just swap the older version files with the new version files. That’s as easy as it can get.

Q: Does licensing allow to edit the source of kendo?
A: Yes. As a licensee you get the source code and you can modify it as per your needs. But you should know what you are doing :).

Q: Is there any service for android?
A: Yes. Please refer to Kendo UI Mobile. http://www.kendoui.com/mobile.aspx

Q: What is the licensing policy of Kendo UI?
A: The licensing is per developer and we do not charge you for deployments i.e. royalty free distribution.

Q: Will this support hybrid app development?
A: kendo UI Web is for web applications. If you are looking for Hybrid Mobile App Development you should take a look at Kendo UI Mobile. Kendo UI Mobile is a mobile control set which does adaptive rendering and is one of the best tools for Hybrid Mobile App development.

Q: What is the shortcut you are using to generate code snippet?
A: I was our Static Code Analysis product called JustCode. JustCode has a feature of Code Templates. So all my demo code were created as templates and a shortcut key associated with them. When have a key stroke which makes JustCode to autocomplete the code pertaining to the short cut key.

Q: Can we dynamically change the themes?
A: Yes you can. It is as easy as grabbing the link tag and changing the style sheet to be used.

Q: supports IE6?
A: We support IE7+ i.e IE8 and on wards.

Q: How it is differ from Upshot supported by Microsoft for SPA?
A: UpShot is not a SPA framework or solution rather it is a JavaScript library to make data retrieval in JavaScript easier. Where as Kendo UI is a complete framework which supports SPA feature out of the box and has a client side data source feature which does the data plumbing between server and client.

Q: Can we able to get the data through database connectivity?
A: The data is retrieved from DB in this demo as well. You need to build a service layer with Web API, WCF Data Service or WCF or any other non-.NET technology to retrieve data from the database

Q: Can we include 3rd party libraries in SPA application?
A: Yes, you are free to include 3rd party libraries. We can’t guarantee that there will be no conflicts.

Q: Does Telerik Test Studio support testing automation of all these?
A: Yes, Test Studio supports automation of Kendo UI controls.

Q: I see you used only JSONs as data type.. what other data-types available?
A: Kendo UI data source works very well with JSON and XML.

Q: Packaging support for android or IOS?
A: If you use our cloud based IDE called ICENIUM, it supports packaging for Android and iOS platforms with just a click.

Q: What about integration with Telerik controls?
A: Sure, this integrates with other Telerik controls too. Depending on the scenario, you can mix and match Telerik technologies.

.NET Ninja T-Shirt Giveaway:

As usual, we will be giving out 2 t-shirts in this webinar also. So following are the lucky winners of this webinar giveaway:

  • Udayakumar Mathivanan
  • Srinivas Abhishek

Congratulations to the winners. We will be contacting you soon on the email ids you have provided us during registration. The t-shirts will be shipped to you soon. Others don’t worry we still have a lot of webinars to go. So keep trying your luck by attending our webinars.

Conclusion:

In our endeavor to bring the Telerik technologies to each one of you, we are doing these series of webinars. Hope you are finding them useful. Looking forward to your presence in future webinars too. Till next time – Happy Coding!

Update:

Here is the GitHub repo to the source code of Kendo UI SPA demo: https://github.com/lohithgn/kendouispa/


Resources for Webinar “MVVM & Validation using Kendo UI in Web Applications”

On May 30 we conducted a webinar titled ”MVVM & Validation using Kendo UI in Web Applications”. We had around 600+ registrations for this webinar. We were very excited that many of you felt that the topic is an interesting one. So we are thankful to all of you who made it to the webinar. Hope you found the webinar useful and that it will be helpful in your day to day work.

image

Slide deck from the webinar:

If you missed attending the webinar, here is a chance to recap it through the slides. Here is the slide deck if you want to download:

Video Recording of webinar:

Many of you had asked if the webinar was recorded. Yes we do record all our webinars and here is the recording of this webinar. Hope this gives you a chance to catch up with the webinar:

Questions & Answers:

Many of you had a lot of questions during the webinar. We did try our best to answer many of them. So we are making sure that we address each one of them through this post. Here are the questions asked during the webinar and answers for the same:

Q: I am a .Net/Silverlight developer. What is the Usage of Kendo UI

A: Kendo can be used to develop HTML 5 apps. More details at: http://www.kendoui.com

Q: Can we use Kendo UI for Windows mobile or only for Androids?

A: Kendo UI Web can be used for Web App development. Kendo UI Mobile controls can be used for developing Hybrid Mobile Apps for multiple platforms i.e. iOS, Android, BB, WP8

Q: Can we use the Kendo UI using C# using .net ?

A: Kendo UI Web & DataViz provide server side wrappers for ASP.NET MVC. So you can program with your comfort of C# & Razor.

Q: Can we develop the Kendo Mobile Project on visual studio IDE, right?

A: Yes you can. Since its just a couple of stylesheet and  javascript, you can always use any editor of your choice. For Hybrid Mobile Application development we also have a cloud based IDE called Icenium – www.icenium.com

Q: By Kendo UI we can create widget – like calender, grid etc

A: Yes you can, though it is only one of its capabilties. Kendo UI Web already provide close to 20+ widgets out of the box. The demos for the available widgets can be found at: http://demos.kendoui.com/web/overview/index.html

Q: Is Kendo UI support all the browsers currently available?

A: We support the following – Internet Explorer 7+, Firefox ESR, Chrome, Safari 5+, and Opera 11+.

Q: Is it mandatory to use MVVM with Kendo UI?

A: No it is not. Kendo UI does support MVVM if you need it.

Q: Is Kendo UI a free version

A: No, Kendo is a paid product. You can

Q: So what is the next roadmap for Kendo?

A: Available here: http://www.kendoui.com/roadmap.aspx

Q: Does Icenium stores my code in a cloud based storage?

A: Yes. It does. The code is stored in Telerik servers. If you do not like our cloud, you can get a GitHub account and integrate Icenium with GitHub.

Q: Is Kendo UI like knockout.js, etc.,?

A: Knockout,js is a JavaScript library for supporting databinding on client side. Where as Kendo UI is a framework which supports the data binding out of the box. So you don’t need any extra library to support databinding and Kendo UI is the only thing you need.

Q: Can it run out of the browser?

A: it runs in the browser only. the browser can be on desktop or on mobile.

Q: So, If I use Kendo UI reference then we do not have to explicitly use jQuery.js reference?

A: Kendo UI depends on JQuery. So you will need to first reference JQuery and then Kendo UI scripts.

Q: In what all flavors(commercial) is Kendo available?

A: Details available here: http://www.kendoui.com/purchase.aspx. You can contact us at sales@telerikindia.com in case you want to make a purchase for yourself / organization.

Q: Does Kendo UI has specific framework for mobile ?

A: One part of Kendo UI known as Kendo UI Web is geared for mobile: http://www.kendoui.com/mobile.aspx

Q: What is this Kendo UI Framework, key points?

A: Marketing folks have done a good job and the features are provided here: http://www.kendoui.com/

Q: Can we use MVVM pattern in normal Asp.net web application?

A: Sure you can, using JavaScript.

Q: So what’s more beneficial to use KENDO UI rather than other available UI tool

A: 1. It is a fully integrated framework (data, UI, MVVM, charts, mobile) 2. Works better 3. Is continuously updated 4. Fully supported.

Q: Which all .Net framework version does Kendo UI supports?

A: Kendo UI Web is server technology obnoxious. Kendo UI is a HTML5 based client side framework. All you need is 2 stylesheet and a JavaScript. But we do provide Server Side Wrappers for ASP.NET MVC 3+.

Q: Does older versions of Visual Studio supports Kendo UI?

A: JavaScript API of Kendo can be used with any IDE (older versions of VS or Eclipse or Notepad)

Q: If i want by pass MVVM and use standard approach / does it support that , What is the licensing model with Kendo?

A: You can use Kendo UI without MVVM as well. MVVM is available in case you need it. Licensing is on a per developer basis.

Q: After getting product, is there any charge for support or maintenance from Kendo UI team?

A: The licenses are perpetual in nature. If you want product updates and support from the team, you have to maintain an active subscription by paying a renewal fee.

Q: Can we update the theme?

A: Yes. By simply changing the CSS file. And you can create your custom themes as well.

Q: Does Kendo UI has dependency on jQuery?

A: The only dependency Kendo UI has is that on JQuery and nothing else.

Q: Kendo provides any database also ?

A: No. Data has to be available over a Web Service. Kendo provides a client side data connectivity solutions.

Q: So after getting this product, is any training or demo free from kendo team?

A: A good getting started tutorial is available as Kendo Dojo: http://www.kendoui.com/dojo.aspx You can also request training from the product team as a paid activity.

Q: For email field, can we place two messages, suppose one for mandate entry and another for the format, ex: email is required and invalid email format?

A: Yes you can. you can use data-email-msg format to provide a message when email format fails.

Q: where can I view the old videos?

A: Telerik India Webinar resources: https://telerikhelper.net/category/webinars/. More Videos at: http://tv.telerik.com

Q: Definitely Kendo UI reduces the development effort. Can you quantify? How much it will reduce ?

A: We estimate this to be in the range of 20-30%.

Q: Does kendo use Knockoutjs for MVVM?

A: Nope. Kendo has its is own framework for MVVM. Doesn’t use KO.

Q: can we access server objects like sessions and application variables using Kendo?

A: No. Because Kendo UI is a client side framework.

Q: Do i need to download anything to use Kendo UI in VS2010?

A: Kendo UI can be used in 2 ways. Pure JavaScript way – for which you will  need the stylesheet and JavaScript. We provide Server Side Wrappers for ASP.NET MVC 3+. That will let you code Kendo UI from server side.

Q: More specific to Kendo UI : Does it take advantage of HTML5?

A: Kendo UI is based on HTML5 based. So we make use of HTML5 features to the core.

Q: How do we integrate web services in REST based calls in Kendo UI data binding?

A: Kendo UI has a feature known as Data Source. So this data source can be configured with CRUD endpoints and rest of the things will be done by the data source.

.NET Ninja T-Shirt Giveaway:

If you have been following our webinars you will know by now that we have been raffling out 2 .NET Ninja T-Shirts in each of our webinar. So we pick the following two people to receive our t-shirt for this webinar:

  • Mirang Parikh
  • Mohanrao Theeda

Congratulations to the winners. We will be contacting you shortly with the email you have provided. We will be shipping you your t-shirt. Rest of you folks don’t worry, we still have many more webinars to come. So make sure you attend without fail.

Till next time, Happy coding.

Resources for webinar “ Web Content Management with Sitefinity”

On May 16 we conducted a webinar titled “Web Content Management with Sitefinity”. We pretty much had a full house on that day and we had a great show from Greg our Sitefinity Sales Engineer. We are thankful to one and all who attended the webinar and posted all your questions pertaining to Content Management System and Sitefinity in particular.

image

Slide deck from the webinar:

Greg did a great job in showing Sitefinity in action. So there was hardly any slides used. But if you would like to review the presentation, we have provided the same below:

Video Recording of webinar:
Also, as many of you had asked during the webinar – we do have a recording of the whole presentation. Here is the link to the video recording:

Questions & Answers:

Many of you had questions regarding the Sitefinity as a product. Here is a quick recap of some of the major questions asked during the webinar:

Q: Could you provide some website url which are running using sitefinity
A:  You can go to SiteFinity.com and look at Showcase area http://www.sitefinity.com/customers/showcases .

Q: is it customization friendly?
A: If you know ASP.NET WebForms or MVC – you can customize it to your will and wish

Q: what is the cost of license?
A: Take a look at pricing here http://www.sitefinity.com/purchase

Q: What is Connector for SharePoint?
A: If you have already an investment with SharePoint you can do a two way sync from Sitefinity to SP and vice versa using the connectors. You can know more about this here: http://www.sitefinity.com/sharepoint-integration

Q: Can we add new Contents other than in built Contents?
A: Yes you can create your custom content.

Q: Can we host the website built on Sitefinity on cloud?
A: Yes we support Azure – http://www.sitefinity.com/benefits/for-it-managers/windows-azure

Q: Does Sitefinity provide any Template Designer?
A: You can always upload a ASP.NET Master Page and make it as a template for your page. We do have a online template creator which lets you design a template with complete drag and drop feature.

Q: Can we integrate external controls like payment gateway to the pages ?
A: Yes. We have a ecommerce module built it in. So integration with payment gateways is easy

Q: Can the content be Role based contents as per authentication?
A: Yes. Granular access to content is possible with Sitefinity.

Q:  Can we host MVC3 based pages?
A: Yes. we support hybrid mode of development. Meaning you can customize and have either a Web Form based User Control as a customized widget or MVC based widget.

Q: how can we control the page access rights?
A: The page themselves have access rights defined which can be controlled from the back end.

Q: Is Sitefinity limited to e-Commerce only?
A: – No. We have news/events/forums/blog etc. modules out of the box. Take a look at our showcase area to see how this is used for a real world examples.

Q: : Can I develop and apply themes on Sitefinity?
A: Yes. Sitefinity supports ASP.NET theming.

Q: Can we create CSS layout from own template?
A: Yes you can do that.

Q: Can i apply different CSS/Page modeling for different display size?
A: Yes you can. Sitefinity comes with Responsive Design Module out of the box which will let you create different rule based on where your content can be viewed. The rule will define how your content needs to be shown when rendered on those devices/screen widths and Sitefinity will automatically take care of that.

Q: Can you explain how we can add DLL reference?
A: Sitefinity source code is a ASP.NET solution. so you develop using the VS IDE and add reference like you do with any asp.net app.

Q: Other that .NET 4.0, does Sitefinity have dependency on any other third party libraries?
A: No – we use our own controls within Sitefinity for e.g. RadControls for ASP.NET AJAX, Kendo UI, Open Access ORM.

Q: Can i create large web application using Sitefinity?
A: Yes you can. Take a look at our showcases area to see what people have built with Sitefinity: http://www.sitefinity.com/customers/showcases

Q: Can we develop application by Sitefinity for my android phone?
A: Yes. With Sitefinity 6 we have a mechanism where in you can create a custom module and with one click a Hybrid Mobile Application can be created for this custom module. The app will be able to perform full CRUD on your module and since it is hybrid, it can run on all platforms and provide you with native look and feel as we use Kendo UI Mobile controls.

Q: what are the features of Sitefinity?
A: Sitefinity features are listed here: – http://www.sitefinity.com/product/see-also/cms-features-list

Q: Is any Open Source version available of Sitefinity?
A: We do not have any Open Source version of Sitefinity. But we do have Community Edition which is completely free for personal site scenario. Here is more info on what does Community Edition contain: http://www.sitefinity.com/try-now/free-asp-net-cms

Q: Which version of ASP.Net does this belong to?
A: Currently Sitefinity supports Microsoft .NET Framework 4.0

Q: Does it support workflow functionality?
A: Absolutely. Custom and standard workflows, all based on Windows Workflow Foundation 4

Telerik .NET Ninja T-Shirt Giveaway:

We had promised that we will be giving away 2 .NET Ninja T-Shirts as a webinar give away. We normally pick 2 people randomly from the audience and raffle it out. So, as part of this webinar we are happy to say that the following 2 people are winners of our .NET Ninja T-Shirts:

  • Pramod Gupta
  • Ranjit Singh

Congratulations to the winners. We will be contacting you shortly as we need your postal address to ship your t-shirts. Rest of you folks, don’t worry you still have chance to win the t-shirt. Do attend our next webinar which is on May 30 titled – MVVM and Validation with Kendo UI Web.

Kendo ColorPicker Wrapper for ASP.NET MVC

Overview:

This is the eight post in the series on Kendo UI wrappers for ASP.NET MVC. We will look at one more wrapper in this post namely Color Picker. This post is part of a getting started with Kendo UI wrappers for ASP.NET MVC and you can find the index post here.

What is ColorPicker Wrapper?

The ColorPicker is a drop-down widget for selecting colors. It’s designed to replace a HTML5 <input type="color"> field, which is not yet widely supported in browsers. ColorPicker widget provides a user-friendly interface for picking colors.

image

Fig 1: ColorPicker Widget

ColorPicker wrapper is just a kendo helper for ASP.NET MVC.

Basic Usage:

In order to use the ColorPicker widget on any page, we will use the ColorPicker wrapper or helper available as part of the kendo wrappers. Following is the code to create a color picker on any page. Note that Name() is a mandatory setting for the color picker. Without setting the name we will get an exception which will tell that name is not set.

@(
Html.Kendo().ColorPicker()
.Name("picker")
)

Here is the output of the above code:

image

Fig 2: Color Picker Basic Usage

Color Palette:

We can customize the color palette that is displayed in the color picker drop down. The wrapper provides Palette() configuration method which accepts the palette. There 2 ways of providing the palette. They are:

1. ColorPickerPalette Enumeration:

We can pass enum called ColorPickerPalette to Palette() method of the widget. The enum supports Basic, None and WebSafe palette. Here is the code for setting the palette:

@(
Html.Kendo().ColorPicker()
.Name("kPickerBasic")
.Palette(ColorPickerPalette.Basic)
)

Here is the output of setting palette to Basic, WebSafe and None:

image

Fig 3: Basic Color Palette

image

Fig 4: Web Safe Palette

image

Fig 5: No Palette

2. Provide Palette as Array

We can pass a string array to Palette() method which should contain the hex codes of the colors we want to show in the palette. Here is the code to do this:

@(
Html.Kendo().ColorPicker()
.Name("kPickerBasic")
.Palette(new string[] {
"#f0d0c9", "#e2a293", "#d4735e", "#65281a",
"#eddfda", "#dcc0b6", "#cba092", "#7b4b3a",
"#fcecd5", "#f9d9ab", "#f6c781", "#c87d0e",
"#e1dca5", "#d0c974", "#a29a36", "#514d1b",
"#c6d9f0", "#8db3e2", "#548dd4", "#17365d"
})
)

And here is the output of the code changes:

image

Fig 6: Custom Palette

Custom Color Tile Size:

So far we have seen how the color picker works and what palettes it supports. One thing to notice in palettes is the size of the individual color tiles. It looks small. What if we wanted a bigger tile? The wrapper supports a TileSize() configuration method which takes in an integer. Here is a code set the tile sizes of the color palette:

@(
Html.Kendo().ColorPalette()
.Name("color-chooser")
.Palette(new string[] { "#ddd1c3", "#d2d2d2",
"#746153", "#3a4c8b",
"#ffcc33", "#fb455f",
"#ac120f" })
.Value("#ffcc33")
.TileSize(30)
)

Here is the output of above code changes:

image

Fig 7: Custom Color Tile Size

Accessing control on client:

So far we have seen how to instantiate a control with the helpers. And since the Kendo controls are all client side, lets take a look at how to get the control using JavaScript code. Kendo controls are HTML5 compliant so we make use of HTML5 attributes like “data-“ and construct our controls. You can use the jquery data() method to get to an already instantiated control. Here is the code snippet for the same:

<p>
@(Html.Kendo().ColorPalette()
.Name("color-chooser")
.Palette(new string[] { "#ddd1c3", "#d2d2d2",
"#746153", "#3a4c8b",
"#ffcc33", "#fb455f",
"#ac120f" })
.Value("#ffcc33")
.TileSize(30)
)
</p>
<script>
$(document).ready(function () {
var colorPicker = $("#color-chooser").data("kendoColorPalette");
var selectedColor = colorPicker.value();
});
</script>

Accessing & Setting Value from client side:

All kendo controls have rich client side API support. One of the api method is value() which lets you read the selected value and also set new value of the color picker. Here is the code:

<p>
@(Html.Kendo().ColorPalette()
.Name("color-chooser")
.Palette(new string[] { "#ddd1c3", "#d2d2d2",
"#746153", "#3a4c8b",
"#ffcc33", "#fb455f",
"#ac120f" })
.TileSize(30)
)
</p>
<script>
$(document).ready(function () {
var colorPicker = $("#color-chooser").data("kendoColorPalette");
colorPicker.value("#ffcc33");
var selectedColor = colorPicker.value();
});
</script>

In the above code – we just created the color picker using the server side helpers. On client side, after document has loaded, we grab the control, use the value() method to set a new value. And then use the same method to read back the selected value.

Handling Events:

Color Picker supports four events which can be handled on the client side. They are:

  • change: Fires when a color was selected
  • select: Fires when a new color is displayed in the drop-down picker
  • open: Fires when the picker popup is opening
  • close: Fire when the picker popup is closing

Here is the code wire up the events and JavaScript code for the handlers:

<p>
@(Html.Kendo().ColorPicker()
.Name("palette-picker")
.Value("#cc2222")
.Palette(ColorPickerPalette.Basic)
.Events(events => events
.Select("pickerSelect")
.Change("pickerChange")
.Open("pickerOpen")
.Close("pickerClose")
)
)
</p>
<script>
function pickerSelect(e) {
var selectedValue = e.value;
}
function pickerChange(e) {
var selectedValue = e.value;
}
function pickerOpen(e) {
//custom code
}
function pickerClose(e) {
//custom code
}
</script>

Summary:

Through this post we looked at yet another kendo wrapper for MVC namely Color Picker. Using color picker is as easy as settings some configuration methods and the rest is done by the helper for you. Hope this excites you to test out Kendo UI in your projects.

Till next time, Happy Coding.

Webinar Recap: Easy HTML5 Data Visualization with Kendo UI DataViz

Apr – May 2013 will see a series of webinar from Telerik India pertaining to Data Visualization, Team Pulse, Windows 8, SiteFinity, Windows Phone 8 and Kendo UI. If you are interested in any of these webinars do take a look at the following post: https://telerikhelper.net/2013/03/19/ninja-enough-telerik-india-webcasts-april-may-2013/.

On Apr 11 we delivered a webinar on HTML5 Data Visualization titled – “Easy HTML5 Data Visualization with Kendo UI DataViz”. This post is a recap of the webinar. As part of the webinar we discussed the following things:

  • What is Data Visualization ?
  • Why do we need Data Visualization ?
  • How do we do Data Visualization ?
  • What does HTML5 technology define for Data Visualization ?
  • Introducing Kendo UI DataViz
  • Demo

Here is the slide deck used for the webinar:

Here is the video recording of the webinar:

Easy HTML5 Data Visualization with Kendo UI DataViz from Telerik Helper on Vimeo.

During this webinar we had a lot of questions and I am trying to address them here:

  1. There are couple of free jquery plug-in available on the net. which do all these charts. how Kendo UI different from  them?
    Kendo UI aims at providing unified framework for HTML5 & JavaScript Apps/Sites. Kendo UI is all about HTML5 powered client side javascript frame work. The DataViz package of Kendo UI spits out the Charts/Graphs/Gauges using SVG technology on modern browsers and will render as VML on older browsers. So if you use Kendo UI DataViz to perform your data visualization rest assured that you are HTML5 complaint.
  2. Being a .Net developer why I should use HTML5 and not Silverlight for all this. same can  be achieved with Silverlight as well?
    The decision to use Silverlight or HTML5 will depend on the nature of the project. Silverlight is still a plugin based technology where as HTML5 is trying to standardize the web world with a common structure to be supported by all browsers.
  3. For running Silverlight applications , user has to download the runtime first. Is it the same for Kendo UI code?
    Kendo UI is a pure client side JavaScript framework. Kendo UI relies on Stylesheet and JavaScript. We have only one dependency and that is of Jquery. Apart from this nothing else is needed.
  4. Why we need to choose separate chart product – when asp.net charting can give the charting option?
    The charting option provided by ASP.NET as far as I know if not HTML5 based. Meaning the output of the chart/graph through ASP.NET charting is still Image based and does not use the HTML5 recommended SVG for output. Where as Kendo UI is a HTML5 compliant and outputs the charts/graphs as SVG on modern browsers and as VML on older browsers.
  5. Can we add Kendo UI references into the PHP project?
    Absolutely. Kendo UI is serer agnostic. Meaning it does not care what server side technology has been used. This is because Kendo UI is a client side JavaScript framework. And to use Kendo UI you only reference a couple of style sheets and scripts and you are up and running. For data you will need to make sure that you create JSON end points as Kendo UI works well out of the box with JSON and XML.
  6. Can we change the styles according to us?
    Yes very much. We provide an easy way to custom style all the Kendo UI widgets. We have an online theme builder for web and for mobile controls. For more information check out this page: http://demos.kendoui.com/
  7. Can we use Kendo on Windows 8 metro & mobile apps ?
    Kendo UI consists of 3 packages – Web, DataViz and Mobile. The Web can be used for Web Applications. Mobile controls can be used to develop Cross Platform Hybrid Mobile Apps. So Kendo UI Mobile Controls support Windows Phone. As of now we do not have support for Windows 8.
  8. can we use it for 3D, is there any support for that?
    We do not support 3D charting at the moment.
  9. Will this work on mobile browsers ?
    Since DataViz output SVG as the format for the chart/gauges, it can run on both desktop browsers and mobile browsers.
  10. Does the charts support Drill Down option?
    Drill-down functionality is not supported out of the box yet. However the chart exposes a seriesClick event which can be used instead. You can find a live demo here.
  11. In the demo shown, was usage of valueAxis , categoryAxis, tooltip…. are these syntax to use kendo ui or some sort of data…??
    These are the configuration settings you do on the Kendo UI DataViz objects and at runtime the chart is generated based on these settings.
  12. Can i use Kendo UI in my .net application instead of SSRS charts?
    Absolutely. You just need to make sure you provide an endpoint which can return JSON payload and the Kendo UI DataViz widgets can consume data and plot it.
  13. How do we know Kendo Chart options ? as you are passing some options to it. is there any full fledged docs ?
    The Kendo UI Documentation can be found at http://docs.kendoui.com. We have the API reference, Getting Started, Tutorials at the documentation site.
  14. Does this come with Samples?
    Yes. whether you download the trial or licensed version of Kendo UI – we ship the demo source code with it.
  15. can we populate the data from database and bind this data to kendo charts?
    Kendo UI is server side agnostic and does not care about what is the technology used for server side. Having said that the way Kendo UI works is – it can understand JSON or XML. So as long as data is passed as JSON/XML we don’t care about anything else. So you need to make sure that you create endpoint i.e. services which can return data in JSON or XML format. Kendo Widgets will be able to read data from those services out of the box.

Also, we had promised to attentive members from the audience will get our Telerik Ninja t-shirt. Well here are 2 winners we picked:

  • Ravi Gadag
  • Narendra Bisht

Congratulations to the winners and we will be getting in touch with you soon. Rest of you don’t loose heart. We have 5 more webinars in April and May and in each webinar we will be giving out 2 shirts each.

Hope you liked this webinar and we hope to see you back in our future webinars.

Kendo Editor

Kendo Editor Wrapper for ASP.NET MVC

Overview:

This is the seventh post in the series on Kendo UI wrappers for ASP.NET MVC. We will look at one more wrapper in this post namely Editor. This post is part of a getting started with Kendo UI wrappers for ASP.NET MVC and you can find the index post here.

What is Editor Wrapper?

First lets understand what is a Editor control all about. The Editor allows users to create rich text content by means of a WYSIWYG interface. The generated widget value is comprise of XHTML markup.

imageFig 1: Kendo Editor

The Editor Wrapper for ASP.NET MVC is a server side wrapper for Kendo UI Editor which is a JavaScript based widget.

Basic Usage:

In order to use the kendo editor on any web page, we will use the Editor wrapper available as part part of the Kendo Wrappers for ASP.NET MVC. Following is the code for the basic usage where in we just instantiate the kendo editor and give it a name while setting the width & height.

@(
Html.Kendo().Editor()
.Name("kEditor")
.HtmlAttributes(new {style="width:740px;height:440px"})
)

Note that you need to set the Name for the editor. Other wise we will be issued a InvalidOperation exception at runtime which will say “Name cannot be blank”. Following is the screen shot of the output:

image

Fig 2: Kendo Editor Basic Usage

Tools Bar:

The top bar on the editor is known as Tools bar. By default the editor will display the basic necessary tools without we explicitly specifying them. The editor supports the following tool options:

1. Bold 13. InsertUnorderedList
2. Italic 14. InsertOrderedList
3. Underline 15. Indent
4. Strikethrough 16. Outdent
5. FontName 17. FormatBlock
6. FontSize 18. CreateLink
7. FontColor 19. Unlink
8. BackColor 20. InsertImage
9. JustifyLeft 21. SubScript
10. JustifyCenter 22. SuperScript
11. JustifyRight
12. JustifyFull

Table 1: Tool Bar Configuration Option

So here is the code to get all the tools on the tool bar:

@(
Html.Kendo().Editor()
.Name("kEditor")
.Tools(tools => tools
.SubScript()
.SuperScript()
)
.HtmlAttributes(new {style="width:740px;height:240px"})
)

Here is the output of the above code changes:

image

Fig 3: All Tools on the Tool Bar

Note: In order to get all the tools we just added Subscript() and Superscript() options. That is because, editor control will default add tools from 1 to 20 in the above table. So we just added missing tools. If you want to keep only some tools on the tool bar, you will need to first clear the tools and then add the tool option you want. Following code will add only FontName, FontSize, ForeColor and BackColor to the tool bar:

@(
Html.Kendo().Editor()
.Name("kEditor")
.Tools(tools => tools
.Clear()
.FontName()
.FontSize()
.FontColor()
.BackColor()
)
.HtmlAttributes(new {style="width:740px;height:240px"})
)

Here is the output of the above code changes:

image

Fig 4: Custom Options in Tool Bar

Custom Tool Bar Options:

So far we saw the default tool bar options available in Kendo. What if we want to have a custom tool bar option. Lets say we want to provide a button to draw a horizontal rule in the editor – it can be done by making use of the CustomButton() support in the editor. Here is the code to do that:

@(
Html.Kendo().Editor()
.Name("kEditor")
.Tools(tools => tools
.Clear()
.FontName()
.FontSize()
.FontColor()
.BackColor()
.CustomButton(cb => cb
.Name("HorizontalRule")
.ToolTip("Insert a horizontal rule")
.Exec(@<text>
function(e)
{
var editor = $(this).data("kendoEditor");
editor.exec("inserthtml",{value:"<hr />"});
}
</text>)
)
)
.HtmlAttributes(new {style="width:740px;height:240px"})
)

Here is the output of the above code changes:

image

Fig 5: Custom Button in Tool Bar

Adding Snippets:

Snippets are short piece of text and can be anything. For e.g. an email signature is a text snippet we normally create and store in our mail programs. The mail programs inserts the signature whenever we compose new mail. Similarly Kendo Editor provides ability to create snippets and enable end users to pick the snippet to insert as text. Following is the code:

@(
Html.Kendo().Editor()
.Name("kEditor")
.Tools(tools => tools
.Clear()
.Snippets(snippets => snippets
.Add("Signature","<p>Regards,<br /> Lohith G N,<br /><a href='mailto:lohith.nagaraj@telerik.com'>lohith.nagaraj@telerik.com </a></p>")
.Add("Kendo Online Demos"," <a href='http://demos.kendoui.com'>Kendo online demos</a> ")
)
)
.Value(@<text>
Put the cursor after this text and use the "Insert HTML" tool.
</text>)
.HtmlAttributes(new {style="width:740px;height:240px"})
)

Here is the output of the above code changes:

image

Fig 6: Snippets Feature

Custom Styling of content:

So far we have seen some of the core functionality of the editor. Another awesome feature of editor is the support for custom styling to the content. You can pretty much define your own style classes and within the editor provide it like a drop down option. Editor supports Styles() option to provide the custom style. Here is the code to achieve this:

<!--Editor Styles-->
.hlError
{
background-color:#fea;
color:#f33;
}
.hlOK
{
background-color:#aef;
color:#060;
}
.inlineCode
{
font:bold 12px monospace;
}
@* Code *@
@(
Html.Kendo().Editor()
.Name("kEditor")
.Tools(tools => tools
.Clear()
.Styles(styles => styles
.Add("Highlight Error", "hlError")
.Add("Highlight OK", "hlOK")
.Add("Inline Code", "inlineCode")
)
)
.StyleSheets(styles => styles.Add(Url.Content("~/Content/EditorStyles.css")))
.Value(@<text>
Kendo UI Editor allows your users to edit HTML in a familiar, user-friendly way.<br />
In this version, the Editor provides the core HTML editing engine, which includes basic
text formatting, hyperlinks, lists,
and image handling. The widget <strong>outputs identical HTML</strong> across all major
browsers, follows
accessibility standards and provides API for content manipulation.
</text>)
.HtmlAttributes(new {style="width:740px;height:240px"})
)

If you look at the code what we have done is, created 3 styles for the demo sake and created a new stylesheet named editorStyles.css. We use the Styles() options to add the custom styles and use the Stylesheets() option to add reference to EditorStyles.css. Note the styling Kendo has added to Styles drop down. while setting it up – we just had given a text value pair for a style. Kendo applies the style for the drop down item – neat I say. Here is the output of the above code changes:

image

Fig 7: Custom Styling of content

Handling client side events:

Kendo widgets being client side controls, we have very rich API support on the client side. One of the API feature is that of client side event handling. Editor supports the following events:

  • change – Fires when Editor is blurred and its content has changed
  • execute – Fires when an Editor command is executed
  • paste – Fires before when content is pasted in the Editor
  • select – Fires when the Editor selection has changed

Here is the code to hook on to the client events for the editor:

@(
Html.Kendo().Editor()
.Name("kEditor")
.Events(events => events
.Change("change")
.Execute("execute")
.Select("select")
.Paste("paste")
)
.Value(@<text>
Kendo UI Editor allows your users to edit HTML in a familiar, user-friendly way.<br />
In this version, the Editor provides the core HTML editing engine, which includes basic text
formatting, hyperlinks, lists,
and image handling. The widget <strong>outputs identical HTML</strong> across all major browsers,
follows
accessibility standards and provides API for content manipulation.
</text>)
.HtmlAttributes(new {style="width:740px;height:240px"})
)
</p>
<div class="console"></div>
<script>
function change(e) {
$(".console").append("change <br />");
}
function execute(e) {
$(".console").append("execute command :: " + e.name + "<br />");
}
function select(e) {
$(".console").append("selection change <br />");
}
function paste(e) {
$(".console").append("paste <br />");
}
function contentLoad(e) {
$(".console").append("Content loaded in <b>" + $(e.item).find("> .k-link").text() +
"</b> and starts with <b>" + $(e.contentElement).text().substr(0, 20) + "...</b> <br />");
}
function error(e) {
$(".console").append("Loading failed with " + e.xhr.statusText + " " + e.xhr.status + "<br />");
}
</script>

Here is the output of the above code changes:

image

Fig 8: JavaScript Event Handling

Accessing Editor from client side:

As mentioned in the previous section all Kendo widgets support a rich API and once instantiated we can grab the control at runtime. Here is the JavaScript code do that:

<p>
@(
Html.Kendo().Editor()
.Name("kEditor")
.HtmlAttributes(new {style="width:740px;height:240px"})
)
</p>
<script>
$(document).ready(function () {
var editor = $("#kEditor").data("kendoEditor")
editor.value("Text added at runtime")
});
</script>

As you can see, on document ready we grab the element which has the id kEditor and then use jquery’s data() method to get the Kendo Editor component. After that we set the content of the editor using the value() method. The client side API support a rich set of methods, properties and events. For a complete API listing, check out our docs page: Kendo Editor API.

Summary:

In this post we looked at one more wrapper namely Editor. It is very easy to work with Editor ASP.NET MVC wrapper and with just couple of lines we have a fully working editor set up. Also we saw how the control supports a rich set of client side API to work with. Hope this post helps you with your endeavor on Kendo Editor.

How to perform localization on RadGrid for ASP.NET AJAX

Overview:

I attended TechEd India 2013 which was held at Bangalore on Mar 18 & 19. I was talking to couple of developers on their experience with our Rad Controls. One of the developer with whom I was talking to wanted to know if localizing string is easy or difficult with our Grid. He was talking about the static texts which we have in our Grids like – message shown on the group bar, message shown in mouse over of columns for sorting, message shown in our filter menu items etc. His project was looking at using a 3rd party control and localizing the controls with minimal effort was one of the main criteria for them. I told him that it was as easy as creating one file and adding it to the project. In this post we will explore our option on localizing Telerik controls in general the RadGrid.

Global Resource Files:

When you download and install the RadControls for ASP.NET AJAX, we also ship resource files for all our controls and is installed in “App_GlobalResources” folder. Below is a screen shot of the resource files installed on your hard disk:

image

Fig1: Global Resources for RadControls

Notice the resource file for Grid high lighted. The file name is RadGrid.Main.resx. This contains all the resource string for neutral culture and will be used by our RadGrid control.

When you create a ASP.NET project, you can add certain specific named folders which the ASP.NET recognizes and specific types of content can be kept in this folder. One such folder is App_GlobalResources and can contain resources namely .resx files and .resources files. These are compiled into assemblies with global scope. These resources are strongly typed and can be accessed programmatically also.

Steps involved in Localizing the RadGrid

Following steps are involved in localizing the RadGrid:

  1. Add RadGrid.Main.resx file to your application’s App_GlobalResources folder
  2. Create a language pack i.e. RadGrid.Main.<locale id>.resx and add it to App_GlobalResources folder
  3. Set the culture to use on the RadGrid

We will go through the above steps one by one in following sections.

1. Adding RadGrid resource files:

Open Visual Studio and create a new project. Select Telerik > Web template and “C# RadControls Web Application”.

SNAGHTML263dbfce

Fig2: New Project Dialog

Once Visual Studio finishes creating the project, solution will look like below:

image

Fig3: Solution Explorer

Open Default.aspx and add a RadGrid from the toolbox. We will bind the grid to Products table from Northwind database. We will make use of OpenAccess to create a Data Model or Domain Model and OpenAccess Data Source for data binding. If you are not familiar with OpenAccess, it is a free ORM tool from Telerik. I encourage you to download and play with it. Add a new item to the project of type “Telerik OpenAccess Domain Model”.

image

Fig4: Add New Item Context Menu

For this demo, I have selected only Products table and created my OpenAccess Domain Model. Here is how the domain model should look like now:

image

Fig5: OpenAccess Domain Model Diagram

After adding the domain model, do a build to make sure everything is ok. Next, open the Default.aspx in designer mode, click on the smart tag of RadGrid, the smart tag property window will be shown. From the choose data source dropdown select <New data source> option. You will be presented with “Choose a Data Source Type” window. Select OpenAccessLinqDataSource. Specify  name for the data source and proceed. Next in “Select OpenAccess Context Type” window, it will automatically select the domain model we have added and select the products table as the entity and click Next. In “Configure Data Selection” window select the columns that needs to be shown on the grid and click Finish. Now we have  a data source and our RadGrid is bound to that data source. Enable Paging, Sorting, Grouping and Filtering on the grid by using the smart tag.

image

Fig6: RadGrid Smart Tag

Add a new folder called “App_GlobalResources”. Add RadGrid.Main.resx file from App_GlobalResources folder found in your RadControls for ASP.NET AJAX installation folder and paste it in your applications App_GlobalResources folder. At this point run the application and you will see the below output of the grid:

image

Fig7: RadGrid output

Notice the static text on – grouping bar, Sort tool tip (when you mouse over on the columns), filter conditions and the page size. So we will see how to localize these.

2. Add language pack:

For the purpose of this blog post I will try to create a French language pack or resource file and the RadGrid will use the strings from it to display the static text. In order to add a language pack for RadGrid, copy the RadGrid.Main.resx and paste it in App-GlobalResources folder. Rename the pasted file to RadGrid.Main.fr-FR.resx. Here fr-FR is the locale that we would like to localize the grid. This can be any other locale that you need to support in your applications. If you double click RadGrid.Main.fr-FR.resx in Visual Studio, you will see the resource editor open and show the strings as a grid. Here is the screenshot of that:

image

Fig8: RESX Editor

As you can see we see the string name and value for that. Since we copied from language neutral resource file, the values are all in English locale. Now all we are required to do is to change the value of the keys to French locale. I will use Bing translator to translate the values and replace them in the RadGrid.Main.fr-FR.resx. After translating some of the values to French, here is how the RESX file looks like:

image

Fig9: French Resource File

3. Set locale on RadGrid

In order for the RadGrid to pick up the right locale you can either set the Culture property of the RadGrid explicitly or set the Culture property to CurrentUICulture. For the purpose of this demo, I am explicitly setting the culture of RadGrid to fr-FR i.e. French.

image

Fig10: RadGrid Culture property

Here is the RadGrid with culture set to fr-FR:

image

Fig11: RadGrid localized to fr-FR locale

Note: The column headers are not localized because I haven’t provided any strings for them. You can pretty much use the same global resource file and use the resource strings instead of the static text. This blog post was to show how parts of RadGrid can be easily localized.

Summary:

With simple 3 steps we were able to localize different texts of RadGrid without much hassle. All we needed to do was to create a language pack and keep it in App_GlobalResources folder. All Telerik controls respect the ASP.NET folder and know how to use the resources from this folder. Hope this helps you all those folks who are looking at localizing our controls. Do leave any feedback if you may have.